the-best-way-to-use-photinia-to-get-a-hedge-594145b177afa.jpg

The best way to Use Photinia to get a Hedge

Photinia is after it is trimmed, a flowering evergreen shrub that grows amazing shoots. The decorative shrub is employed to produce casual Landscaping price San Diego, CA boundaries like a hedge around a home and privacy fences. The red-leaved photinia makes a focal point that is striking when planted in a flower-garden. The Japanese photinia (Photinia glabra) and Chinese photinia (Photinia serrulata) are hardy crops that can grow nicely in Sunset’s Environment Zone 4 through 16, 18 through 22 and 28 through 31.

Planning Hedge Plot

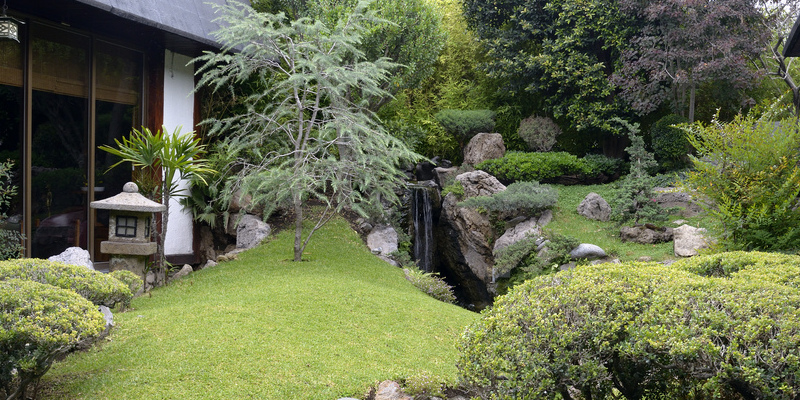
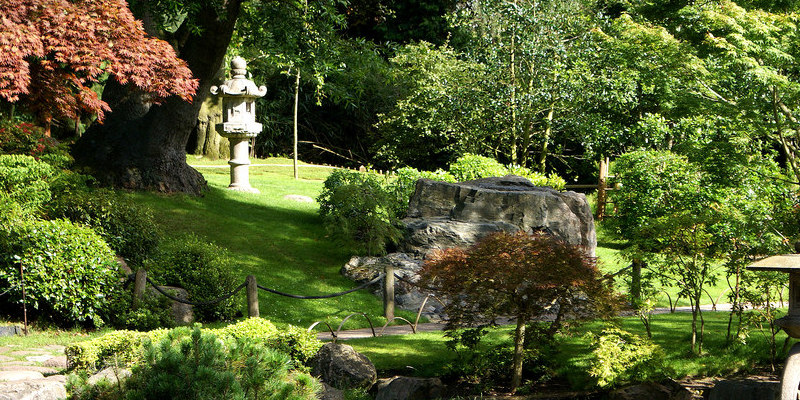
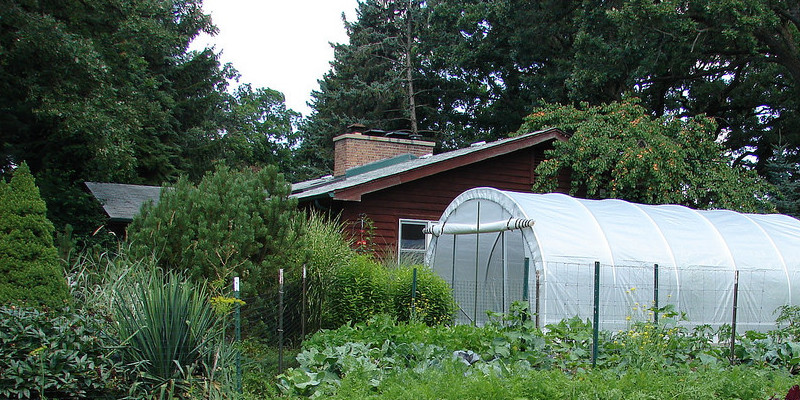
Clear an area for the hedge that has and receives full sunlight or part. Hedges be normal wind breaking partitions or strategically-placed to quit snow drifts can provide a privacy screen, mark boundaries in your lawn (San Diego, CA), or be employed as fence or a barrier. Photinia increase at an average width of an average height of 10 feet and 5 feet to 8-feet to 15 feet tall, so keep this in mind as you plan where to Stump Removal your hedge.

Remove aged roots, rocks, weeds or other particles in the planting Chico location soil. Add manure or organic compost to the soil and change the soil over using a shovel to to combine it in.

Measure the planting location out and location floor stakes. This accommodates the width of the photinia hedges. The crops require room to increase, as densely planted leaf place can be developed by photinia. Lack of air circulation through branches that are dense enables water to to get on the leaves and dry gradually, which encourages fungus growth.

Planting Photinia Hedge

Dig a hole that’s twice as broad as the photinia root ball and 2″ less than the peak of the root ball. Set the soil. Water the hole and wait one hour to enable the water.

Place the photinia and remove it. Place the photina in the hole. Rake the sides of the root ball using a hand cultivator to expose the roots. In case your photinia came together with the root ball wrapped in a wire basket as well as burlap, set the root ball to the hole. Cut the wire basket off with bolt-cutters and eliminate the burlap in the root ball.

Fill in the hole and mound the added s Oil in a circle around foundation of the shrub. Till it’s full, add water. Wait before the water is absorbed by the s Oil or one hour, and a-DD water to the moat. Wait for the water to go into the soil. Rake the wall with all the hand cultivator down and fill out the moat.

Cover the s Oil round the bottom of the plant having a 2 inch layer of mulch. Leave a-2-inch room throughout the bottom or trunk of the photinia to avoid the mulch from touching it. Mulch aids helps maintain dampness in the s Oil.

Photinia Hedge Treatment

Water the photinia once through the developing time. During summer months, water every two to one month to keep the s Oil moist.

Let the shoots of the plant grow to BE – 1 foot-long. Cut the red that is young shoots back above an outward-facing leaf bud on the shoot with shears, by 6″. Trim the photinia provide it sides to allow sunshine to filter to achieve the leaves of the plant, which encourages branches to develop denser and hedge so the top is mo-Re slim the base.

Trim the photinia hedge in summer, planting season and fall. Water and fertilize your photinia hedge after each trimming with natural fertilizer.

See related

the-best-way-to-grow-eucomis-594136ff0e5d4.jpg

The best way to Grow Eucomis

Eucomis, a genus indigenous to South Africa, includes 11 species of flowering crops better-known as pineapple lilies. The pineapple lily gets its title in the cluster of star shaped flowers & Lawn Service and spiky leaves that develop atop the stem. Lilies develop hardy to the Environment of Sunset Zone 4, however they like the the moderate winters of zones 1 4 through 17. When developed close to your porch or entry way lilies make a daring, colourful declaration.

Select a backyard website for the pineapple lily. Lilies favor -rich soil. They thrive in full sunlight, but might need some shade during hot summers.

Plant Fresno pineapple lily bulbs in the garden following the last frost day in late January. Plant bulbs 3″ apart and 6″ deep.

Before the soil feels moist water the pineapple lily bulbs. Keep the soil moist throughout the growing period, usually spring through fall, for the flowering show that is greatest.

Provide 1 1/2 ounce to 2 ounces of all purpose fertilizer in early spring before flowering starts. Lilies don’t require fertilizer throughout the growing period.

Remove any yellow or dead foliage as winter approaches in the pineapple lilies. Cut off wilted flower heads.

Cover the bulbs with a 4 inch layer of mulch if temperatures fall below freezing in your area, to protect them. Alternatively, raise the bulbs and store them. Keep the bulbs dry. Bulbs that are stored go dormant. Winter safety is needless if temperatures don’t dip below freezing in your area.

Remove the mulch and resume after the last frost day passes, watering as-usual.

See related

the-best-way-to-grow-nicotiana-sylvestris-from-seeds-59412b72c7cae.jpg

The best way to Grow Nicotiana Sylvestris From Seeds

The fragrance alone is enough cause to develop Nicotiana sylvestris. Called tobacco that is woodland, this range of nicotiana has even though the fragrance is strongest at night, long flowers & Lawn Service that remain open all day. The crops develop to 5 feet tall as much as a foot-long and clusters of white flowers Redding that dangle in the ends of the branches. When they appear to glow in the moon light the flowers and Lawn Care appear their best.

Starting In-Doors

Place personal pots and fill potting soil. them to within 1/2 inch of the top with Moisten the soil with water.

Lay the seeds in the middle of the pots along with the soil. N. sylvestris seeds require light to germinate, therefore don’t protect them with soil.

Slide the tray of pots and seal the bag. Place it in an area with temperatures between 75 and 70 degrees Fahrenheit. Provide sunlight. 10 to 20 times, germination requires.

When the seedlings germinate remove the bag, and place the tray of seeds in the light of a window.

Keep the soil moist but not damp or soggy. Water that collects in the tray beneath the seeds every time.

Harden the seedlings when all risk of of frost has passed off. Place the tray of seedlings above a period of 10 days to to 2 months for two hours at first, steadily raising the quantity of sunlight as well as the amount of time outdoors in a outside area.

Dig a-1- to 2 inch layer of compost and level the soil using a Shrub Removal rake.

Transplant the seedlings to the garden, spacing them.

Planting Outside

Work a-1- to 2 inch layer of compost and rake the soil to make a an even area for the N. sylvestris seeds.

Moisten the backyard bed once all risk of of frost has passed, and press the seeds onto the very best of the s Oil. Don’t protect the seeds with soil; doing s O would block required mild.

In the event the s Oil starts to dry prior to the seedlings arise, water gently.

When they’ve two sets of correct leaves, thin the seedlings to 18 to 24-inches aside.

Care

Water seriously and gradually during dry spells, permitting the soil to absorb the maximum amount of water as feasible.

Pinch the ideas from the spikes when they’re about 6″ tall, to seem. This encourages free and branching flowering.

As they fade to aid keep the plant, remove the flowers.

Cut straight back the crops by onethird to onehalf in summer when they’re no longer generating plentiful flowers as well as the foliage starts to look ragged. Fertilize the crops having a slow release after reducing them straight back.

See related

the-best-way-to-care-to-get-a-black-cobra-pepper-594116efd40ee.jpg

The best way to Care to get a Black Cobra Pepper

Capsicum annuum, or the Black Cobra pepper, is also called goat’s weed pepper. Black Cobra peppers create a sizable number of tiny blooms that yield long and increase into a height of approximately three to five feet, slender fresh fruit about 3″ long. The fruits are black for a number of weeks before turning red and develop straight in the conclusion of the plant Salt Lake City stalks. Their taste is hot. The amount of their colour as well as fresh fruit make an edible also as this pepper a stylish decorative. They are able to be grown in a variety including 4 through 2-4, of Sunset’s Environment Zones.

Black Cobra pepper seedlings were proven by buy from nursery or a garden Long Beach center. Sprout Black Cobra chili seeds by soaking them in water within an insulated container. Sow two seeds each in to pots that are starter till they sprout, and keep them in a warm location and have four leaves each. Fertilize weekly with one fourth-power chili plant-food. Seedlings are ready to transplant four to six months as soon as they sprout.

Mix 3 parts planting Fresno medium with 1 part sand. Fill a big container. It’s important the Black Cobra pepper has excellent drainage. Leaving the root ball intact, transplant one Black Cobra pepper seedling to the pot and pack the soil firmly. The Black Cobra chili pepper matures in 90 to 100 times.

Place the container in a sunny location in-doors such as greenhouse or a sunroom. Give full-sun to the Black Cobra chili. Keep the day-time temperature between 68 and 85 degrees Fahrenheit for the period. Keep night-time temperatures. In summer, it is possible to move the container outside provided that you provide them inside at night for the week.

Water the Black Cobra chili usually enough to keep the soil moist but not damp.

Insert a Shrub Removal stake alongside the Black Cobra chili pepper plant to the soil without harming the roots. Tie the stem of the plant to the stake to lend support to it.

Fertilize the plant having a specialty plant-food utilized and blended according to label guidelines. Don’t over-fertilize.

Shake when it’s in flower to assist it, the Black Cobra plant self -pollinate.

Allow the good fresh fruit to to show before harvesting it from black to red.

Keep the container inside through the winter. Maintain a temperature of for around 50 levels Fahrenheit. The plant will encounter some die-back, the spring, but it’s perennial and ought to reinvigorate it self.

See related

the-best-way-to-grow-romanesco-broccoli-594061afce356.jpg

The best way to Grow Romanesco Broccoli

Romanesco broccoli (Brassica oleracea) is an intriguing heirloom vegetable having a green colour and fractal head. It’s not something between, although perhaps not really cauliflower and very conventional broccoli. Romanesco broccoli that is growing is similar to developing cauliflower than broccoli in the feeling that it needs constant water and very natural soil to prosper and is a temperamental to temperature. As crops mature to 3-feet tall, Romanesco needs a somewhat shaded area with soil and space to distribute. It’s best to Stump Removal Romanesco in the drop in hotter climates.Those in more northerly areas can Shrub Removal in the spring, after the last frost. Seeds are usually accessible through purveyors that are Italian.

Planting Seeds

Seed that is fill pots six months prior to the last anticipated frost for the region, with natural potting mix.

Place one seed in every seed pot and moisten the soil somewhat.

Place the pots in a area from direct sun and cover the seed pots to keep moisture in. Keep the soil moist.

Following the seeds sprout remove the plastic wrap. Move the pots into a warm location with lots of sunlight. Keep the soil moist.

Transplanting

Move the outside into a protected area from direct sunlight, 30 days after planting. Allow them to harden off for one week. Temperatures should be-at least 4-5 F throughout the day.

By including plenty of compost prepare a backyard area for the Romanesco transplants.

Plant the seedlings 16-inches apart in rows that are 24-inches apart.

Sprinkle bone meal liberally on the entire planting area.

Water maintaining the top 8″ of soil moist.

Following the florets open using a sharp knife, sever the head in the bottom. Time to maturity is around 90 to 120 days from planting.

See related

cucumber-stem-rot-5940493eea119.jpg

Cucumber Stem Rot

Cool-climate gardeners developing heat-loving cucumbers in a house greenhouse encounter the threat of a cucumber that is life-threatening stem rot disease, fusarium oxysporum. Attracted to moist conditions, this hardy virus that is air borne lingers for years making it hard for home gardeners to fight in rock wool blocks the soil and greenhouse frameworks. Proper greenhouse sanitation actions reduce the threat of home gardeners dropping their cucumber crop to stem rot.

Causes

Being a warm weather plant Fresno, cucumber seedlings that are youthful are susceptible to infection in the event the temperature falls below 68 degrees Fahrenheit or the soil doesn’t permit sufficient air circulation. The spores spread through re-circulation in the method, contact with crops that were infected or contaminated clothes, tools or fingers. The ones that produce huge load of fresh fruit or wounded crops are more vulnerable to infection.

Symptoms

The leaves display the first signs of wilting at day-time temperatures but recuperate in the night coolness. The wilting spreads to the whole plant Chico as roots, stems and the leaves become discolored over time. The tissues start to to look orange or yellow. In advanced levels, the stem becomes stringy and salmon-colored spore masses as well as a cottony growth seems. Shortly following the crops die and become brown. Hot climate hastens the improvement of the illness. Even though the stem is rotting, the roots preserve firmness.

Prevention

Prevention is the only hope to prevent as no treatment exists a fusarium stem rot infection. If identified flush the irrigation method with water and industrial disinfectant. Disinfect pots, resources, gloves and all inside greenhouse buildings with household chlorine bleach. Use potting mediums and aerate the soil to make sure adequate air circulation. Work top quality natural compost to the soil to reduce the danger of infection. Disease – keep a close eye on the seedlings for indications of infection and resistant cucumber varieties. Transplant seedlings that are robust, discarding or stem infection combined with the ones in its quick vicinity. Keep the walk ways in the greenhouse free from s Oil and Shrub Removal particles. Avoid high-humidity in the greenhouse and enhance the the temperature to ranges an hour or maybe more before sun rise to avoid dew.

Control

Learn stem rot infection. At the first indication of infection, place crops that are afflicted right into a plastic bag and eliminate instantly in the greenhouse. Avoid passing through non-infected are as if if possible. Burn them in a totally individual area where the air borne spores are probably to drift back to the greenhouse. If crops have been handled by you or even labored in the region together, depart instantly before continuing to perform on the crops, to bathe and alter garments. Sterilize resources, seed trays, shelves and all pots before re using. If in question, discard and use clear, components that are new to Stump Removal the crop.

See related

the-best-way-to-fertilize-lavender-59403383e024a.jpg

The best way to Fertilize Lavender

Whether your landscape aesthetic is an English cottage Lawn Service or a minimalist, green landscape with well-placed bursts of purple blooms, lavender (Lavandula) is a house gardener’s favored. This herb is grown because of its grayish-green foliage, flowers and Lawn Care that range in colour from light to its fragrant fragrance and deep purple. And for the gardener who enjoys the benefits of the herb, the oil, petals as well as lavender blooms find their way to living-rooms, the kitchen and bathrooms. However do not neglect to water and feed this multi-use perennial.

Before you Stump Removal lavender blend compost together with the soil. To to add compost, perform the backyard shovel to the indigenous soil until it’s effortlessly manipulated. Add a 2- to 4 inch layer of compost and mix the soils till completely mixed. Although this herb will grow in soil that is weak and is hardy, it is going to thrive and bloom abundantly in a compost- atmosphere that nourishes the plant as well as the root-system. You generate your own or can buy compost at your neighborhood nursery. If it’s easily accessible, farm manure is also an ideal soil modification. Fertilize the plant soon after after planting.

Bone meal and lime combine equal parts of compost in a bucket; and blend before the the weather are mixed in springtime following the frost that was standard.

Scoop out about 1 teaspoon of the mixture, and sprinkle a circle of your home-made fertilizer across the root of the plant. If you don’t want to create your own fertilizer, a total fertilizer or an easy application of lime will also feed this hardy plant; nevertheless, because lavender is vulnerable to over-fertilization, use all fertilizers in moderation

Water the lavender instantly to soak the fertilizer to the soil and until its roots are moist, about 6 to 8″ deep, with respect to the dimensions of the plant. It’s possible for you to insert extended dowel or a chopstick to the earth to decide how deep the soil is moist. Lavender doesn’t like wet feet therefore infrequent — every seven to 10 times soaks are preferred by it.

Add still another program of the compost, fertilizer and bone meal by the end of the subsequent cold temperatures to prepare the crops for spring growth.

See related

how-to-water-crops-with-ice-cubes-59401637580bb.jpg

How to Water Crops With Ice Cubes

Like people, few plants can survive with no steady supply of water. By wilting dehydrated crops frequently present their anxiety, plus they generally refuse to create fresh fruit or flowers & Lawn Care. In warm climates, 1 day of watering that is missed can cause a Shrub Removal. Gardeners with a lot of crops can use ice to make a process that is faster to watering crops. The ice melt gradually, providing the plant time to absorb the water it wants.

Put a plate or shallow tray beneath the plant’s container.

Place one to three ice on the the top of soil. Use ice for containers that are extremely big. Let the ice melt entirely.

Insert your index-finger 2″ to the soil. In the event the soil is moist, water has been acquired by the plant. Add another ice-cube if it’s dry. Check the moisture level when the ice-cube melts of the soil. Continue to include ice before the soil feels moist.

Check the tray for pooling water underneath the container. You place too many ice in the container in the event the tray fills with water. Reduce the amount of ice provided time you water.

Note the amount of ice it will take to completely water the plant. Reduce or you might need to boost the amount of ice provided in the event that you transfer the plant indoors or outside.

See related

the-best-way-to-prune-an-outdated-leggy-rhododendron-59400b6092273.jpg

The best way to Prune an Outdated Leggy Rhododendron

Resist in the event your name is being called by the chain-saw in your garage. That eye-sore of a rhododendron warrants better — even supposing it’s just plain unpleasant, lanky and tall. Rhododendron is a huge genus of crops, although it can grow in Sunset zones at the same time developed best-in Sunset Climate Zones 3 to 4, 1 5 to 17 and 32 to 4-2. With a few tender Stump Removal, it is possible to change your outdated, leggy rhododendron right into a complete, shrub that is flourishing.

Prune woody old and unproductive wood. Thin out the heart of the rhododendron to improve sunlight coverage This assists the middle of the plant Boise generate flowers and new growth. Cut branches back to your parent branch or just above a bud that is healthy. Don’t trim over one-third of a rhododendron in the pruning.

Cut back new development in fall and the spring. Pinch development again to just above an outward-facing leaf bud. The plant will branch out at this time to inspire a fuller rhododendron.

Prune the following year in a manner that is similar. It may take as much as three years to change a rhododendron that is leggy right into a complete specimen.

See related

the-best-way-to-get-cleared-of-cabbage-beetles-593fe4dd28997.jpg

The best way to Get Cleared of Cabbage Beetles

Commonly called flea beetles beetles are tiny, tough-shelled insects with long legs for leaping like fleas perfect. Although they calculate only 0.125 inches long, grownup cabbage beetles feed on the foliage of seedlings in spring, riddling the leaves with tiny holes and rapidly decimating new plantings. They choose leafy crops like evening primrose, brussels sprout, cabbage, cauliflower, collards, kale, kohlrabi, mustard, broccoli, turnips and water-cress.

Aluminum foil that is apply mulch after planting Cape Coral. Cover backyard beds with aluminum- building paper or spray plastic mulch that is clear with paint.

Plant rosemary (Rosmarinus officinalis) and thyme (Thymus vulgaris) near crops which can be susceptible to cabbage beetles. These herbs repeal cabbage beetles, in line with the web site that is Learn2Grow.

Add nematodes to the soil to get cleared of larvae. Heterorhabditis bacteriophora will destroy cabbage beetle larvae when added to the soil when it’s between 60 and 93 degrees Fahrenheit.

Spray soap on the cabbage beetles in night or the morning when crops are in their first-leaf levels.

Plants for worse cabbage beetle infestations using the Carbaryl.

See related