the-best-way-to-grow-orange-flesh-honeydew-593f9182beddf.jpg

The best way to Grow Orange Flesh Honeydew

Orange-flesh honeydew melons are a great source of vitamins A and C and are lower in in calories. Its flavor resembles that of the honey-dew melon despite the fact that this member of the family is a cross between a honey dew melon and cantaloupe. Growing your melons in the backyard remove worries about chemicals applied to the fresh fruit you consume and can help you save money. Orange-flesh honeydews prosper in temperatures between 80 and 70 degrees Fahrenheit. Sow the seeds outside the soil has a temperature above 60 degrees Fahrenheit as well as after all risk of of frost has passed.

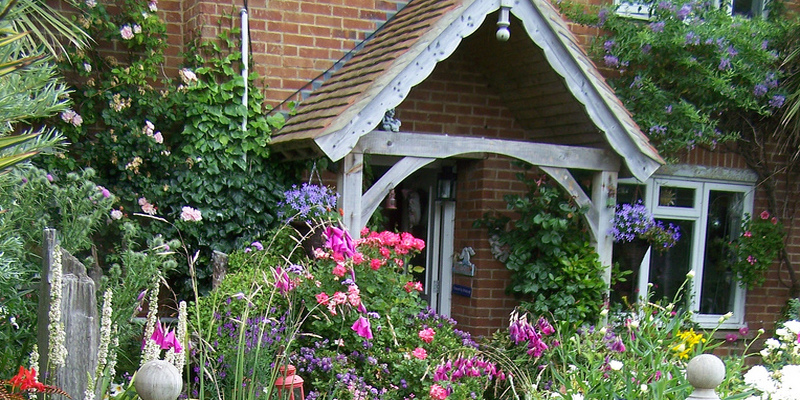
Select a place in the backyard to increase the seeds. Use your fingers as well as a garden Cape Coral hoe to eliminate weeds in the soil. To market development, perform a 2 inch layer of compost to the soil and use an all purpose fertilizer in accordance with package instructions. Cultivate the soil to a depth of approximately 8″. Aim for well-drained, fertile soil.

Mound the soil to produce hills that are 10″ high and about 6 feet apart. Shrub Removal four orange-flesh honeydew seeds per hill. Sow the seeds in a circle, in a depth of 1-inch. Therefore it is firm within the seeds press on the soil.

After planting Chico the seeds, and every week there after, saturate the soil with 1-inch of water. Aim to achieve a watering depth of 8″. Water in the morning to ensure by night-time the developing foliage is dry. Stop before harvesting the crops, watering the plants about three months.

The plants once the seedlings develop two leaves. Remove crops that are tiny and keep the crops that are powerful. Avoid over-crowding — try to hence the melons have adequate room to develop to keep only two plants per hill.

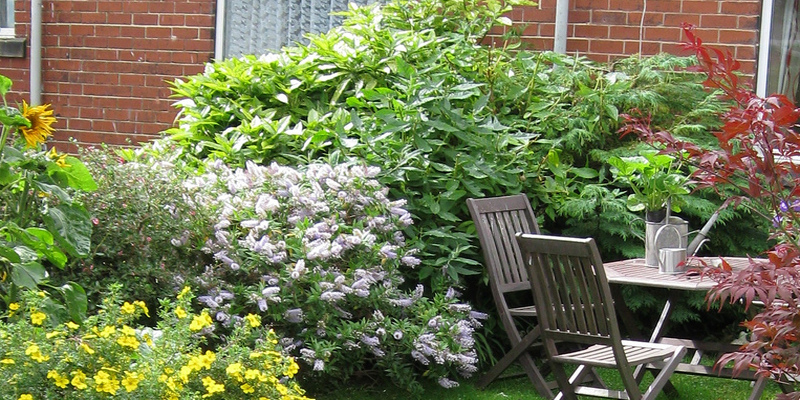
Place a layer of straw or peat moss round the crops to advertise soil moisture-retention and also to help suppress weeds. When the soil temperature is above 75 degrees Fahrenheit, mulch.

Side-dress the plants every three months or use an all purpose fertilizer in accordance with the packaging instructions.

The orange-flesh honey-dew melons after about 85 times, when they are ripe. The melons are ripe when the good fresh fruit stem becomes brown and dry and the section of the melon that touches the floor turns yellow.

See related

the-best-way-to-use-a-backyard-shade-screen-593f913f98042.jpg

The best way to Use a Backyard Shade Screen

Gardens developed in places that receive warm temperatures or sunlight gain from backyard shade screens that help to cool the floor and filter the sun’s powerful rays. Screens manipulate the quantity of sunshine within an area to ensure partial shade crops thrive in full sunlight surroundings and enable gardeners to harvest crops outside their typical growing period. Garden Phoenix shade screens are not generally required in coastal locations that obtain fog that is excellent, but are suitable for locations further inland with long.

Observe the expanding area on a day that is sunny and take notice of places that receive the quantity of shade and sunlight to find out the best lay-out of the shade display. A shade display that handles the backyard parallel to the floor is most useful, in the event the sunlight beats along on the backyard through the day. Install a shade display inside the Lawn Service room to shade the medial side most suffering from the sunlight in the event the sunlight hits mainly on one side.

Hammer stakes in the bottom, spaced 3 to 4 feet apart, leaving about 6″ of the stakes protruding to the floor. Install stakes across the whole perimeter of the backyard if within the the whole backyard; install the stakes between garden Chico rows in the location established by your observations, if installing a shade display.

Cut one piece of 1/2 inch PVC pipe for every garden Redding stake into a length of 6 feet. Cut one end of every pipe at a 45-degree angle, using a miter saw or hack saw.

Fit one pipe over each backyard stake and push them around 6″ to the floor. The 45-diploma angled cuts produce sharp factors on each and every pipe, producing it easy to drive the pipes in manually. Tap the very top of the pipe having a hammer to aid generate the pipes to the bottom in the event the s Oil is compacted.

Connect 1/2inch T PVC pipe fittings of every pipe with PVC glue to the very best; minimize pipe to connect each tee fitting and secure with to 1/2 PVC Swab the glue throughout the outdoors of the pipes as well as the within of the T fittings, push the pipes in the T fittings and twist somewhat. Use 90-diploma elbow fittings a-T every corner of the shade display perimeter to to create rectangle or a-square.

Roll the backyard shade display on the other side of the PVC body and reduce if required to match a razor knife, ensuring fabric that is enough to fold the pipe over. In the event the fabric demands cutting, enable a 1-inch seam allowance, fold over the edges and sew or bond to stop fraying.

Pull the display taut over the body without stretching clip with butter-Fly clips spaced 1 foot aside in location. The joints of butter Fly clips suit on the two ends and also the pipe fold-over to clamp the cloth in position.

See related

the-best-way-to-grow-melons-with-manure-594a9046df370.jpg

The best way to Grow Melons With Manure

Manure, an organic matter is generally employed to amend planting soils. When integrated properly, manure helps to replenish the soil’s nutritional elements while advertising aerated, water-retentive soils. These advantages are particularly promising for melons, which need well-drained, fertile soils for improvement that is wholesome. One modification, as well as proper treatment, aids to create quality melons by the end of the period although melons don’t need constant manure amendments.

A well- aerated place for the melon crops. Choose a sunny area that receives at least 10 hours of total sunlight each day. Dig the planting Phoenix location that is chosen up, break any soils that are clumped up and eliminate all weeds in the area.

Incorporate a 2- to 3 inch layer of manure to the period of the planting Cape Coral location. Mix the manure completely to the planting area to produce a soil that is well-balanced atmosphere. Use clean, livestock manure and prevent manure from meat eating animals as this manure might improve the potential for illnesses.

Plant your melon seeds in the area that is ready and permit the seeds time to sprout and develop. Sow the seeds in the spring that is late, only above 50 degrees Fahrenheit and soil temperatures relaxation stay after night-time temperatures between 68 and 78 degrees F. Place the seeds about an inch-deep to the soil and place the seeds, at least to permit sufficient space for development.

Keep the melon’s planting location moist and free of weeds. Irrigate the melon crops weekly to supply the plant with around 2″ of water per week. Increase the watering schedule during warm summer periods and usually pullback on the watering schedule during wet periods. Allow the soil to dry somewhat between rainfall or watering to avoid over-watering and ensuing root-rot. Pull weeds in the planting location as they seem to avoid the weeds from stealing the melon’s nutritional elements and water.

Once the fresh fruit starts to to make fertilize the melon crops. Use an all-objective, well-balanced fertilizer, like . blend 51010 or 101010 Distribute 1/2 cup fertilizer for the diameter of the planting area and every five crops along integrate the feed into the s Oil. Irrigate the soil seriously just after after the chemical to be forced by fertilization to the soil.

the-best-way-to-propagate-hops-593f909e7dd20.jpg

The best way to Prune Cerastium

Snow in Summer (Cerastium tormentosum) is a groundcover that lives up to its title — frosting sunny areas and rock gardens with time-long, fuzzy grey foliage and with little white flowers & Lawn Care in mid summer. The Stump Removal grows 6 to 8″ tall with blooms that rise somewhat over the mat- . The plant Cape Coral prefers poor soil, though it should be well-drained, and is hardy in U.S. Department of Agriculture plant-hardiness zones 3 through 7, even though it can develop in greater zones where summer temperatures aren’t severe. Pruning is essential to keep this groundcover plant seeking its finest.

Sterilize the blades of your pruning shears with rubbing alcohol on a rag prior to each use to avoid the spread of illness or fungi from crops that are formerly pruned.

Cut back one third to half of the plant using the flowers that are shears after it. Don’t shear in the event the climate is very hot or dry or the timing falls near to cold temperatures, advises writer Tracy DiSabato-Aust in “The Well-Tended Perennial Garden.” The plant generates new, fuzzy development, therefore it rapidly starts to seem snowy after being sheared. Pruning late in the the growing season prospects to tender new development that’s damaged by the winter.

Set your lawn mower to its highest setting when there is a big plot of Cerastium. Run the lawn-mower on a ground-cover that is mature planting of Cerastium tormetosum after the flowers fade to keep compact and the desirable.

Prune any dead spots that can be found in with pruners in the plant in spring. Cut dead stems off in the bottom.

Use a shovel to find out parts of the plant that develop outside their planting locations that are meant. The plant may be intense in moderate climates, based on “Sunset” magazine’s on the web Plant Finder. It’s not, nevertheless, to the invasive species listing that is federal.

See related

autumn-blaze-trees-amp-pruning-593f8f78f1a09.jpg

Autumn Blaze Trees & Pruning

Introduced by Poplar Farms of Batavia, Illinois, in 1982, the Autumn Blaze maple tree Salt Lake City (Acer x freemanii) is recognized because of its flaming hues. A member of the Aceraceae plant Long Beach family, Autumn Blaze is a cross involving the red maple (A. rubrum) as well as the silver maple (A. saccharinum). The strong branches of Autumn Blaze maple trees sweep forming an oval form that allows for pruning Cape Coral that is easy.

Growth Practice

In the frigid climes of the North to the South’s sweltering humidity, Autumn Blaze maples effortlessly adjust to into a wide variety of growing conditions, achieving a peak of 60 feet along with a spread of 40-feet. The summer’s vibrant green, 5 inch-long leaves change vivid orange and bright red in the fall. These shade trees may be developed in clusters and so are well-suited to planting in parks and yards, around parking lots and along streets. Fast-expanding, they bear fruit and encounter little or no disease or insect problems or seldom flower.

Characteristics

The Autumn Blaze tree inherited power and amazing colour, in the maple, as well as dark red-leaf veins. The form of the leaves resembles those of a maple: five and reverse – lobed. The adaptability of Autumn Blaze comes in the silver maple.

Pruning Ideas

Dense- Autumn Blaze maples that are expanding need pruning twice annually — in spring and the fall to make it to the interior of the trees. Remove dead and weak limbs that could not be resilient enough to withstand both high winds or winter’s ice and heavy snow. Rid the trunk of any development. It’s possible for you to prune the very top of Autumn Blaze maples to to make a crown that is broad.

Background

Freeman maple, the typical title for Autumn Blaze, honors botanist Oliver Freeman, the first to develop Acer x freemanii at the U.S. National Arboretum in Washington, D.C., in 1933. A patent was issued for Acer x freemanii “Jeffersred,” an Autumn Blaze cultivar, to Ohio nurseryman Glenn Jeffers on July 6, 1982. In 2003, “City Trees,” an arborist journal, find the the Autumn Blaze maple as Urban Tree of the Year.

See related

the-best-way-to-replant-okra-593f8f5f734a3.jpg

The best way to Replant Okra

Okra (Abelmoschus esculentus) is a member of the hibiscus family. The family resemblance is apparent in the huge saucer-shaped blooms that are yellow related to all those of the hibiscus. Okra creates prior to the pods reduce in time for weeks after which quit production. It’s possible to replant another crop of okra to taste your soups and gumbos in places that have prolonged seasons with temperatures that are warm. Seeds for the okra planting Flagstaff may be sown the soil temperature is 65 degrees F or or more as well as when the evening temperature is above 55 degrees Fahrenheit.

Ground Planning

Put on a long as well as leather gloves -sleeved shirt to protect arms and your fingers in the spines and leaves of the okra crops that are proven.

Cut each plant Flagstaff stalk off about an inch above-ground level with Stump Removal shears that are huge. Dispose of each plant outside the backyard location or spot them.

Dig the plant roots and stalks from the ground using a shovel.

Loosen the soil to a depth of 12 to 15-inches using a garden fork or tiller. Spread a layer of compost along with the soil in a depth of approximately 2 to 4″ deep. Mix the compost to the soil using a garden fork or tiller.

Create rows for re-planting the okra using a hoe.

Planting

Create a furrow in the very best of every row about 1-inch deep. Move the suggestion of a hoe over the very top of every row at a 45-degree angle produce a furrow and to eliminate soil in the row.

Place the okra seeds in the three to four inches.

Pull the soil that has been moved to make again the furrow along with the seeds. Use the flat side of a hoe to tamp down the soil .

After they attain a peak around 3″ tall provide about 1-inch of water per week and slim seedlings to one to to 2 toes.

See related

the-best-way-to-stop-tree-stump-re-growth-on-a-fence-line-593f8f2b07647.jpg

The best way to Stop Tree Stump Re-Growth on a Fence Line

Trees are organisms that are persistent and resilient. After reducing down them, life springs forth anew with regrettable effects. Stump re-growth can interfere with creating considerable damage fencing parts and requiring expensive repairs. Using heavy equipment to remove stumps along a fence-line cause further damage and can disturb the existing footings. Treating the stumps enable the decomposition of the stumps, preserving the integrity of your fence and will stop re-growth.

Nonchemical Therapy

Remove any development throughout the stump with a hand-saw or Tree Pruning shears.

Cover the whole stump and secure it. The sheeting inhibits re-growth and blocks sunlight.

Hide the plastic-coated stump with natural mulch if preferred.

Check across the stump for re-growth every couple of weeks and trim any shoots that occur. Following a year or even more, the stump stops generating shoots as well as the plastic may be removed.

Chemical Therapy

Drill holes in the very best of the stump as your drill, as deep to the wood permits.

Fill the holes with high-nitrogen fertilizer and soak the whole stump. In the first year of decomposition have nitrogen. The addition of nitrogen- fertilizers increases the decomposition method and assists these organisms.

Cover the stump and secure it as required.

Remove the re apply and sheeting fertilizer and water occasionally in the first-year only. The decomposers that inhabit wood after having a couple of years don’t gain from nitrogen programs.

Apply a coat of herbicide containing triclopyr or glyphosate . Herbicides are ineffective on stumps that are older. Use the appropriate herbicide for this species, in the event that you know the species of the tree Flagstaff. Triclopyr is more efficient than glyphosate on willow, oak, maple and locust. Check with the maker for performance of the item on the species that is intended.

Repeat application of herbicide as suggested from the producer to avoid re-growth also to ruin the plant’s roots.

See related

the-best-way-to-maintain-a-arborvitae-shrub-593eedcb6243a.jpg

The best way to Maintain a Arborvitae Shrub

Using their tall, dense development and ever-green foliage, arborvitae (Thuja occidentalis) make excellent plants for privacy hedges. These columnar shrubs prefer loamy and full sunlight, well-drained soils, however they are going to tolerate many different soil conditions. Some cultivars have foliage ranging from golden to copper although green is the most typical foliage colour. If planting Redding arborvitae 2 to 3 feet. Once planted, arborvitae are low-maintenance shrubs but do need some treatment to remain healthy.

Feeding

From an annual feeding, your arborvitae will gain through the first five years of development. Drop offer your arborvitae using a fertilizer that includes twice as much nitrogen as phosphorus. As an example, the figures on the label will examine16-8%8ample, the numbers on the label will read 16-8%8-8%8ample, the numbers on the label will read 16-8-8 or 20105. Compost is an outstanding natural foods for the shrubs. Give the crops one third pound of foods for each foot of height. A 6-foot-tall plant Flagstaff will require 2 lbs of compost or of fertilizer. Use a trowel to perform the the meals to the soil throughout the Stump Removal. Avoid allowing the the meals come in immediate connection with roots or the trunk. After five years, if you don’t want to encourage it to develop taller or fuller your arborvitae doesn’t require to be fed.

Watering and Mulch

Throughout the first year of development, your arborvitae will require water that is enough to keep the soil moist but not damp. Next, you need to water during periods that are extremely dry. Supply water to completely soak the soil throughout the Stump Removal but maybe not to depart standing water when the climate is dry. To aid retain s Oil moisture, spot a-2- to 3-inch layer of mulch for example leaves or bark dirt round the shrubs. To decrease rot, prevent permitting the mulch come connected with all the trunk of the arborvitae.

Pruning

In planting season, your arborvitae will require to be pruned to restrict its peak and also to assist preserve its form, motivate fuller development. Use hedge clippers to trim along best and the sides of the shrub to minimize it to peak and the form you choose. If some of the most truly effective branches are also thick for the hedge clippers to cut-through without pressure, use loppers or a pruning noticed. A great peak for many privacy hedges is 8-feet.

Winter Care

Although arborvitae are frost-tolerant, ice, snow and large winds can bend and split the branches of your arborvitae, leaving unsightly bare places. It is possible to help your plant if severe climate is predicted. To do this, rubber or tie rope straps across the plant throughout. The complete plant doesn’t need to be coated with rope, sufficient to hold the branches — as you tie the shrub, feel of the red stripe along a candy cane. Since these can reduce to the foliage and bark of your arborvitae don’t use string or wire.

See related

the-best-way-to-grow-a-kung-pao-pepper-593eedba703cf.jpg

The best way to Grow a Kung-Pao Pepper

By developing a kung-pao pepper Stump Removal, add some warmth to your own garden Phoenix. The kung-pao pepper is a variety that generates several fruits per plant Miami. The fruits are about 6″ long and slender. They’re green, when unripe. The fresh fruit turns red as well as the pepper raises in warmth, as they ripen. Grow the Shrub Removal both in the floor or in a container that is big, with respect to the the area available. Start peppers from seeds indoors.

Starting the Seeds

Fill 4 inch plastic pots with seed-starting mix. Create a hole 1/4 inch deep in the middle of every pot, then place a seed in every hole. Cover the hole and press.

Water soil and the seeds utilizing water that is hot. The seeds rot can not be made by cold water or maybe not germinate.

Set the pots in the place in-doors. Place lamp or a grow-light on the pots. Shine the light on the pots for at least 10 hrs daily following the seeds have sprouted. The kung-pao pepper seedlings require light and heat to prosper. Make certain temperatures don’t go below 70 degrees Fahrenheit.

Set the Crops Outside

Harden the seedlings off following the last frost in your region about two months. Hardening the crops off stops them from encountering shock as they transfer from inside to outside. Set the pots in a outdoor place that’s extreme sunlight for two hours to the day and shelter from wind. Increase the time the crops invest out doors, till they’re outside all evening and day. As the cold-temperature will stunt their development and produce, in the event the temperature dips to 50 degrees or less at night, don’t leave the plants outdoors.

Plant the seedlings in a container or the garden as soon as they are hardened off. Choose an area that receives full sunshine daily. Place each pepper plant 2-feet apart from each other, should you be planting in the backyard. Plant one pepper plant per container. Dig a hole in the backyard which is as extensive as the root ball of the pepper plant or fill a container two-thirds complete.

Set the plant or on the container combine. Fill in the rest of the hole or the container with s Oil or container blend. Press down and water to soak the s Oil.

After the first round of pepper fruits are established, generally about a month when you plant them outside side gown the crops with a few compost. Several tablespoons of compost -foot row ought to be lots of fertilizer.

Water the crops frequently through the duration of the developing time. The s Oil shouldn’t dry up between waterings. Don’t water therefore significantly the soil becomes soggy, as do-ing s O may cause trigger the crops to rot. A layer of mulch will aid the s Oil retain dampness.

See related

the-best-way-to-mulch-hostas-593eec5845f74.jpg

The best way to Mulch Hostas

Foliage is provided by hostas to aspects of the Shrub Removal bed. They thrive in moist soil and over cast times do not hinder the development of the plant Chico. In coastal locations, hostas might require it and tolerate sunlight. Mulching minimizes maintenance and more encourages healthy development. The mulch suppresses weed growth, prevents soil from drying rapidly and enhances the look of the mattress. A natural mulch that is appealing provides the garden your lawn a stylish first impression as well as bed.

Spread a woodchip or bark nugget mulch on the soil or early summer following the crops have emerged from dormancy. Use the mulch into a 2-inch depth.

Pull the mulch back in the bottom of the hosta. Leave a two-inch area between the bottom of the stem and foliage as well as the layer. Mulch from the stems can cause rot and retains moisture.

Summer replenish in the layer. Bark and wood mulches decompose, which provides nutrients to the soil. Add mulch to preserve a 2 inch depth.

Pull weeds in the mulch when you they are noticed by you. Mulches help suppress weeds, but some might really root in the layer. Pull these when youthful before the roots penetrate root and the mulch in the soil, where they are going to compete together with the hosta for water and nutrients.

See related