fruits-in-container-gardens-5949362a98d4f.jpg

Fruits in Container Gardens

Overcome issues of unsuitable soil or inadequate area by developing fresh fruit in container gardens. Container gardening lengthens the growing season and advances the the kinds of fresh fruit you-grow as it is possible to make the soil hotter by relocating them to hotter areas in winter and insulating the containers. Container gardens perform properly for a lot of types of fresh fruit crops including Tree Planting fruit like lemons and oranges, berry bushes like blueberry and huckleberry, and strawberries.

Containers

The most useful kinds of containers have drainage holes and therefore are made from thick wood, plastic or glazed terracotta. Unglazed terra cotta pots dry prematurely. The dimensions of the container depends on the fresh fruit you pick, but typically the container should be broader and at least a few inches deeper in relation to the roots to supply the Shrub Removal room to grow. By way of example, citrus trees require a container having a diameter three or four inches greater in relation to the root ball.

Pollination

Flowers Long Beach require pollination to make fruit. Self-pollinating fruit contains most citrus trees, apricot and peach, as well as large-bush blueberries and a few strawberries. Other fresh fruit, including pear and apple trees, need cross pollination, meaning the flower should obtain pollen from a different plant Salt Lake City to make fruit. Plants will cross pollinate in the event that you plant two in the same container or develop several plants in various containers and place them less than 100-feet away from each other when they’re outside – the nearer the better – or next to every other if they’re inside.

Fruit Trees

Choose dwarf kinds of fruit-trees and fertilize frequently. You will find basically two types of dwarf fruit-trees. True dwarf trees usually generate good fresh fruit that is less, so should you be shooting for esthetics, they work well. To harvest the good fresh fruit that is most readily useful out of your container backyard, pick trees that have a dwarf root-stock grafted having a scion that is normal. The scion is the section of the tree over the soil. To stop the fat of the good fresh fruit from breaking branches, clip off the immature fresh fruit s O there’s only one-per cluster – and about 6″ between clusters. Prune the tree yearly to sustain its authentic dimensions and form.

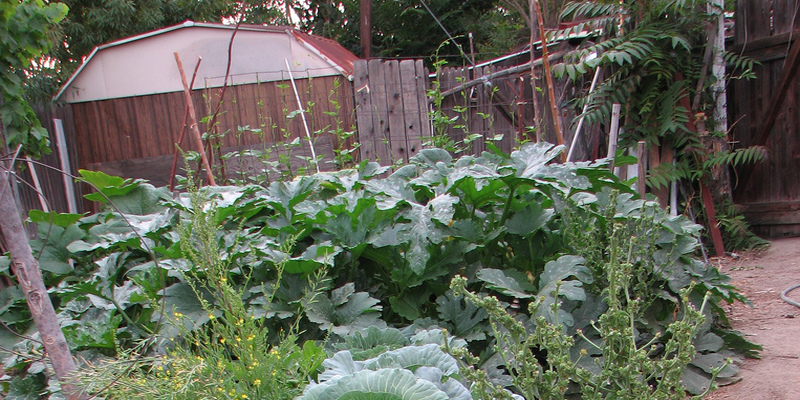
Fruit You Believe of as Veggies

Don’t overlook that tomatoes, cucumbers, peppers and squash are fresh fruit and do properly in containers also. So, even should you not have the ideal area or s Oil for gardening, you can still encounter the joys of vine-ripened “vegetables.” Smaller kinds of these fruits, such as cherry tomatoes or lemon cucumbers, an average of execute better in containers than kinds with larger good fresh fruit.

See related

the-best-way-to-paint-a-kitchen-stove-59492d7b47be4.jpg

The best way to Paint a Kitchen Stove

As an alternative to buying a new one, it’s possible for you to paint your kitchen stove. Repainting the stove is is among the many ways it is possible to remodel your kitchen without having to spend lots of money. Nevertheless, it’s impossible to use any type of paint when you re-paint the stove. The paint you require comes under several different brand names and is especially for appliances. This kind of paint dries to an end that is significantly tougher and has an base. It’s possible for you to use cleaners with this type of paint as it dries into a finish which is hard like porcelain, without creating harm.

Turn off the electric power to the stove’s circuit by switching off the appropriate breaker in your house service panel (breaker box). Remove the drawer beneath the oven compartment or slide the stove out somewhat to access the power cord of the stove pull the cord in the wall outlet. In case fuel is used by your stove, have the fuel supply shut down as well as the fuel line disconnected with a competent expert.

Clean the stove. It’s possible for you to use other kinds of cleaner in the event you wish, however don’t use oil-based cleaners when cleaning the stove; it will not be adhered to by the the applying paint.

Open doors and windows . Set up a fan to blow air outside, pulling the fumes from the kitchen. This may help to decrease the fumes in the space. Remove the burners on the grates on a gas-stove or a power stove. Remove any knobs in the stove by pulling off them.

Any elements of the stove which should not get paint to them, with newspaper and masking tape, like the burners, oven glass and chrome handles. Sand the complete area of the stove utilizing medium-grit sand-paper. This may help the paint stick to to the stove. Shake the spraycan of paint till you hear then and the steel ball inside begin to rattle shake it to get a moment or two after that to completely combine the paint inside.

A gentle coat of paint on the the top of stove, holding the can 8 to 10-inches a-way in the stove. Keep even the paint can-as straight as possible and use long strokes. Don’t take to to coat the stove in an individual pass. It will look like over-spray on the stove when you spray the coat. Allow the first coat of paint to dry for approximately an hour after which apply still another coat. Continue in this way before you therefore are satisfied with all the result and paint the whole stove.

Allow the paint on the stove before performing such a thing else, to dry and harden for around three hrs. Remove any newspaper that handles the stove and substitute grates or the burners essential. Attach the knobs of the stove to the areas that are proper.

Plug in the cord of the stove and drive the stove again back to its authentic placement. By switching on the breaker restore power to the circuit. To get a gas-stove, have the fuel line re connected as well as the offer turned straight back on with a professional.

See related

the-best-way-to-paint-a-pocket-door-594914432f491.jpg

The best way to Paint a Pocket Door

True to its title, a pocket door disappears into a pocket between partitions and makes an appearance when you desires to close a doorway which is open off. Such doorways provide flexibility that is excellent in tiny houses where living area is at a premium. Except that you should first determine if you’re planning to remove the door from its monitor just before painting painting a pocket door is actually no different from painting a normal door. Leave it uncovered for 24 hrs to prevent scraping the paint when you drive it straight back back to its pocket should you paint the door in the doorway.

Remove in the doorway if it’s easy to go off the monitor and lay it on two saw-horses for painting. If eliminating the door from its monitor is also hard, it can be painted by you in the doorway.

Lay a painter’s tarp underneath the door to avoid stray drips of paint from harming the ground Cape Coral. Mask the door’s components on both sides utilizing blue painter’s tape. If you’re painting the door in the monitor, mask all do or trim adjacent to the door. Seal the edges of the tape firmly to avoid paint bleeding. In the event that you plan to paint it without eliminating it from your track push the door to its completely uncovered place.

Open a can of latex enamel and stir carefully using a paint stick. Pour a few of the paint.

Choose one aspect of the door. Operating down and starting on top of the door, paint any panels that are recessed, utilizing an angled sash paint brush. Paint the door’s heart stile, then the horizontal rails, again operating top to bottom. Paint the remaining stiles throughout. In the event the do-or is flat with no recesses paint from left to correct and toptobottom.

When painting the facet of the do or follow the sam-e measures. In the event you are unable to enter the area through still another doorway, wait 2 4 hrs before pulling it shut to paint the other facet and after that sliding the do-or straight back to the pocket. Wait 2 4 hrs before flipping up to the do or to paint the aspect, should you be painting the do-or on saw-horses.

In the event you removed it in the doorway return the do-or to its track 24 hrs following the last coat of paint. Remove the blue painter’s tape. Pull the do or from its own pocket just several inches. Paint the lip of the do or, the sole element of the do or that displays when it’s set aside.

See related

how-to-to-separate-a-dieffenbachia-plant-5948f599a8591.jpg

How to To Separate a Dieffenbachia Plant

A member of the aroid or Araceae family is connected to crops like calla lilies and jack-in-the-pulpit. Native to tropical America, several species bred and of Dieffenbachia happen to be cultivated for use as houseplants. A broad selection of green-and- leaf designs happens. Dumb cane, the most popular name, refers sap displays when touched making speech difficult. Propagation is by tissue culture, layering, or division of shoots in the root clump. By dividing, the plant San Diego, or splitting it is possible to make more to fill out your Shrub Removal.

Preparations

Put on a long- sleeved shirt, eyeglasses that are protecting and water-proof gloves.

Cover the work area with all the plastic sheeting.

Place them and open the Stump Removal shears as well as the knife with points down in the container.

Pour hydrogen peroxide on knife and the shears therefore all reducing surfaces are touched by it. Allow extra hydrogen peroxide to drain in the implements. This helps guard divisions that are clean from pathogens, including fungi and bacteria.

Time the division therefore the soil throughout the Dieffenbachia roots is somewhat moist.

Plant Division

Unpot the plant. Turn the pot upside-down for containers that are smaller and thump the container edge from the worksurface edge therefore it slides from the pot to loosen the root ball. Lay big containers rotating and thumping the pot.

Put the Dieffenbachia along with the sheeting. Work the soil in order to see where stems and shoots and eliminate it from the roots are rising.

Inspect the root-system for area of cuts that are possible to divide the root mass. Plan to have three stems and shoots per division.

Start dividing the root system in the edge. Use the knife for cuts as well as the pruning shears for little cuts. Set the freshly divisions on a clear part of the plastic apart.

Clean-up

Woodier nonproductive parts of plant particles, soil, divisions that are undesirable, and roots. Remove the chosen divisions into a clean bit of newspaper. Roll up and discard the plastic sheeting.

Repot the divisions in pots that abandon 2″ of area around all sides. Keep the very top of the division in the sam-e le Vel it was in the first plant. Use clear properly-draining potting blend. Put divisions that are potted ingrowing location and water carefully.

Remove and discard water-resistant gloves. Remove and clean protective and shirt eyeglasses.

See related

the-best-way-to-apply-rubber-roofing-seam-tape-5948ebefe3978.jpg

The best way to Apply Rubber Roofing Seam Tape

Rubber roofing is usually applied on roofs. More or two rubber mats are laid alongside, one that has a top-sheet overlap seam flap. Tape is laid all the way down to join them in the flap. In many instances, rubber roofs are reliable and strong, however they’re able to create a leak. The only other location to get a leak to to happen is in the seam unless there’s a puncture someplace in the membrane. Before being put on the industry to attain the best sales price any property that leaks will require to be fixed.

Flip on the top-sheet overlap seam flap from the side it’s going to join. Once it’s been flipped over, it should be laying flat.

The region using a stiff-bristle broom. Remove dust, all dirt and particles in the area.

Use the primer activator adhesive to the flipped over the location as well as seam flap where the seam flap will lay on another bit of rubber. Use a 3 inch stiff-bristle brush and use the activator liberally to either side.

Allow the activator to dry completely before continuing.

Lay down the seam tape where the rubber has been coated by the activator, opposite the seam flap. Pull off the wax-paper coating on one side as you unroll it and press it into place. Begin in the begin of the seam and work your strategy to the finish, pressing back on the tape most of the way.

Walk to the other on the tape from end, or use a 2 inch roller.

Flip the seam flap on the seam tape. Lay the flap down on the tape because of its entire length. This aspect of the tape will be covered in wax-paper therefore it will not be adhered to by the flap.

Where it commences begin peeling the waxpaper strip tape. Reach under the the flap and pull out the tape. Gently seat the flap on the tape, as you do this. It will not need to to put up securely a-T this level, it wants to stay in in spot.

Work the right path down the whole seam pulling the waxpaper off while seating the flap in to placement covering.

Begin a-T a conclusion and use A2-inch roller to press the seam flap in to spot. Work the roller on the flap utilizing a 90-diploma or perpendicular movement. Press and function the right path across the complete flap.

Roll down the amount of the whole seam to the other in one finish. As you go, press.

See related

the-best-way-to-attach-a-display-mesh-into-a-gate-5948bba0346de.jpg

The best way to Attach a Display Mesh into a Gate

Yards keep out unwanted guests, offer a plan into a particular area of the lawn for example in Salt Lake City and produce a secure location for small children and animals to perform. Some wood gates have huge openings within their designs where animals can escape while attempting to crawl through, or young children might get caught. By attaching a display mesh created especially for outside use, correct the problem. The layout of the mesh is a big open-weave that offers visibility that is simple .

Remove the gate in the opening.

Place the gate on a worksurface that is flat. For attaching the display mesh position the gate therefore the medial side is on top.

Measure the the size of the gate area.

Measure and cut a bit of display mesh around 1/2 inch shorter than each measured . that is dimension As an example, the gate measures 36 by 48-inches. Measure and cut a bit of screen mesh that’s 3 5 1/2 by 4 7 1/2 inches. Cutting the display somewhat smaller in relation to the size of the gate helps to ensure the screen mesh WOn’t stand out out past the edges of the gate.

Center the mesh display on the gate leaving a 1/4 inch border round the outside the screen.

Staple the screen to the every 2 to 3″. Begin stapling in the upper-left-hand corner. Place the staple that is 2nd in the bottom-right. Repeat the procedure on the two corners that are other. Staple the the rest of the display involving the corner staples.

Rehang the gate.

See related

the-best-way-to-lay-an-herb-garden-out-59489ee6a7f91.jpg

The best way to Lay an Herb Garden Out

For a large number of years, cooks and gardeners have herbs for flavors and their fragrance. Clean herbs are much more tasty, although today, supermarkets sell bottles of herbs for the convenience. Growing your own guarantees you access herbs accessible and enables one to harvest as much or as small as you require. An herb Lawn Care has curb appeal for your home to guests and passers-by. You do not require a big backyard to develop several kinds of herbs. Lay your herb garden San Diego out according to your theme, by growing herbs behind types, or manage the backyard.

Select a website to your herb Stump Removal. Herbs require at least six hours of sunlight per day. Herbs generally choose to develop in nutrient-rich, well-draining soil. Generally, several herbs choose a Mediterranean environment, including moderate or warm winters. Grow herbs as near to your own kitchen or entry way for access as feasible.

Determine the dimensions of your herb garden Miami. The dimensions of the garden depends on how tall the herbs increase or how extensive they distribute, as well as many herbs you want to develop. Generally, several kinds of herbs can increase in a mattress measuring just 2-by 3-feet. Use a measuring tape to help you decide the precise size of the backyard.

Draw a photo of your backyard. This may help you visualize your backyard as it is planned by you. As an example, attract a rectangle to re-present the backyard border. Draw a grid of squares within the rectangle. Create their names as you choose which herbs to develop and where to develop them.

If wanted, plan a a style to your herb backyard. By way of example, you can provide your backyard an colonial, organic or fragrant tea theme. Herb gardens may possibly contain parsley, oregano and basil. Tea gardens include chamomile, lemon balm and mint.

Place herbs, for example angelica, fennel or lemongrass, in the trunk of the herb backyard, generally the north-side. This enables herbs that are tall to get the sunlight they require.

Shade – herbs, for example chives or parsley, in the row straight in the front of the herbs that are tallest. Shade will be provided by taller herbs for types that are shorter.

Position herbs, like marjoram and parsley, in the very front of the backyard, frequently the south-side. Low- Roman yarrow and chamomile appear appealing when positioned in the edges of the backyard. Sun- herbs, including sage and basil get plenty of of sunshine in the very front of the backyard.

Place any other herbs, like herbs that entice butter flies, in the middle of the backyard.

Plan confined to containers. They could take over your backyard and distribute quickly.

Decide whether you want a border for the herb garden. Decide the goal of the border should you want a border. Logs and rocks offer a normal-seeking border that improve the looks of the garden’s. A fence makes a stylish border that shields herbs from animals that are hungry.

See related

the-best-way-to-prune-pinus-nigra-594886f8c5c01.jpg

The best way to Prune Pinus Nigra

Pinus nigra, frequently called pine or pine, is a coniferous evergreen prized as a landscape or bonsai specimen to get easy outline and a typically symmetrical canopy, as well as needles and desirable bark on trees. Austrian pine grows across a broad variety, which contains Sun Set Environment Zones 2 through 10 and 14 through 21, withstands city problems and provides warmth, drought and salt tolerances. Youthful specimens occasionally need shaping, and servicing Tree Removal is required by trees of any age, although Shrub Removal is seldom required by pine. In late-winter or early spring, prune pine generally. Cutting in to stay, branches that are actively developing leaves the tree Flagstaff at risk of infection.

Thin out branches soon after planting the tree that is young. Remove branches expanding in a narrow angle in terms of the trunk or any crowded or damaged branches. Roots broken throughout the planting and shifting method are balanced out by pruning during the time of planting.

To ensure only one powerful, central leader stays, reducing them back with their junction together with the stem remove several frontrunners.

Cut the leader that is central again, when it is vigorous, to ensure only 8 to 12 inches remain above the next-highest branches. If feasible, make the cut just above a well formed bud to the northside of the tree.

Prune side branches across the leader. Cut each again into a junction, creating them about four to six inches shorter in relation to the leader. Continue working the tree down in this way to produce a pyramidal form.

Pinch or cut again candles, shoots of new development that is limited that can be found in in spring, in the tips of branches provide the tree a denser look and to shorten development. Remove between about one half and two thirds the size of every candle.

Remove diseased or damaged branches the injury occurs or is observed as. Create a clean-cut a T least 3 to 4 inches in to tissue. Clean ruin or get rid of eliminated branches to restrict illness spread and pruning resources with alcohol or a bleach answer between cuts.

See related

the-best-way-to-install-versatile-flooring-tile-5948744c0765f.jpg

The best way to Install Versatile Flooring Tile

Flexible flooring tiles are plastic components which come in various styles and colors. Most designs have a border similar to your jigsaw puzzle. You basically match tabs and notches to install the tiles. Other types might possess a tongue-and groove system that snaps together. All tiles that are versatile are ideal for floating flooring installation. That makes them a great option. They’re fast to install, and in the event that you if you want to to pull one or even more damaged tiles up to to displace them, it’s an effortless job.

Examine the Landscaping for lumps or cracks that could cause unevenness. Hammer nails into protected screws or wood flooring. In the event the flooring is concrete, sand off any high spots using a Landscaping grinder or a hand sander. Fill any cracks greater than 1/4 inch with Landscape Design patching compound, subsequent manufacturer’s instructions.

Remove the baseboard using a prybar. In order to reinstall it, save the base Board.

Clean the floor using a store or broom vacuum.

Set the tile in a a large part. The tile using the corner that was marked could be set in virtually any direction now. Place a tile adjacent to the tile using the corner that is marked oriented the same path. Press the tabs as well as a wallpaper roller.

Continue to spot tiles. As the tiles are connected by you leave 1/4 inch over the wall for an expansion joint. Move to the second-row and spot these tiles, leaving a 1/4 inch expansion joint across the partitions that are adjacent. Set each of the tiles in the area in a manner that was similar.

By putting a straight-edge device across the line cut tiles, as required. Draw a utility knife across the fringe of of the instrument to score the tile. It might take three or two passes with all the knife to cut via the tile. Tiles are simpler to minimize than kinds that are chilly.

Cut and measure trim strips the duration of transition are as and doorways. Press the strips to the tabs using a wall-paper roller.

Reattach the baseboards to the wall to support the the edges of the versatile ground tiles in location.

See related

the-best-way-to-limit-the-warm-water-use-in-a-shower-5944036c92547.jpg

The best way to Limit the Warm Water Use in a Shower

Restrict warm water use in a shower also much and you’ll be getting cool showers. You can find ways to save lots of energy and water but still appreciate your shower. Energy Savers, a joint work of the U.S. Environmental Protection Agency and the Department of Energy, reviews that authorities laws currently restrict the water use in a shower. If you’ve moved right into a home built prior to the Energy Policy Act of 1992, you may be losing warm and cold-water in your shower and taps. Water-conserving adjustments aren’t costly or drastic, and you’ll save money on water and power.

Flow Price

Check your shower flow-rate using a gallon bucket underneath the showerhead. As you usually do, turn on the shower and time it takes for the bucket. In case it fills in less than 20 seconds, you possibly don’t have a low-flow shower head. When you shop, shower heads that satisfy requirements in in America in 2012 should possess a flow-rate of less than 2.5 gallons per minute at 80 lbs of pressure per square inch.

Saving Warm Water

When several members of your family consider showers inside the hour, the last individual to shower may run from hot water in case your water-heater can’t keep up with all the flow. Taking a shower as opposed to a one that is hot saves the warm water for the next individual. The length of a shower establishes the quantity of heated water . Warm water use can be limited by you by turning it off while you clean and beginning the shower. Turn it straight back on to rinse. Shutoff shower-head having a lathering valve lets you turn the water on in the off and showerhead using a shutoff valve on the shower arm. The shower head with lathering valve comes with cautions for seniors or for older properties that don’t have equivalent water-pressure on the chilly and heated water lines. An unexpected burst of water could result in thermal shock or scalding.

Aerating-Movement Shower Head

You’re probably familiar using the aerator cap on the finish of the kitchen faucet that sprays the water and restricts the movement. The sam e type of restriction is accessible for the shower head. The aerating showerhead air together with the water, producing it spray in a mist. You believe you’re obtaining mo Re water than you’re, therefore the aerating-circulation shower-head limitations warm and cold-water with mini Mal inconvenience.

Laminar-Circulation Shower-Head

Laminar-circulation shower-heads decrease water-use with all the spray method. The laminar-flow generates personal good streams of water. Replace the present shower-head using the aerating- the laminar-flow or circulation shower-head by keeping the shower arm constant and turning the outdated shower-head counter clockwise to unscrew it from your shower arm. Clear the shower arm when you’ve the outdated shower-head eliminated in order to get an excellent connection, and threading. Follow directions which come for installation with the showerhead, because you may possess before screwing the shower-head clock-wise to affix to the present shower arm, a washer assembly that goes inside.

See related