types-of-cornice-brackets-599933872f7dc.jpg

Types of Cornice Brackets

Cornice mounts refer to the decorative carved brackets most commonly seen on the exterior of Italianate-style Victorian residences. These mounts can also be common on Victorians with exterior gingerbread trim and styles like Queen Anne, Stick and Gothic Revival. Craftsman-style homes frequently feature cornice mounts under overhanging eaves, even though they’re not as decorative. Bracket styles vary in thickness and decorative ornamentation.

Origins and Materials

A cornice bracket is fundamentally the same as a corbel, which has been used for centuries to help support extruding surfaces. Originally made from concrete or stone, the primary function of these conventional architectural components was weight assistance. During the Renaissance period in Italy, buildings were created with balconies supported by outsized stone corbels. The debut of wooden corbels during the Victorian era shifted the primary focus from supportive function to decorative ornamentation. Nowhere is this more evident than the repeating brackets along the cornices and eaves of Italianate residences. Along with wood, cornice mounts can be made from steel, resin, plaster and fiberglass.

Bracket Styles

Cornice mounts are found in a vast range of styles, from easy half-circle arcs to visually carved basket-weave layouts. Vintage Greco-Roman layouts include carved acanthus leaves and grapes, while Mission-style mounts contain tidy, geometric lines. Brackets can be cut from a single plank of wood or be constructed out of as many as three layers of wood, with two thinner carved bits on the exterior and a sound, thicker piece in the center. On Victorian residences, these layered mounts are usually painted in contrasting colors.

Repeating Brackets

Typical spacing for replicating exterior mounts is 12 to 18 inches apart. Another choice is to set the mounts, leaving 2 to 4 inches between each bracket in the set and bend each set several feet apart. Brackets are generally installed from the frieze area under roof eaves, porch eaves and in the corners of porch articles. Corner article mounts are often highly ornamental. Repeating mounts, typically 1 1/2 inches thick, provide a three-dimensional appearance. A visually pleasing pattern emerges in the installation of several mounts round the perimeter of a house.

Interior Options

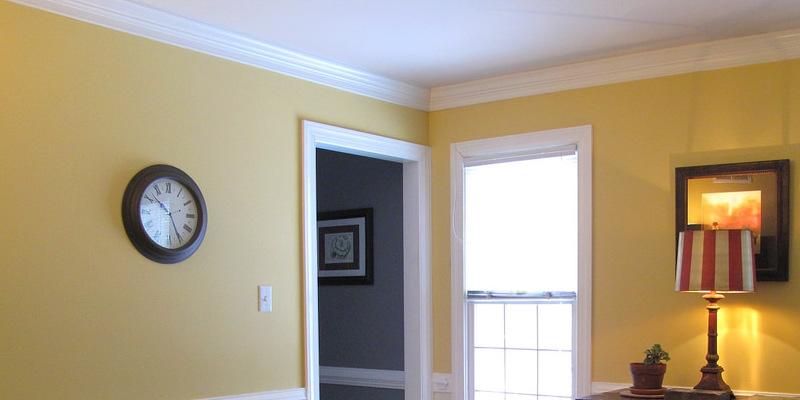
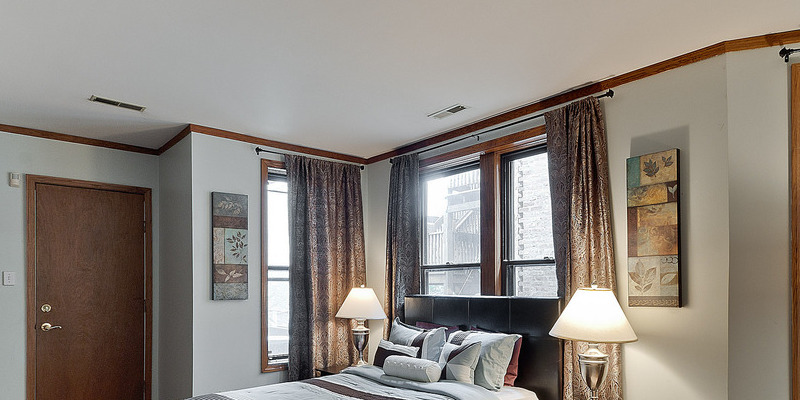
Cornice mounts can be used inside the house as an added decorative detail to classic molding. Brackets add elegance and style in kitchens when employed under wall cupboards, cabinets and kitchen island countertops or bars; mounts add character in entryways and beneath soffits. Use them under your fireplace mantel, on the fireplace surround and on stair risers. Thick brackets can even be used as small, decorative shelves to showcase a small trinket or figurine. Stain or paint the mounts to complement your interior trim or attempt an alternative material like metal or wax.

how-to-clean-a-sofa-cushion-made-of-polyester-batting-5999337ce0ba9.jpg

How to Clean a Sofa Cushion Made of Polyester Batting

Sofa cushion makers and upholsterers layer polyester batting between the outside upholstery fabric and the pillow filling; collectively, the three form a comfortable, durable indoor or outdoor cushion. Once covered with upholstery, polyester batting handles various kinds of cleaning nicely, allowing you to dictate your method from the material of the upholstery fabric rather than the internal materials of the cushion. But when the pillow covers are removable, polyester batting requires a heavier touch.

Covered Outdoor Cushions

Patio sofa cushions using durable covers stand up nicely to excess water and a cleaning. The fabrics used are thick and resist fading, and the polyester batting maintains its shape and dries quickly. Consistently sweep the cushions using a broom or eliminate dirt and debris using a vacuum to reduce staining. After per year or as needed, hose down the pillows thoroughly and wash them using 4 tablespoons of clear liquid detergent mixed with 1 gallon of cool to lukewarm water. A nylon scrub brush works well oftentimes, but follow manufacturer instructions. Rinse the cushions as thoroughly as possible when you’re done; leaving behind any trace of detergent produces a dirt-attracting sticky layer. Sun-dry the pillows, flipping them often, before placing them back to the furniture or storing them.

Covered Indoor Cushions

For indoor pieces, polyester batting offers a low-cost, durable means of increasing plushness while creating a durable cushion. When the cushions don’t have a removable cover, thoroughly vacuum them after weekly to keep both the upholstery and inherent batting clean. Treat any stains or spills immediately. After per year or as needed, deep wash the couch cushions according to the care tag. If the tag includes a “W,” use water-based techniques like shampooing or steam cleaning. Because polyester batting dries relatively quickly, it stands up to the excess moisture. An “order” also indicates water-based cleaning, but restricts you to cold water only. If the fabric is dry-clean just, noted by an “S” on the tag, you could be able to take the pillows to a dry-cleaner and then spot-treat any stains using a dry-cleaning solvent.

Uncovered Cushions

Both indoor and outdoor cushions may have removable covers, allowing you to clean the upholstery fabric and the polyester batting covered cushion separately. Remove the cover and launder and air dry or dry-clean it according to the tag instructions. Clean out the batting by wrapping the end of a vacuum attachment using cheesecloth. Secure the cheesecloth with a rubber band and suction dirt and debris from the cushions that are bare. The cheesecloth acts as a buffer between the vacuum and the batting, preventing harm. Dilute 1/4 teaspoon of mild laundry soap in 4 cups of water and wash the bare pillow using the solution along with a soft rag; don’t use a brush or any other abrasive instrument. Recover the pillows after the batting, foam and covers are completely dry. Unless there was a large accident, you don’t need to wash out the polyester batting regularly or in any way. The upholstery fabric is usually thick enough to guard the batting.

Spot Treatments

Immediately managing spills decreases the chances that the fluid will soak through the fabric and to the batting. Eliminate as much of the fluid as possible with clean, absorbent towels, pushing to the pillow to absorb the humidity. Depending on the magnitude of the spill, you may need to use several towels. Eliminate stains on cushions using an “order” or “W” on the tag with the suds created by mixing 1/2 teaspoon of mild soap with approximately two cups of warm water. Combine both ingredients and agitate the solution to generate lots of bubbles. Dip the rag in only the suds and use this to wash; avoid wetting the upholstery using the water underneath the suds.

Dry Cleaning Solvent

Use dry cleaning solvent or unflavored vodka for tags marked with an “S.” Wet a white cloth with the merchandise in accordance with manufacturer directions or by covering the bottle’s opening using the fabric and temporarily tilting it over. Dab the stain using the fabric until the mark disappears. Do not pour or use the solvent or vodka right on the upholstery. Absorb excess moisture and odors by sprinkling the area with baking soda while it’s still wet from the treatment. After dry, vacuum the area.

how-to-eliminate-mulch-lay-rocks-5999337e99c77.jpg

How to Eliminate Mulch & Lay Rocks

Mulch in the Shrub Removal helps decrease or eliminate weed growth, regulates soil temperature and retains moisture to help plants grow, saving you money and lowering your garden Chico’s maintenance requirements. Mulch might need to be removed and replaced with big rocks if you would like to put in a flagstone walkway or patio, or in case you wish to replace organic mulch with absorbent stone mulch that does not require regular replenishment. Organic mulches naturally break down over time and could really be left in position, however, the mulch might mix with small rocks or make it tough to lay large stones flat.

Eliminating the Mulch

Rake the mulch to a stack with a bow rake. If the mulch pieces are too small to move into a stack with a bow rake, use the bow rake tines to fluff the mulch, and use a broom rake to make the piles. While not needed, you can leave approximately 2 inches of mulch in place to cushion and level large rocks, if applicable. The ground Long Beach beneath the mulch might be uneven, but you can leave some of the mulch in place to level the region, if wanted.

Scoop the mulch piles off the Landscape Design using a flat shovel. Skim the shovel just above the ground Phoenix surface to remove the mulch without digging into the ground Cape Coral.

Set the mulch at a wheelbarrow and use it to mulch plants elsewhere in the Shrub Removal. Aged mulch which has broken down for many months might be better suited to your compost pile.

Laying Large Rocks

Set the first rock in place in addition to the 2-inch mulch layer, then placing it at one end if creating a walkway or beginning at a corner in case putting a terrace.

Trace around the edge of the rock with a screwdriver, stick or similar object, tracing deep enough to make the shape obvious when you remove the stone. Lift the stone and set it apart.

Remove the mulch within the rock outline to the desired thickness, plus another 1 inch outside the lines for matching purposes. Dig the hole to exactly the same shape as the rock if the base of the rock isn’t perfectly smooth and flat. Eliminate a minimum of 1 inch of the mulch so the rock is put in the ground, leaving an inch supporting for cushion. If you prefer the rocks to rest flush with the soil grade, you can remove all of the mulch and dig the soil to the same thickness as the rock thickness.

Place the rock back into position. Harness the surface in many places to firmly embed the stone. Lay a carpenter’s level throughout the rock to check for level. Insert or remove mulch or soil from beneath the rock as needed to make it level.

Push mulch tight against the faces of the rock to fill in the additional 1-inch margin you cleared when digging the room. If you opted not to leave any mulch behind, fill in the room with soil.

Laying Small Rocks

Install edging around the boundaries of the space where you wish to lay tiny rocks. Gravel and even marginally larger cobblestones can easily be forced from place as time passes, but edging helps maintain the rocks included. Attempt polyvinyl or metal landscaping edging installed to ensure that the edging protrudes above ground to exactly the same desired thickness for the rocks. Boards, bricks and larger stones also work well as edging, or you might only dig the whole distance to the desired depth for rocks — at least 2 inches — to avoid extra materials costs.

Cover the ground using permeable landscaping material to prevent weeds from growing through the rocks. Overlap the edges by about 6 inches when several pieces of fabric are needed. Expand the cloth up the sides of the edging.

Dump the tiny rocks to a large stack in the center of the space. To get a larger area, you might rather dump several stacks to avoid spreading the rocks as far. Transport the stones using a wheelbarrow, garden sink or cart.

Drag the rocks away from the stack across to the borders of the room using a bow rake. Flat shovels and scoop shovels work well if the rocks don’t drag readily. Scoop some of the rocks onto the seams and spread them above the ground. A depth of 2 inches throughout the space is generally sufficient to totally cover the bare ground. Apply more rocks if the ground shows through in any spots.

Lay a carpenter’s level above the small rocks in a number of areas to check for level. Insert or remove rocks where needed if a level surface is important to your objectives.