0a6eb26bebf7348bfca0cafd0a0b557f.jpg

Vinegar Formula for Shower Walls

Cleaning mildew and soap scum from shower walls doesn’t have to be a miserable undertaking. Skip the trip to the shop to purchase cleansers made out of harsh chemicals as soon as you’re able to grab your cleaning source from your kitchen pantry instead. White vinegar, often used to bring wilted vegetables back to life and also to make hard-boiled eggs easier to peel, has made easy work of making dirty showers sparkle.

Squeaky Clean

Create your own spray bathtub wall cleaner with vinegar along with two other components. Mix in a tidy and empty spray bottle, 1 cup warm water, two cups of vinegar and one tsp of a vegetable-based dish soap. You may also make a paste with 1 cup of vinegar, 1 tablespoon grease-cutting dish soap, 3/4 of a cup of baking soda and 1/4 quarter cup of sodium borate. Both methods must be applied liberally to the bathtub walls and permitted to sit for at least 15 minutes before being eliminated using a scrubbing sponge. Rinse the walls and wipe dry.

Wipe the Ceramic Wash

Your ceramic, chrome, stainless steel and vinyl fittings can all be washed with vinegar. But when tackling dirty ceramic walls, use a vinegar formula that contains 1 gallon of warm water, 1. /2 cup ammonia, 1/4 cup sodium carbonate, and 1/2 cup white vinegar. Apply the solution using a spray bottle or using a sponge. Let it sit for a few minutes, then rinse and rinse with water.

See related

df7145d3e87077246ca7f5948041e390.jpg

The way to Remove a Candle Wax Stain From a Glass Top Table

A candle-wax puddle or band onto a glass table becomes an unsightly place on the table also acts like a magnet for dust and debris. It might be tempting to scrub away the stain, but an abrasive scrub pad or cleaner may scratch the glass. A combination of scraping, heat and dabbing the softened wax helps eliminate all the wax from the table. Clean the glass with a water and vinegar mix for final removal.

Wax Removal

Scrape as much of the wax away as possible using a plastic scraper, the border of a plastic gift card or the bowl of a plastic spoon. If any residue remains, heat it with a hair dryer set to low or medium heat and carry it 12 inches away until the wax melts down. Blot up the melted wax with paper towels, continuing to heat the region and blotting with new paper towels until the wax is gone. Mix a blend of equal parts water and white vinegar into a spray bottle. Spray it over the tabletop, wiping the liquid up with a lint-free white cloth. Vinegar supplies a natural all-around cleaning solution for glass tabletops.

See related

f000d775531969b84d90108175af8813.jpg

How to Troubleshoot Kenmore Double Ovens

Double ovens come in handy once you’re cooking large meals, allowing you to cook various foods at different temperatures. They are usually stacked, integrated as a single appliance. But with two ovens, your chances of encountering problems that prevent them from functioning properly are essentially doubled. Some problems that can happen to a Kenmore double oven might require professional company, but others you can remedy yourself. Troubleshoot before making a service call.

Don’t Operate

If the ovens will not function at all, you might need to place time on the digital display. When power is interrupted, the screen will flash to indicate that it should be reset. You will not have the ability to program the heaters till you have reset the clock. If the screen is blank, the oven’s power supply could be disrupted. Make sure the power cord is securely inserted into the electrical junction box. Then check your home’s circuit breaker or fuse box; reset the breaker or replace the fuse as vital. When there’s absolutely no problem with your circuit breaker or fuse box, then your oven’s support wiring could be incomplete or there can be a short in the cord or plug. Call the number on your owner’s manual for support.

Screen Error Code

If your dual ovens’ control panel beeps and the screen shows an F or E error code, like F11 or E5, the digital control has felt a fault state. Press the Stop/Clear button to clean the code and try to reprogram the oven. If the error code looks again, switch off the power and wait approximately five minutes before turning back the oven on. Put the screen clock and try to program your oven again. If the error happens again, then write down the error number and call the number on your owner’s manual for assistance.

Poor Baking Results

If cooking results in your oven really are inferior, your ovens might not be level. Put a rack in the center of each oven; put a level on it over the width and in a diagonal to test for level. If the racks aren’t level, contact your installer for assistance. When cooking results are away in a level oven, the racks might be in improper place. Make sure food stays in the center of the oven; enable space between the pans so air can circulate freely. In addition, it will help to preheat before putting food from the oven.

Self-Clean Doesn’t Work

If your dual ovens’ self-clean function does not work, make sure the doors are fully closed. Then check to ensure that the controls are set properly. The screen clock has to be set before you are able to engage the cleaning feature. Press the Self-Clean button — “Cln” will flash on the screen and 3:00 HR will seem to indicate that the oven will self-clean for a short period. You can adjust it to two or four hours by hitting the “2” or “4” button on the key pad. Press Start. If the door is locked, the cycle will start.

See related

f6bd3269bc3639d5875d0494c5565cb8.jpg

Benefits of a Cast-Iron Front Axle on a Riding Mower

When you shop for a new riding mower, you’re likely to encounter ample advice about which features must be on your “must-have” list. While it’s ultimately your responsibility to decide which kind of riding mower you purchase, a mower with a front axle is usually considered a better investment than one with a front axle made of welded steel.

Top excellent

When assessing a riding mower as a possible buy, one indication of quality is really a leading axle that is made from forged or cast iron. When the manufacturer has taken the opportunity to provide the machine using the cast-iron axle, it’s more probable that the remaining portion of the machine has exceptional parts too. As you’ll most likely pay more for the machine using the cast-iron axle, odds are it’ll last more than its cheaper competitors.

Superior Strength

The exceptional strength of the cast-iron front axle, when compared to a steel axle, is of special value when your yard contains rugged terrain or even numerous obstacles. Replacing the mower into a raised cement curb or hitting a ditch at an increased rate of speed is enough to bend an axle of lesser strength. While it’s still a good idea to mow attentively, the cast-iron front axle is far more likely to originate from injury unscathed. Axles made of cast-iron withstand higher loads, have better vibration damping than steel and a better wear, heat and corrosion resistance.

Avoiding Annoyances

When you have bent on a front-axle of lesser quality, then you’ll probably learn of it quickly in an annoying manner. The mower may have a tendency to rise upward and down slightly as the bent axle ends, which makes you feel as if you’re on a merry-go-round horse instead of a lawn mower. You may also experience excessive vibration when the device is operating. If you notice an uneven cut and you know that your mower deck is flat along with the blades and spindles are in proper working order, it’s possible that you get a bent front axle. Picking a machine using a cast-iron front axle can help you avoid those difficulties.

Additional Weight

Since among the most dangerous conditions that can arise if you’re using a riding mower is a turnover situation, it’s always comforting to know that your mower has added weight to allow it to avoid tipping. The added weight of the cast iron increases the mower’s traction too. When the manufacturer has gone to the trouble of adding a cast-iron front axle, odds are that the transmission case is probably made from forged iron too, adding even more weight to the machine.

See related

5dc63606f9b60aa3eba2b63ed00de4e7.jpg

7 Fantastic Structures for an Attractive Front Yard

Your front lawn is the transition out of the rest of your neighborhood into the inside of your home, so its attributes are important. It is also exactly what your neighbors see when they are outside in their own yards, what passersby consider when they drive by and, most important, the first thing you see when you come home.

Large, structural pieces play an integral part in the way the front lawn is organized and laid out, so give them a idea for an entrance that works best for you.

Nancy Van Natta Associates

1. Arbors. There’s something quite magical and quaint about a front-yard arbor. It not only says, “Welcome”; it seems to shout, “Come on in and visit for a short time!” Arbors can accent a cottage, but they can set off a more house — it is all in the materials. A rose-topped white lattice appears quite traditional, while angular steel with clipped evergreen ivy adds a cool, contemporary vibe. The arbor and plant substance provide a one-two punch.

Tip: Resist the need to overplant your own arbor — assess the size of the vine you plan to grow on plant and it accordingly. If you are in love with a more diminutive vine, you might have to plant one on both sides of the arbor, however only plant one if it is more competitive, like a 20-footer. Overplanting your arbor may get you faster coverage, but ultimately you might create maintenance issues or plant health issues, or worse, you might weaken the structural integrity of your arbor.

Company & Woodburn Landscape Architecture

2. Fences. Not each front lawn wants a fence, but sometimes it can help to make a separation between the sidewalk and the garden. Front-yard fences should not be the exact same type of privacy fence as in a garden; they need to be more open and friendlier, setting off your garden rather than sealing off it.

Keep the fencing non, about 3 to 4 ft tall. This way your neighbors could see in without feeling as though they can just walk onto your property. Aim for a somewhat friendly and open feel, as tall fences state, “Keep out” Choose classic white pickets, rustic split-rail fencing or contemporary horizontal board fencing — just make certain to choose a design that puts off the architecture of your home.

Core Development Group, Inc..

3. Gates. Gates can be constructed to a fence to signal your visitors where to enter, or they can be inserted into an arbor for a magical effect. A well-placed and thoughtfully constructed gate places off the entrance while developing a little bit of separation from the rest of the planet. Gates offer a transition from one space to another while not a necessity generally.

Tip:Choose your gate hardware sensibly — gate latches that are too hard for people to readily open are frustrating, and abandon family and buddies waiting patiently on the sidewalk till you come to rescue them.

More guides to fences and gates

Personal Garden Coach

4. Artwork. Why should art be relegated to the yard? And by art, I really don’t mean little, kitschy pieces you select up at the craft shop — I suggest honest-to-goodness artisan-crafted pieces. Tuck in some that are created to withstand the elements, like these magnificent glass curlicues. Also search for unique pieces like framed prints that are created for outdoor display, intriguing wood pieces that begin conversations and forged steel artwork that could stand alone from the middle of your front yard.

Be sure that your art is acceptable for outside and can withstand wind, rain and sun. Do not put glass pieces underneath large trees that could have falling branches, and put expensive art closer to the home and fasten it properly to avoid theft.

Allan Malouf Studio

5. Statues. Statues go under the heading of art as well, clearly, but they have a more powerful presence than many other artwork pieces do. Statues lend a feeling of timelessness and elegance to a garden, whether they’re custom made or prefabricated and readily available.

Statues ought to be kept to a minimum in most front yards — just one or two well-placed pieces, for example — in order not to overwhelm or crowd the space with a lot of important pieces. Use evergreen plant material to make a traditional background and don’t hesitate to add colorful flowers around the foundation to set off it.

Tip: A statue can be quite heavy. Make sure to know where it’s going before having it delivered and choose the location sensibly, as it will be hard to proceed after it’s placed.

Get the puzzle of a Gothic garden for yourself

De Santana Handcarved Stone

6. Fountains. Water attributes produce a sensory experience for you and your visitors that is hard to make in any other manner: the sound of trickling or splashing, the movement of falling water as well as the visual coolness that water supplies to a hot day. Fountains could be grand “look at me” attributes or out-of-the-way beams tucked into a garden, waiting to be found.

Ensure your fountain is the appropriate size and ratio to your home and front lawn. I’ve seen many postage-stamp yards dwarfed by enormous three-tiered fountains. If your lawn and home are on the other hand, ensure your fountain is small as well.

35 Fabulous Fountains

Elemental Design Group

7. Retaining walls. If you have a front lawn with a steep incline, you might have to put in some retaining walls or terraces to make it even more accessible and to keep soil erosion to a minimum. Retaining walls could be a set of low walls, like those shown here, to produce a gentle step-down impact, and can be reached from a variety of eye-catching materials. Rock cut into stackable blocks has a very clean look, while bigger boulders tucked into the soil look more casual and cottage-y. Steel retaining walls are more contemporary and possess a rustic elegance.

In case your front lawn requires tall retaining walls, speak to your regional authorities about the city code — in most areas you will need a structural engineer to sign off on any wall that is taller than 3 feet. These types of walls are not DIY jobs, as they need to retain heavy quantities of soil; they ought to be assembled by seasoned professionals.

See how steel retaining walls changed a steep front lawn (includes video)

See related

a6c440689e54ae02ba198cf8a7db5129.jpg

Guides: 12 Ways to Decorate for Less

Between the pride of keeping more money in the bank along with the creative solutions we can be motivated to find, decorating a house on a tight budget can be rewarding. However, being a budget decorator requires its own unique set of skills, and that is where this ideabook comes in. From purchasing your house, finding amazing bargains on Craigslist and repurposing found things to planning well, making smart investments and much more, these priceless lessons from our Budget Decorating section are here to assist.

Brown Glaws Contractors Fine Custom Homes

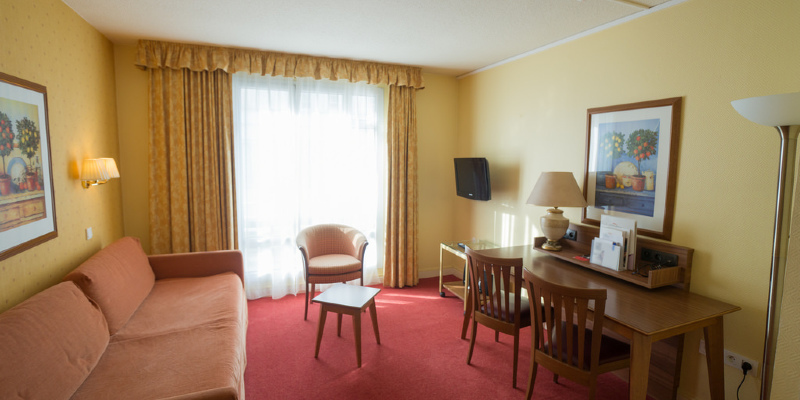
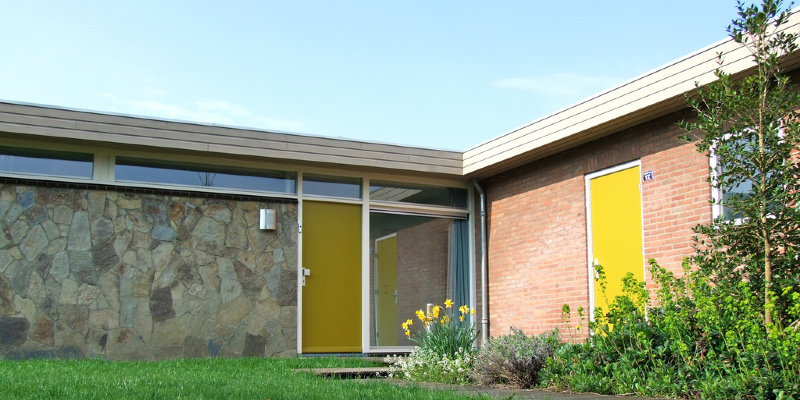
1. Discover how to get a high-end look on a budget. Sometimes a little detail, like extra-large (and superstuffed) throw pillows, can make your entire room feel more lavish — even if your sofa is out of Ikea. Familiarize yourself with other decorator tricks, like painting interior doors incorporating architectural molding to bland spaces, and you will shortly be on your way to creating a fabulously rich-looking space without overspending.

Get the manual: Luxurious Appears on a Budget

Natalie Myers

2. Learn to shop your property. Sourcing “new” furniture and accessories from within your own house is the best (read: cheapest) way to decorate on a budget. Shifting old furniture to another area or using it in a fresh way, like repurposing an older twin mattress as a daybed, can provide amazing results with no spending a dime.

Get the manual: Shop Your Home for a New Look

Lauren Liess Interiors

3. Learn to slash prices on the biggest remodeling expense: the kitchen. Kitchen remodels are somewhat expensive — but savvy homeowners may slash those prices with a bit of creative repurposing. Look at working with what you have, out of painting and updating hardware on your old cabinets to giving your present appliances a makeover with chalkboard paint.

When searching for new materials, comprise Craigslist and salvage yards, and look for budget-friendly alternatives to standard fare, like open shelving instead of pricey cabinetry.

Get the manual: 15 Ways to Update Your Kitchen

ANNA CARIN Design

4. Discover how to dream, plan and stick with your budget. When it comes to decorating on a budget, it pays to consider a couple steps ahead. Will that cute “bargain” desk fall apart following year, requiring one to invest additional money on a replacement? Perchance a less-shiny (but sturdier) classic desk would be a wiser choice. Look for versatile pieces that can be utilized in at least two different ways, like tables that may be utilized as nightstands or paired up as a coffee table. Understanding your style, picking quality and taking things slowly will pay off in the long run.

Get the manual: The way to decorate Smart and Slow

Tobi Fairley Interior Design

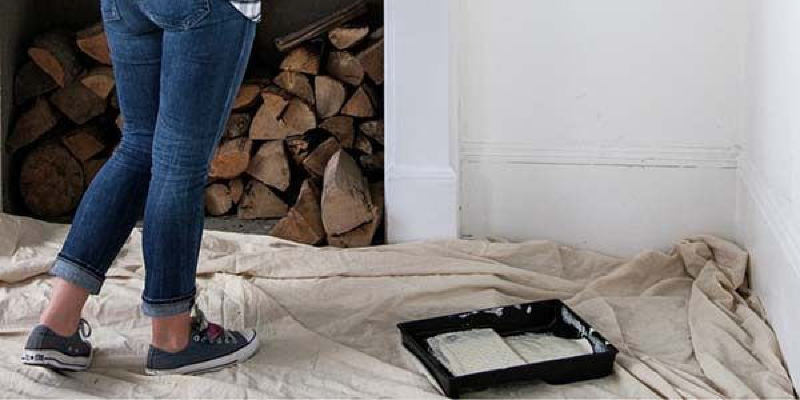
5. Learn methods to stretch that can of paint. A fresh coat of paint is one of the best ways to totally transform a room for very little dough … but do not stop there! Consume every drop of your leftover paint on a slew of creative, catchy jobs. Make more than your furniture by painting only the drawer fronts, whip up DIY wall artwork by means of a stencil to make a duplicate pattern or paint a “runner” down your staircase.

Get the manual: 25 Fab Projects With 1 Paint Can

Monica Ewing

6. Learn to repurpose. Repurposing is the art of using older, forgotten junk in a beautiful new way — and it’s a skill well worth obtaining. Turn a classic window into a picture frame, use old doorways as a headboard, screen towels on a propped-up ladder or create a classic suitcase as a nightstand. Once you get started repurposing, you may end up coming up with all sorts of new uses for all those curbside freebies you used to pass by.

Get the manual: 10 Repurposing Ideas

7. Learn to score amazing bargains on Craigslist. With listings for everything from accessories and furniture to building materials and appliances, Craigslist is a gold mine for the budget decorator. The trouble is finding what you want with this huge resource. Narrow your search by selecting the option to look at only listings with photos and just by owner, not trader. When it’s a particular style you’re after, instead of a specific thing, try your search on the homepage — otherwise you may be missing out on great stuff in segments you may not have thought to search in. And keep in mind, most Craigslist sellers expect a bit of back-and-forth within the price, so expand your search to include pieces at $100 over what you hope to pay.

Get the manual: Secrets to Shopping Craigslist

Before Photo

Wild Chairy

8. Learn to make over your furniture. Once you get a couple techniques down (stripping, staining, painting and re-covering) you are able to revamp almost anything. If you’re simply getting your toes wet with DIY, consider painting a little piece of furniture with chalk paint or milk paint — either one can be implemented right over a classic end. Or get a staple gun and re-cover a chair cushion with fresh fabric. More seasoned people can attempt trimming, whitewashing, liming or even reupholstering.

Get the manual: 8 Ways to Make Old Furniture Look Brand New

Elizabeth Metcalfe Interiors & Design Inc..

9. Learn which portions will grow with you. Do not fall in the trap of buying furniture that is so unique to a specific space or fashion it’s unlikely to get used again in the event that you move. Look instead for elegant, versatile bits — like a shapely love seat, a beautiful mirror or a little chest of drawers — that can seamlessly transition from studio flat to bigger home and back again.

Get the manual: 13 Versatile Furniture Pieces That Grow With You

Kerrisdale Design Inc

10. Learn ways to upgrade your space for free. Being resourceful around the house and learning to work with what you have in new ways is a good way to reduce unnecessary spending. Want new artwork on the walls? Frame pages by a damaged book or older calendar, or repurpose colorful fabric scraps as artwork. Revamp your living room by styling or color coding your bookshelves, and masking your sofa with a fairly fabric. Even something as simple as mason jars can be placed to use holding flowers or workplace supplies.

Get the manual: 15 No-Cost Ways to Invigorate Your Space

Rikki Snyder

11. Discover how to maintain a yard sale that truly pays off. To make sure big audiences, invite neighbors to take part and promote your purchase on Craigslist. On sale day get everything off the ground on tables, hang clothes on a wardrobe rack and place like with like. Well-styled vignettes encourage people to buy more, and make even humble things more attractive to buyers. For extra profits consider selling cut flowers from your garden, handmade crafts or refurbished and repainted furniture.

Get the manual: 14 Ways to Make More Money in a Yard Sale — and Have Fun Too

sarah & bendrix

12. Find out how to take your house as it’s. Rather than always thinking about the list of things to alter, decorate and fix around the house, would not it be refreshing to only enjoy your house as it’s right now? You are able to. Set a break to style envy by starting a gratitude journal, attempting a press quickly and focusing on what matters: the people and furry friends in our houses, and also the things we love to perform there.

Get the manual: How to Savor Your Beautifully Imperfect Home

CM Glover

Bonus: Get motivated by a good Tour. One terrific way to figure out how to pull everything together is by analyzing a true home brimming with budget-friendly DIY thoughts. Bookmark the ones you love and make notes about which projects you’d love to attempt.

Get a great Craftiness and Color in 3 Charming Virginia Spaces

See related

27daf49f9678abd2ddb799de620c213c.jpg

Chamfer

Used to add depth to cabinetry and furniture, chamfers are bevels usually cut at a 45-degree angle along an advantage. They may be cut on a table saw with the blade tilted or with a router fitted with a chamfer bit. Chamfers usually aren’t cut through the entire depth of a part and render some portion of the edge intact, revealing portion of the original 90-degree edge.

Chris Hill

This illustration shows 45-degree chamfers cut on the ends along with a plank. The chamfers are cut at exactly halfway through the board’s thickness.

Sticks and Stones Design Group inc..

A chamfer provides a detailed advantage to the white countertop on the ideal side of the photo.

Quartersawn Custom Cabinetry and Woodworks, LLC

Stopped chamfers add a fantastic amount of architectural interest to cabinetry. They create more places to add an antiqued and distressed appearance.

See related

411928c50a3e628b45390a6007c7c4e5.jpg

Neat Little Job: Create a Fundamental Wood Stand

Most woodworking jobs can be compact down to only earning a box. That’s essentially what they are. A good way to enter in the area of hand crafting your own decor and bits of furniture is to begin with a simple project which includes the elements inherent in the great majority of things you’re most likely to try. The stand alone below is just that.

Chris Hill

This multipurpose stand can be used to hold a beverage, a small plate of hors d’oeuvres or even a potted plant. It’s easy to construct, and you’ll be able to adjust the length, height and width to create a small table, a stool or even a bench.

Tools

This project features a tiny curved cutout at the bottom, but when this is more than you want to handle to begin, simply skip it, since you would need a ribbon and a drill to create it. For the rest of the project, you can get by using a handsaw and a hammer. A circular saw or chop/miter saw will make cutting quicker and easier. Also make sure to have a measuring tape, a straight edge (a wooden ruler works really well), a pencil, a compass or 4-inch round lid, a paintbrush and a few rags.

Lumber and Supplies

At home improvement shops you can pick up craft boards that could fit in a car or have more boards cut shorter. For this project you’ll need a 4-foot-long 1-by-8 board and a 2-foot-long 1-by-4 board. At some shops you can in fact have a worker cut the components to the length you need, but that requires some of the pleasure out of it.

Additionally grab a bottle of wood glue, a small box of #17 by 11/4-inch brads, plus a sandpaper or a sanding sponge. Pick some stain or paint and masking or painter’s tape in case you don’t already have some at home. For a small project such as this, an 8-ounce sample size is ideal.

See how to mimic blot with a DIY shade wash

Chris Hill

Construct It

To create the legs, ” I find it easier to cut a hole (in this case 4 inches in diameter) at the center of a board. To do this, cut on the 1-by-8 board to 22⅝ inches and mark a center line across the width at 11 5/16 inches. Mark an “X” with this particular line 3⅝ inches from the edge. Use a compass just like you did in college, using this beginning point to mark a 4-inch circle.

If you don’t have a compass and so are utilizing a 4-inch round lid, make marks in four distinct directions 2 inches in the “X,” line up the lid together with these marks and mark the circle.

Drill a pilot hole near (but not touching) the inside of the circle large enough to permit the jigsaw blade to go into. Cut across the inside of the circle but not on the line.

Now cut the board in half at the center line and sand the cuts.

In the remaining portion of this 1-by-8, cut on a bit 83/4 inches to produce the stand’s best, and in your 1-by-4, cut two pieces 41/4 inches to create the rails.

Chris Hill

Use Figures 1 and 2 as a guides for positioning the components. You’ll first need to position the rails and legs as shown in the amounts (make sure you apply glue to the ends of the rails) and attach them hammering from the 11/4-inch brads. A clamp or 2 would be excellent for holding these in place, but if you do not have some, you can handle by attaching the rails to a single leg at a time.

Apply glue to the top ends of the legs and the top edges of the rails, and attach the stand’s top using the brads.

Paint and guard It

After the paste has dried and you’ve sanded, you can paint or stain the table. If you are applying two distinct colors, place masking or painter’s tape across the various advantages while painting. This project employs a solid white to your legs and rails, and a color wash, which mimics the appearance of a blot, for the top.

Apply a protective coating as the last step, either a spray polyurethane or clear spray finish.

More: 20 Tools Every Homeowner Must Have

See related

f7483212867211b05c4a139c1e61769d.jpg

7 Spectacular and Practical Spring-Flowering Trees

The flowering cherries of Washington, D.C., the redbuds around Lake Michigan, the saucer magnolias of the San Francisco Bay Area — wherever you live, there’s probably a flowering tree that spectacularly announces that spring is here or is on the way. The majority of these are valued trees, the consequence of centuries of growth by horticulturists around the world.

Contemplating one for your own garden? It goes without saying: Do your homework. There is A tree a significant investment of money, time and backyard space. Check locally to see which trees are appropriate for your climate and site. You will probably have tons of types from which to choose. Check on eventual size, care issues. You will find individual novels on many different flowering trees, or even consider Michael Dirr’s 952-page Encyclopedia of Shrubs and Trees. To get you started, below are just seven spring-flowering trees that are not only beautiful but functional (really, one isn’t very functional in most gardens). These are strong, dependable landscape designs, as long as they’re in the ideal place.

Deciduous magnolias. Known for oversized blossoms, from purest white to deepest purple, on bare branches, these include big trees and shrubs like Magnolia soulangeana, M. kobus and M. liliiflora. There are dozens and dozens of options, including this unidentified species along with an unidentified bird. Some are hardy to USDA climate zone 5 and colder but also do well in mild California. Most deserve a place in a garden — even onto a lawn.

Saucer magnolia. Best known of the deciduous magnolias, this can be a reliable medium-size tree with a substantial branch arrangement that looks great all season, even when leafless. Look for a variety with an ultimate dimension that fits to your backyard and a flower you prefer. ‘Alba Superba’ has purplish. ‘Black Tulip’ lives up to its title.

Botanical name: Magnolia soulangeana
Common names: Saucer magnolia, tulip tree
USDA zones: 5 to 9 (find your zone)
Water necessity: Moderate
moderate requirement: Full sun or partial shade
Mature dimension: 15 to 30 feet, depending on number
Growing tips: Young plants can grow in a container for a few decades.

More about saucer magnolia

Redbud. Glorious purple-pink blossoms brighten early spring in many North American woods. Offered in a range of graceful forms, redbud is adaptable to a wide spectrum of garden climates — in California it performs more radically than the native California redbud.

Botanical name: Cercis canadensis
Common title: Eastern redbud
USDA zones: 4 to 9
Water necessity: moderate or more
moderate requirement:
Full sun or partial shade, especially in hot climates
Mature size: Up to 30 feet tall; streamlined types are a lot smaller
Growing tips: make certain the soil drains well and can be kept moist. Prune after bloom.

Flowering cherry. Most loved of the flowering trees is most likely the Japanese flowering cherry, the pride of Washington, D.C., originally a gift from Tokyo more than a hundred decades ago. Pick from varieties of different shapes and sizes (sprawling, narrow, rainbow, columnar, weeping); flower colour and form (double, single, drooping, white, light pink, deep pink); and bloom time, from early to late spring. Notable types include ‘Kanzan’, ‘ ‘Shirotae’ and ‘Akebono’.

Botanical name: Prunus serrulata forms along with other species
Common title: Japanese flowering cherry
USDA zones: 5 to 8 or 9, depending on species and number
Water necessity: Moderate
Light requirement: Full sun
Mature size: 12 to 25 feet tall and wide, depending upon range
Growing tips: Supply deep, well-drained soil. Look into pruning certain varieties and into pest and disease issues.

Flowering crabapple. One of most spectacular flowering trees, but in addition, it provides among the shortest displays. It’s usually adaptable but doesn’t succeed in the dryest climates. Hundreds of types vary in height and flower color; a number of these bear edible fruit.

Botanical name: Malus
Common title: Flowering crabapple
USDA zones: 3 to 9, based on number
Water necessity: Moderate
Light requirement: Full sun
Mature dimension: Up to 25 feet tall and wide; dwarf types may be just one third that size
Growing tips: make certain the soil is well drained and kept moist. Follow the pruning instructions for your specific variety.

The New York Botanical Garden

Flowering dogwood. Beautiful pink or white blossoms appear to perch on layers of branches in midspring. There’s deep red fall color too. This is a classic backyard shrub, available in many varieties (shown is ‘Cherokee Brave’), colors and shrub forms and with distinct disease resistances.

Botanical name: Cornus florida
Common names: Flowering dogwood, Eastern dogwood
USDA zones: 5 to 9
water necessity: Moderate; don’t let the soil dry out
Light requirement: Full sun or partial shade
Mature size: Up to 20 to 30 feet tall and wide
Growing tips: Watch for anthracnose, a debilitating fungus that reveals on leaves.

Purple-leaf plum. It’s not quite as magnificent as a flowering cherry or many others, but this really is a reliable, simple, versatile picture plant — street tree, background plant or featured spring perfomer. It blooms early. Purplish foliage produces a good screen throughout the growing season.

Botanical name: Prunus cerasifera ‘Pissardii’
Common names: Purple-leaf plum, flowering plum
USDA zones: 5 to 9
Water necessity: Moderate
Light requirement: Full sun
Mature size: Up to 25 feet tall and wide, or larger
Growing tips: Make sure the soil doesn’t become too moist. Some flowering plum varieties bear little fruits that can create a mess underneath. Little pruning is necessary, and several pests are a problem.

Apricot. I am showing my California prejudice by adding it; this spring-blooming fruit tree is amazing but not so practical for most gardens. It’s fairly hardy to cold winters but produces fruit only in certain climates with sufficient winter chill, no frost in spring and long, dry, hot summers. The white to pinkish flowers in early spring have been set off radically by shadowy weathered trunks and branches. The fruit, if you are lucky enough to grow some and have it remain on the tree until fully mature, is priceless.

Botanical name: Prunus armeniaca, many types
USDA zones: 4 to 8
Water necessity: Moderate
Light requirement: Full sun
Mature size: 15 to 20 feet tall and wide
Growing tips: Keep the soil moist once the fruit is growing. Prune in late summer.

More thoughts for a stunning spring garden

See related