574a081f06063d4d12378f8aa3d00498.jpg

The way to Remove 1920's Linoleum

Linoleum is a soft, flexible floor covering that has been produced and installed starting in the 1800s. Through the 1920s, this was a very popular floor covering since it was durable, low maintenance and could be cut into different shapes and patterns for setup. The glue used during the 1920s has a inclination to get stronger over time, instead of poorer. This may signify that based on where the linoleum was installed, it could be rather hard to eliminate.

Check the Material and the Substrate

Before starting to remove old linoleum, you first need to ascertain whether or not it contains asbestos, and onto what it’s installed. Asbestos was used during the 1920s, especially to generate dark-colored linoleum. It also was used in the glue. If your linoleum is black, burgundy or another dark colour, measures 9- or 13-inches square or contains a black, tar-like glue, then do not try to remove it. Call a professional to have it analyzed for asbestos. If you decide that your linoleum doesn’t have asbestos, then pry up a corner to look at the subfloor. Linoleum may happen to be installed over concrete, a wooden subfloor or hardwood. Removal will fluctuate, based on the subfloor.

Heat Removal

If your linoleum is installed over concrete — or in some instances, hardwood — it can be removed by softening the adhesive using a heat gun or hot water. Cut the linoleum into smaller sections to make it easier to eliminate. Peel back the top layer with a floor scraper and heat the adhesive under it using a heat gun, using a towel filled with boiling hot water or use a wallpaper steamer. Once the glue softens, scrape it off with the floor scraper and continue on to the next part.

Wooden Subfloor Removal

Linoleum installed wood is quite tricky to get away because the glue deposits so extensively to the timber. If the linoleum is on a wooden subfloor, it can be more easily removed by taking out the whole subfloor along with the linoleum, then placing in a new subfloor. Cut the linoleum, using a circular saw with the blade set to 1/8-inch deeper than the width of the subfloor. Ensure to decrease the linoleum and subfloor into sections, then simply remove each part. A new subfloor can be installed on the floor joists that can handle whatever new material you intend to install.

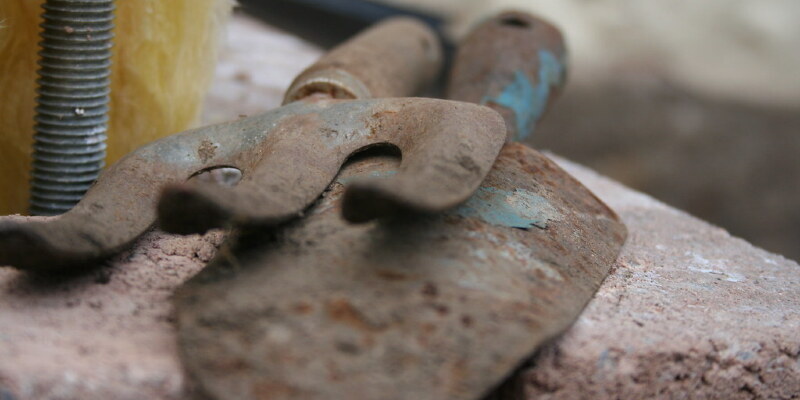
Use a Linoleum Floor Stripper

Floor strippers are electric tools that get beneath the flooring they are intended to eliminate and vibrate or agitate until the flooring comes up. A few floor strippers are intended only for linoleum. They can be handheld or big enough to ride on, and several can be leased from home improvement centres. Scrape up one or two rows of linoleum using the floor scraper and heat gun to make a beginning point for your stripper. Get the stripper beneath the linoleum permit it to pull up the linoleum and glue. Any remaining glue can be heated and scraped away, using a floor scraper.

Safe Removal

If you’re unsure if your linoleum tiles contain asbestos and you cannot get a professional test to tell for certain, you need to take more precautions when removing them. The asbestos fibers become a problem when they’re airborne; not cut, mud or break the tiles or the glue when removing them. This could release the asbestos dust to the atmosphere. Verify the room has great ventilation when working, and put on a dust mask as you operate. Use hot water to loosen the shingles and soften any dust dust to keep it from escaping into the atmosphere. Gently pry up and remove the tiles one at a time, disposing of them in plastic bags with high tensile strength to maintain the bags from ripping. Contact your city to get information on disposing of the shingles as they can be considered hazardous waste.

See related

d66a85884a0afec6faad2cc6e6d7bc5b.jpg

The way to Pour Curved Concrete Cement Edging Around a Grass region

A variety of different materials can be installed at a landscape to function as an edging to separate sections of the lawn and include traffic, mulch, creeping turf or ground covers within their designated areas. Poured concrete edging produces a particularly neat and smooth border. It lasts longer within an appealing state than most other edging materials when correctly installed.

Dig a trench at which you will install the poured concrete edging. Create a trench 3 inches wider than the intended edging so the trench is at least 8 inches wide. Dig a trench deep enough to accommodate concrete edging at least 4 inches deep; depth will be different depending on how much above the soil surface you want the edging to extend.

Push a 12-inch wooden stake into the ground each 18 inches along the inside edges of the trench. Install extra stakes where the trench makes any particularly tight curves.

Cut 1/4-inch from 4-inch strips of hardwood or plywood into sections, as required, to match the planned edging. Bend and fasten the 4-inch broad strips of hardboard or plywood to the inside of the stakes using 1-inch timber screws. Soaking plywood in water for a couple hours can improve its versatility and make it much easier to fit to tight curves.

Decide on a flat on top of the form in a variety of sections to be sure the top of the form is flat. Make any alterations required by pounding the stakes slightly.

Cut parts of 1-by-1-inch wood or spare stakes to the width of this edging and match them snugly into the base of the form every 3 feet as spacers.

Apply form lubricant or used motor oil to the inside of the hardboard or plywood types to make after removal easier.

Mix the concrete according to manufacturer directions. Add concrete coloring and some other additives, as desirable.

Pour the concrete into the ready forms and use a trowel to distribute it evenly, pack it in nicely and also make it even with the top of the form.

Smooth the surface of the concrete with a wood float after the bleed water that looks on the concrete surface begins to disappear.

Cut 1-inch deep control joints that extend across the width of this edging around every foot, using the border of a margin trowel or similar tool.

Run an edging tool over the concrete or stamp it, as desirable, to create curved borders or wiggle patterns.

Seal the concrete edging using a concrete sealer after the curing period as recommended by the concrete manufacturer.

Remove the mold three to five times after sealing or as directed by the sealer manufacturer.

See related

ef04fc6befc270241e7a265ff937eaac.jpg

When to Plant a Cool-Weather Vegetable Garden

Cool-weather vegetable crops are a gardener’s best friend, although a lot of individuals are still unfamiliar with them. Many of the vegetables grown in summer gardens really perform better in cooler weather once the average temperature is 50 to 70 degrees Fahrenheit; mild frost can actually enhance a few cool-season crops.

Cool-Season Vegetables

Although most men and women have a tendency to plant their vegetable gardens within mid-spring to get a summer crop, some frequent salad vegetables are quickly destroyed by the warmth of the summer. Cool-weather vegetables contain salad greens, peas and root vegetables. Lettuces, radishes, carrots, rutabaga, beets, turnips and cabbages work well for your cool-weather vegetable garden.

Fall and Winter Harvest

For many, cool-season vegetable gardens are intended for a fall or winter crop. Gentle young seeds or plants are planted in the garden during mid- and late summer and are ready for harvest in fall. When planting cool-season crops during the hottest part of the summer, protect the crops with floating row covers to colour them and shield them from the warmth.

Spring Harvest

Planting cool-season vegetables in late winter will allow you to have a bountiful harvest in mid-spring, right around the time you’d plant a normal vegetable garden. Plant your vegetable transplants or seeds so they’ll reach maturity before daytime highs hit around 60 F. Spring harvest presents a single obstacle: The soil temperature still has to be warm enough for germination. Due to this, you might need to start seeds indoors or use some type of insulation around the plants to keep the temperature of the ground raised marginally.

Benefits

Many of the vegetables that prefer cooler weather will grow in the warmth of summer, but badly. Lettuces, for instance, grow fine during the summer heat, but the heat also makes them bolt to seed more quickly and also the leaves turn bitter. Cooler weather also has more rainfall, fewer insects and fewer grasses.

See related

5d3c52ec6a2c36b1c9d37a59b4c72e5d.jpg

How to Boost Burpless Tasty Green #26 Cucumber Plants

For people who have gastrointestinal problems with ordinary cucumbers, the Burpless Tasty Green #26 variety can be an ideal gardening alternative. This hybrid cucumber contains thin skin, very little bitterness and was designed to reduce the probability of the veggie inducing gas. Like most of cucumber varieties, Burpless Tasty Green is a warm-weather plant and needs to be planted after the soil warms up to at least 60 degrees Fahrenheit in your lawn.

Dig the cucumber patch once the soil warms in the lawn, about three weeks after the last average frost date. The date will be different based on the part of the country in which you live. As an example, in San Francisco the last frost date is near the end of January, so start the cucumber patch at the middle of February if the weather holds.

Dig the soil in your cucumber area 12 inches deep. Mix at a 3-inch layer of compost to improve drainage. Insert an all-purpose fertilizer such as 5-10-10 according to the package directions. Create the cucumber patch up against a chain-link fence or a trellis to permit cucumber vines to climb away from damp soil.

Space the Burpless Tasty Green #26 cucumber seeds about 12 to18 inches apart. Place the seeds about 4 inches from the fence or alternative support and then cover the seeds with 1/2 inch of compost. Water the seeds thoroughly.

Spread a 2-inch layer of grass clippings or other organic mulch over the seed bed once the seeds have sprouted. This will keep moisture in the ground while shading out seeming weeds.

Side dress the cucumber crops using a high-nitrogen water-soluble fertilizer once the vines start to bloom, and again three weeks later. Do this by moving apart the mulch, sprinkling the fertilizer on the ground beside the plant stems and watering it into the ground. Replace the mulch after the water has sunk into the ground.

Water the patch often, particularly in very hot or warm weather. Keep the ground moist, but avoid massive puddles.

Decide on the Burpless Tasty Green #26 cucumbers as soon as they are ready to eat — approximately 62 days after planting. These cukes are greatest when they are approximately 8 inches long with a smooth skin. Regular picking will keep the vines creating more cucumbers.

See related

38ecfb4e6f25fd51174b7e88ada7e50c.jpg

What Are the Benefits of Wood Vs. Tile for Entry Ways?

The entrance floor material requires a decision when you are constructing or remodeling a house. It might appear to be a no-brainer to proceed with wipe-down tile, however there are excellent reasons to select hardwoodfloors Comfort, visual appeal, integrated decor and market are compelling arguments to stay with switch or — to — wood. A well-maintained hardwood floor increases the value of your property.

Slide-‘n-Slide

You are one step away from the weather inside the entrance; rainy, snowy and otherwise less-than-balmy days will all impact the floor — and whomever walks on it. Tile can be quite slippery when wet, and it’s not very forgiving when you slip either. Wood is more textured, gives shoes and feet better friction, and wood is friendlier. It’s smart to use walk-off mats at the entrance, regardless of what the surface, to eliminate the majority of the grit and dirt on shoes before it can scrape and scrape the floor. In moist weather, an indoor mat or rug collects more moisture and, if it’s secured, offers safer footing. Absorbent mats are essential for hardwood floors which get wet, although rubber backings stop the floor from “breathing” and so are not suggested. However, dry or moist, wood is not as slippery than tile, so it’s a practical choice for more stable footing.

Keeping the Flow

Many homes are floored completely in hardwood planks; the rooms, halls and staircases are hardwood and, in most cases, it all fits. An entry may open into the living room, a hallway to the remainder of the house, and the staircase to your second floor. Keeping the same flooring is logical. Hardwood on the entrance flooring flows smoothly into the rest of the decor. However, the entrance traffic, and dirt tracked in from outside, can be rough on any floor. So avoid softer woods such as bamboo or pine for flooring that can see heavy usage. Harder forests — pine, maple, hickory, cedar and cedar — minimize dings from sharp dropped items, scratches and scrapes from shoes, wheeled cases and umbrellas, plus general wear from continuous use. Deliberately distressed forests such as wire-brushed or hand-scraped finishes hide daily wear as they add a decorative element for your flooring.

Fixing the Buffer Zone

A home’s entrance is a barrier space, a portal site which funnels traffic in the rough-and-tumble world into the serene retreat of a house. Even if a transition to tranquility seems like an perfect your rambunctious crowd won’t ever attain, the entrance is a buffer which gets its share of abuse, and it’ll require routine maintenance and occasional repairs. If you design your entrance with fabulous tile, at a hand-painted Moroccan, Moorish mosaic or irregular terra-cotta pattern, replacing a cracked or chipped tile might be cluttered, expensive or difficult to match. Hardwood planks can be sanded and solved fairly easily; a single board can be replaced if the damage to it is irreparable. Wood is also easier to pull and replace entirely if you are prone to dramatically switching decor or changing the layout of the entrance and adjoining spaces.

Warm and Welcoming

Grout gets grungy and can develop mold or just become badly discolored by continuous dirt and moisture. The plan and hues of clay or ceramic tile have wrapped and degraded as the glaze or finish wears off. So, the tile floor in the entrance doesn’t “wear” magnificently over time. It will call for frequent resealing, cleaning and re-grouting. In an old house which will settle or flex at floor joints, tile can crack, as it can if a heavy object is dropped on it. Tile floors are tough, inflexible and cold. Wood is more forgiving and wears its age well. It’s easier on your legs and rear, absorbs sound rather than bouncing it around like ceramic, and is a lot warmer, even without an area rug or a hallway runner.

See related

ab10a03959492e3650c8b9c0b4343e02.jpg

Growing Seedless Grapes On My Backyard Fence

Luxurious grape vines (Vitis spp.) , which develop in U.S. Department of Agriculture plant hardiness zones 2 through 10, provide welcome summertime shade and greenery, not to mention that sweet fruit. Seedless grapes in particular provide quick snacks without the bother of seeds. Mediterranean climates are ideal for cultivating a vine or two, and a backyard fence might offer sturdy support with a few alterations. However, it’s also important that you know your lawn’s microclimates and design can make growing seedless grapes in your fence more complex.

Location and Cultivar Choice

Grape cultivars possess their particular climate preferences, so not all kinds for your own zone will work in your particular location. For instance, hotter, sunnier inland regions of Mediterranean climates that don’t find cool and misty during the night in the summertime are suitable for growing “Thompson Seedless” (Vitis vinifera “Thompson Seedless,” USDA zones 7 through 9), the classic green seedless table grape. Coastal places that have cooler nights in summer would not be suitable for “Thompson Seedless,” however they could be suitable for varieties like “Black Monukka” (Vitis vinifera “Black Monukka,” USDA zones 8 through 10). There are grapes available for both colder and warmer regions, which means you should be able to find one that you can develop. However, you must focus on the cultivar’s own needs and not simply the zone amounts.

Microclimates and Cultivar Choice

What direction your fence faces and what it’s made from can help determine the climate right from that place, no matter your zone. For instance, if you are living in a hotter, warmer part of the region, but your solid hardwood fence is on the west side of your lawn, grapes on the side of the fence within your lawn won’t become much sunlight. In case your neighbor to the west contains tall trees that block out the sunlight after midday, that will decrease sunlight exposure and the day temperatures. That place in your lawn could end up using a microclimate that is slightly cooler than is suitable for a cultivar like “Thompson Seedless,” and it just may not get enough sunlight for any grape cultivar. Spend some time observing the place where the fence will be to make sure that sunlight and temperature demands will be fulfilled. Search for tall trees in neighbors’ yards that may block the sunlight when they have all of their leaves in the summertime, too.

They Want Their Space

Seedless grapes must be planted at least 75 feet from seeded grape types. Seedless varieties undergo a procedure called stenospermocarpy, where the seeds that develop within the fruit remain little and unviable. The vines still have flowers and require pollination to set fruit, however. That means that if you’ve got a seeded variety nearby, you could acquire small seeds forming on your supposedly seedless grapes throughout that season if the seeded variety’s pollen ends upon the seedless variety’s flowers. Organic Gardening notes that most grape varieties have been self-pollinating, but that’s not going to avoid a flower cluster from using pollen from other plants if that pollen lands.

Air Flow

You can buy disease-resistant grape cultivars, but “resistant” does not mean immune. Organic Gardening warns that good ventilation and air circulation round the plant is essential if you would like to decrease the chances of the vine growing diseases. Set the vines toward the middle of the fence, as opposed to close the corners. Put in trellis support wires that maintain the vines a short distance before the fence, instead of on the fence itself. Put the initial wire 1 1/2 feet above the ground, and then place extra wires above that with 1 feet in between each wire.

See related

46a7d5749b431d01b151c4f1e824e901.jpg

Should I Pull Up Bluebonnets to Save the Seeds?

Annual arroyo lupine (Lupinus succulentus) and silver bush lupine (Lupinus albifrons) are two species of lupine, also referred to as bluebonnets, that burst their seed pods in spring to self-sow for another season. If you would like to save seeds from these indigenous plants, or some other bluebonnet species, then you need to pull the plants up when the seeds are ripe and just prior to the pods burst. To ensure you don’t miss this narrow window, pull the bluebonnets when the seed pods start to turn yellow.

Select Healthy Acids

Seed pods form on the terminal ends of bluebonnet flowers. To ensure the seeds you harvest grow into plants that are vigorous, pull up just strong, healthy plants in the flowerbeds to dry. Bluebonnets are prepared to pull when the seed pods start to yellow but still haven’t turned brown. This occurs about a couple of weeks after the flower petals have dropped. You may wait for the pods to turn brown but you run the danger of the pods bursting in the garden and spreading their seeds on the ground. To decrease seed pod drying time, pull the bluebonnets at one time of day when the plants are dry. Be sure you’ve got permission to harvest seeds and plants from the land on which the bluebonnets are growing.

Hang Plants, Collect Seed

After pulling the bluebonnet plants, hang them, using the seed pods facing down, to dry in a well-ventilated room. Spread newspaper below the plants to collect the seeds, or even better, place an open cardboard box beneath the plants. Hang the plants low enough the forks are included in the box, without touching the box’s bottom. When the dry bluebonnet seeds pods burst open, then they eject their seeds quite a distance. The box keeps them contained.

Expand the Seeds to Dry

When the seed pods have ejected their seeds, spread them in a thin layer on newspaper to dry for about one week. Dried seeds are less likely to become moldy. For seed pods that did not open on their own, pull them open and dig out the seeds. Dispose of the plants in the compost pile. Bluebonnet roots are full of sulfur and will help enrich the compost. Dry the seeds indoors in a room with good air circulation. Indoor drying permits you to control the room temperature, as well as the humidity level is usually lower than drying seeds in a garage.

Store the Seeds

When the seeds are dry, store them in glass jars using tight-fitting lids. Place them in a cool, dry place away from light. Humidity and humidity may make the seeds to sprout and thus don’t store seeds in a bright kitchen or in a moist bathroom. Label each jar using the seed type and the date the seeds were picked. Silver bush lupine (Lupinus albifrons) seeds, which grow as perennials in U. S. Department of Agriculture plant hardiness zones 8 through 10, in addition to other types of bluebonnets, should stay viable for two to three decades.

See related

d4e86fade64278514bf6dbbb4404022f.jpg

What type of Foam Can I Use to Make an Upholstered Headboard?

You do not require a good deal of time or materials to create an upholstered headboard of stretched and stapled fabric above a sheet of medium-density fiberboard or plywood cut to the desired contour. You require decorative upholstery nails or buttons, a staple gun, the wood foundation, upholstery foam, material and prayer. If necessary, you can even use a memory-foam mattress topper in place of upholstery foam, because these often cost less than upholstery foam. Even the most novice crafter can complete this project in about half a day or less.

Upholstery Foam

You require upholstery foam at least two inches thick or heavier cut to the contour of this wooden board or MDF. A serrated knife easily slices through the foam to size it to the form of the wood. Cover the foam with the polyester batting stapled to the wrong side of the wood to keep the foam in place. If you’re planning to set buttons on a tufted headboard, then first create the layout on the wood and then drill holes through it to fasten the buttons through the foam, batting and upholstery stuff.

Memory Foam Topper

A 2- to 3-inch polyurethane foam mattress topper, or even a 1 1/2-inch-thick topper that you double, offers a cheaper option than purchased upholstery foam, in case it’s possible to get the upholstery foam on the market. With a ridged bed topper, only face the ridges toward the wood base so that its flat side faces forwards on the headboard. The thicker the better, particularly in the event that you want to recline against the headboard when studying or watching TV in bed.

See related

51c9e519f2338b2eb210f54b60166af9.jpg

What Color Wall Paint Can Go With Brown Tile Bathroom Wall and a Peach?

When a toilet wall features tiles, wall color options rely on underlying hue, or the colour and undertone, of the tile. A range of colours and neutrals harmonize than when tile is orange-brown if brown tile includes a red undertone such as mocha. It also changes in colour and peach sometimes has a more yellowe cast, although peach often is orange. It’s likely to pair color-wheel opposites, or suits, with orange and peach, but this works nicely with hues that are grayed.

Dark Red-Brown and Cool Peach

Wall-color options include taupe, pale peach and almond — all of which have undertones that connect together with pinkish peach if the toilet tiles include a dark red-brown such as mocha. To determine if peach tile and your brown has warmer undertones or cooler, borrow samples. Cabinetry in dark, red espresso echoes dark tiles, as do fittings in bronze that is red; to get a hint of complementary color, accents in teal, sea green, olive or spring green organize.

Light Red-Brown and Peach

In colors such as light mocha tile includes a taupe-like look when paired with vinyl from peach. There is A wall color light undertones. Contrast is provided by walls in light warm grey as do fittings in pewter. Almond is a wall paint with a pinkish undertone, and a connection is made by walls that are pinkish-almond with the undertones in light-mocha and peach wall tiles. Fixtures in rose gold add to the pinkish tones.

Dark Orange-Brown and Warm Peach

Adjacent peach tiles look as do walls from fans or whites warmer adobe walls harmonize when dark-brown tiles possess an undertone. As does accent color in bright apricot or almond, persimmon, tomato red, fixtures in gold contribute to the interplay of tones. Cream paint goes together with tiles from warmer colors of brown and peach, and if cream components are included, it’s simpler to integrate, such as dressing table base or a cream shower curtain. Fixtures in yellow gold include cohesion.

Light Orange-Brown and Peach

For bathrooms with wall tiles in peach and light orange-brown, a complementary is provided by walls in slate. The hues are tied together when other decor elements feature gray and peach, such as a slate-gray vanity base with a peach vanity top or a shower curtain in slate gray and peach. Another is provided by walls in blossom green and in this scenario, fittings in greenish brushed nickel blend with all the walls, while a dressing table in peach echoes the peach wall tiles’ pinkish-orange tones.

See related