19074bb02b5892486d851e1ad7fc27d2.jpg

Value-Added Real Estate Strategies

In a swiftly appreciating market all you’ve got to do to make money in real estate is purchase the property. In a depreciating marketplace all you can do is hunker down until the market turns. The good thing is that historic appreciation rates are positive–in excess of eight per cent over long spans of time–so the market will almost certainly turn sooner or later. In a standard — marginally appreciating–or apartment market, the perfect way to make money in real estate would be to add value to the house.

Cosmetic Improvements

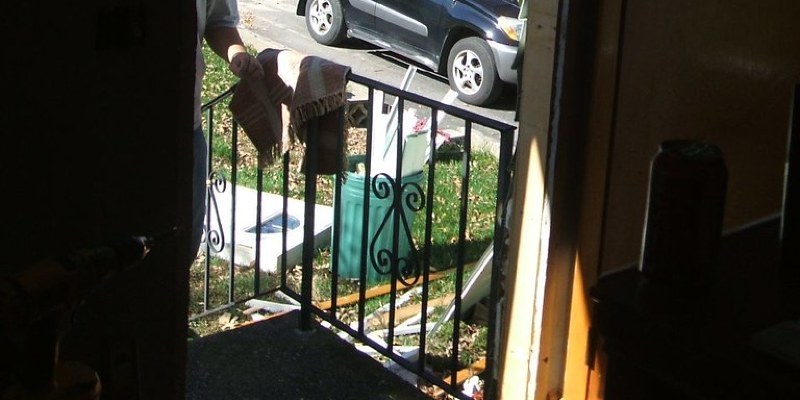
A decorative fixer is a building that only needs improvements that will enhance its appearance instead of its systems–like heating or plumbing–or structure. Cosmetic improvements are the simplest and cheapest repairs and remodeling projects you can undertake. And they often bring the best return on investment. Replacing a front door may bring a 130-percent yield on investment, based on”Remodeling” Magazine. Exterior painting and landscaping may turn the worst-looking home on the block to the best in a single moment. Curb appeal may not sell the home, but it is going to get buyers in the doorway. In the inside, a comprehensive cleanup requiring nothing more than elbow grease not only creates a difference in sales price, it helps sell the home more quickly. Replacing carpet and linoleum, light fixtures and door components are inexpensive improvements that add value to the home.

Change of Use and Addition of Units

Zoning is often thought of as an impediment to development, but actually making use of zoning regulations may add a great deal of value to your properties. If you are considering buying a two-unit building in an RH-3 zoning district, then you may be able to bring a third unit on the house. You may purchase a cheap home on a commercial lot and find it would be worth more if you demolished the building and sold the whole lot to a franchise or chain shop. Think Starbucks. Is it a very large lot? Believe Walgreens. You may be able to alter the use before making any structural changes. Depending on the condition subdivision code and local land use regulations, you may be able to turn a apartment building into condos through the subdivision mapping process. In areas like San Francisco the regulations are restrictive, however, the payoffs are large. You can turn into a two-unit apartment building into condos there if the two units are owner-occupied.

Additions inside the Building Envelope

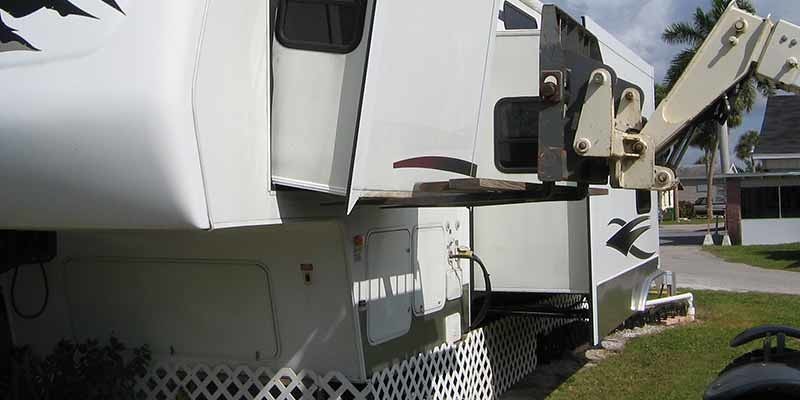
If it is possible to locate a building with a large, undeveloped attic or basement, you have the potential of adding square footage inside the building envelope–a good deal simpler and cheaper than building an addition. Headroom is occasionally a problem in buildings like these, but excavating a few feet in the cellar and including a dormer window in the loft aren’t insurmountable obstacles.

See related

af907b5323ca16a8885fabe8d4243690.jpg

How Do I Receive a Refinance?

Refinancing your second mortgage could help you secure a lower monthly payment. A home equity line of credit and a home equity loan are just two options that homeowners have for second mortgage loans. A home equity line of credit, or HELOC, is similar to a credit card because your balance varies based on the usage of your credit . The proceeds from a house equity loan are disbursed in a lump sum and won’t allow you to draw additional money. Both a HELOC plus a home equity loan may be used to fund large projects such as home improvements, wedding expenses, college expenses or debt consolidation. Either loan could be secured as a second mortgage lien.

Produce a written plan that outlines your goals for refinancing. Your plan must include things you want to combine, such as credit cards, student loans along with your existing second mortgage. If your goal is to refinance and receive a lower rate of interest, your plan can indicate several ways you could allocate your monthly savings.

Review a current statement from your second mortgage lender, and call the customer service department or go to your lender’s site. Inform your second mortgage lender you want to refinance your loan. Offer your lender permission to review your credit and loan history.

Consult different creditors to ask about second mortgage loans. Review their information about second mortgage product offerings. You may qualify for a home equity loan or a home equity line of credit. Complete the requested information to compare prices.

Opt for the lender that provides the best conditions for refinancing your mortgage. Forward your loan records to the mortgage expert that will allow you to complete your refinance.

See related

c9e3fb2ca2831e850e3185666497847b.jpg

Troubleshooting Leaking Water at the Base of a KitchenAid Dishwasher

Dishwashers may be powerful, however you can occasionally encounter problems that prevent yours from operating correctly. Though, it puts your entire kitchen, when it’s leaking from the base. You can troubleshoot front flow problems yourself, preventing serious harm and producing dishes that are clean whenever possible.

Poor Setup

If your dishwasher isn’t installed water can leak from the front of the appliance. The dishwasher has to be flat, or water can burst during the cycle to the front of the appliance. Decide on against the front of the bathtub to ensure that it’s flat from side to side’s opening. If it isn’t, examine the floor under the dishwasher. If the floor in the front of the dishwasher’s opening isn’t level with the ground in the trunk, use shims to ensure that the appliance is level. The dishwasher has adjustable leveler legs, therefore if the ground is flat but the appliance is irregular, turn the legs till they’re exactly the exact same height. For the front legs, you might need to use a socket or an adjustable wrench to turn the legs. Make sure the legs all sit firmly on the ground.

Drain Issues

If it is unable to drain properly your dishwasher may flow. For dishwashers connected to a waste disposal, guarantee that the knockout plug was removed from the disposer inlet so water is able to drain from the tub. Look carefully at the drain hose pinched regions or clogs as well, and make corrections as required. Examine for meals obstacles in the drain and disposer device that might prevent water from flowing out of the bathtub.

Incorrect Detergent

If detergent is wrongly applied, your dishwasher will leak from the front of the appliance. Using too much detergent can lead to excess suds, which might cause the dishwasher. Choose a detergent designed for use and carefully gauge the detergent out according to the instructions on the label. You need less detergent, so adjust accordingly if you reside in an area with soft water. Switch to another detergent if excess continue to happen with these alterations.

Gasket Issues

If the seal around your dishwasher’s door isn’t secure, water can flow during surgery. With time, tear and wear can affect the gasket that forms the tight seal around the door of the dishwasher. Look carefully at the gasket and clean it of detergent residue or any food debris that might affect the seal. Check for damage such as cracks, tears or shrinkage which could contribute to a flow. If the gasket is damaged, replace it water can not escape and so the door closes tightly again.

See related

dbcba75c6802227f7f4a44783b45765c.jpg

Materials for the Repair of a Rubber Roof

The fantastic news is the EPDM (ethylene propylene diene terpolymer) or single-ply plastic roof is one of the most environmentally friendly and environmentally accountable roofing materials used today. The good thing is that your plastic roof is presently torn or leaking. No worries! With a bit of research, it is possible to find some materials to fix in addition to greatly extend the life of your rubber roof.

EPDM or Rubber Roofs

Annually, EPDM represent roughly 35% of the entire roofing marketplace and or plastic roofs account for more than a billion square feet of roof coverings in the United States. As a celebrity that is long-term, it has a high emissivity which allows heat energy to reflect back in the atmosphere rather than being absorbed into the house. Because of this, a home”melts” faster at night. Rubber roofs comprise carbon black in their compositions to block UV radiation; with white membrane, titanium dioxide can be used instead. The newer energy efficiency white EPDM is favored because of its capacity to reflect sunlight in warm climates. Most important, your roof is 100 percent recyclable.

Materials for a sterile

Rubber roofs have been put in one piece with few seams. Some are cut to resemble shingles. If you have seams or shingles, then the flow is most probably caused by standing water or water which stays on your roof after it rains. Another problem can be the adhesive — used to maintain the seams which could disintegrate and cause the membrane to separate over time. Seam tape and sealant (for irregular regions ) are the best and most popular repair stuff. After applying primer with a utility paint brush, then follow the directions.

Materials for a Tear

Your roofing has torn because of a decreasing or puncture object like a satellite dish. However, fixing the area is often as simple as minding a bicycle tire with a prepackaged peel-and-stick fix kit. For stains larger than 5 inches, you’ll need a sheet of EPDM membrane and fabric shears to cut the material. In addition, you’ll need seam primer and a clean pad to clean the surface. Apply multipurpose adhesive to the patch and the area surrounding the pit with a nap paint roller. After drying, put the patch on the hole, roll the edge of the patch with a seam roller, and seal the edges.

Materials for Flashing

Failed flashing can rust, crack or different, causing leaks. You can do a temporary fix by caulking the area or substituting the flashing with a new or similar material. Both metallic and aluminum are available in preformed configurations. Aside from the fundamental tools, such as a hammer to remove the stuff, you will also need straight-cutting tin snips to cut the material that is new, a measuring tape, and a masonry bit and grinder. If replacement is needed by areas, it is best to hire a roofing contractor.

See related

3f8d86edb77cfa2ba1f9bd5e48900210.jpg

How to Remodel a Kitchen

Granite is a hard crystalline rock that gets its colour and personality from feldspar, mica and quartz. Its attractiveness, durability and effortless care make it an excellent material. Although granite is a rock, granite tile is a budget-friendly choice to granite slab. It is also more versatile than slab. Granite tile is appropriate for kitchen floors and backsplashes as it is for countertops.

The Design Process

The very first step in the process is currently designing your new kitchen. Your layout choices serve as the base on which the success of your project depends. Choose a design that’s compatible with the architectural design of your home. Start with the cabinets, because they’re the strongest element of a kitchen. Pick on your appliances . Plan counters granite the floors and backsplash.

Design Considerations

Maintain some concerns, although granite tiles may create effects at a kitchen remodel. Variations in grain and color are interesting if you use tile, however mismatched 12-inch tile may make for a look that is poorly executed. The exact same is true for the backsplash. An additional concern with the backsplash is where it ought to begin and end. The backsplash fills the spaces between appliances and your counters and your upper cabinets. Tiling walls is overkill. Because granite tile is a bold material, use it. Alternatively, use it . Tile your entire flooring with granitecountertop, but combine granite tile with different materials in your own backsplash, or tile a center island but not countertops.

Choosing Granite Tile

Granite comes in neutral colours such as black, brown, beige and white as well as blues, reds and greens. The grain, or crystal pattern, can be dense and tight or loose and striking. Finishes are available, the most common of which are polished the two absence polished granitefinish. Choose a combination of grain colour and finish that matches your kitchen layout style. By way of instance tile works in spaces that are modern, while more demanding textures and finishes work for an old world look. Tile colors ought to pick up colour from elsewhere in the area. Tailor your choice of grain you’re using. If you’re using a bold pattern elsewhere, for example, stick with a tight grain in your tile. In case surfaces are strong, it is safe to opt for a vinyl grain that is bolder.

Granite Tile Setup

Granite tile demands a stable substrate. Plywood covered with cement backer board works on surfaces such as floors and countertops. You can install tile to your walls that are backsplash . Use thinset to stick tiles. Unlike ceramic tilewhich you space granite tile edges are butted by you together. Grout any spaces to be filled by the joints with a grout that matches the tile colour to produce the joints noticeable. Seal your grout against discoloration, to protect it. Seal the tiles if they’ll be exposed to substances that might stain or into standing water.

See related

9a459a93bb8d789c72f6985ea8aa0405.jpg

How Can I Install Vinyl Siding Around an Octagonal Shaped Window?

Vinyl siding provides the outside of a house and a decorative insulating barrier. Pieces of siding known as J-channels frame them, when you install windows with vinyl siding. Vinyl siding’s pieces match within these channels for a seamless look. Instead of collecting on the window sill, siding installs round windows, like octagonal windows , to block moisture and also assist water run down the side of the house.

Cut bits of metal are equal in length and 9 inches broad to the faces of the octagonal window plus 9 inches, with tin snips. When it’s installed, the metal will overlap.

Run a bead of metal flashing sealant along the center line of the nail flange or nail fin of the window and over the nails and nail slots of the flange.

Press the metal flashing with the top border of the cozy from the outer edges of the window frame into the sealant on the bottom of the window flange. Overlap the bottom metal as you press on the next metal flashing piece into the sealant on the side of the octagonal window flange, flashing piece. Do exactly the same with the piece that is left. Continue overlapping the edges of the metal flashing as you left top faces of the octagonal window and put in it. Position the metal flashing at the top border of the window so that it overlaps the right and left edges’ flashing ends.

Use short #8 stainless steel screws to attach the flange or fin using an electrical screwdriver.

Run a bead of sealant on the screws on the top piece of metal flashing. Install a drip cap or stiff head flashing into the top border of the window that is octagonal. Position the drip cap so that it covers the two bits of flashing to the right and left sides of the window. Use tin snips to cut a notch out of each end of the head flashing to allow you to insert on the top of the J-channel.

Cut bits of J-channel to match the sides of the octagonal window with tin snips. Cut 1-inch notches on each end of the J-channel to make a tab. Nail the J-channel into the window flange area. Bend the tab down on the first parcel of J-channel to make a drip edge at every window corner. The drip edge protects the sides of a house also directs rain water down the faces of the window.

Use tin snips to cut a piece of J-channel that is two inches more than the top of the window’s width. Cut notches of the J-channel on each end. Cut a tab out of the side of every J-channel and bend down it.

Nail a strip of utility trim cut over the metal flashing stuck to the window’s nail flange, right underneath the window , to size. Nail the bits of J-channel into the window’s faces, finish with the surface of the window and beginning with all the sides and overlapping every J-channel’s border by 1 inch. Bend on the tabs so that they protect the top border of utility or the J-channel trim as you put in them. This consists of the rain trickle, which forces water.

Cut the vinyl siding that is flat to match around the window using a utility knife or tin snips. Create a raised dimple on the top of vinyl siding with a snap lock punch. Create a punch every 6 inches along the top border to fit into the slots on the utility strip.

Slide the vinyl siding into the upholstery trimming and snap it in place. Continue adding siding round the window. 1 inch is ended by the panel. Leave clearance between also the J-channels on top and the sides of the windows along with the conclusion of every vinyl panel. Twist them into position, and attach them. Use a hammer and leave distance between the vinyl panel and the nail head to permit for expansion. Vinyl siding expands in heat and sunlight and contracts in cold and during the nighttime.

See related

6e180e98f3f208369aa88cc71b11f19e.jpg

How to Install a Metal Roof on a Gable

There are various kinds of metal roofing and all can be set up on a properly styled gable roof, with a centre summit and slopes on two sides. The three common styles of metal roofing are corrugated, with alternating ridges and valleys; standing seam, with broad horizontal sections and vertical seams, and metal tiles, which may resemble slate or alternative materials. Corrugated and standing seams are installed in large panels, tiles as independent tiles. All are steel or aluminum.

Frame the fundamental gable roof with trusses to any pitch that is acceptable. Install metal roofing just with a pitch of 4/12, which rises 4 inches per foot, or steeper; it isn’t suited to horizontal or low-slope roofs and functions best on steeper pitches of 6/12 or longer. Sheath the roof with oriented strand board and roof paper and insulate it like you would any roof.

Install Concrete panels with solid steel or aluminum screws, based upon the metal roof, with vinyl washer heads. Run corrugations down the roof. Start at one bottom edge, fasten a plank aligned with the side and bottom edges of the sheathing and fix it with about 20 screws per panel. Overlap panels horizontally by one ridge and a single valley and vertically by at least 6 inches.

Fasten standing seam panels typically together with clips, which can be secured to the framing and also maintain the panels; special clip kinds and setups vary with manufacturers. Twist panels together at seams, the border of a single fitting into a slot on another panel, similar to tongue and groove timber. Have panels pre-cut to size usually, as it can be difficult to cut back standing seam panels onto a job site.

Lay metal tiles similar to you would wood or composition shingles or replacements. Start with a row of tiles in the bottom of a single edge of the roof. Fasten the shirts with nails or screwsfollow manufacturer’s directions for specifics as styles vary. Start a second row with a half shingle, so the seams do not align, and also work across and up the roof installing tiles, with ends and seams overlapped.

Place metal edge flashing down on almost any style of metal roof, but fit the flashing to the kind of roof; corrugated and tile, for instance, use very different kinds. Install flashing any chimneys, vent pipes or other openings, again matching the flashing to the roof material. Finish a gable peak on any metal roof with special peak caps, that overlap the metal roof on both sides.

See related

88b27ea931d280a1635965f50e041576.jpg

How Do I Add a Wood Border into a Room?

A wood edge — referred to as a seat rail by interior designers — is one of stacked wood, or numerous pieces, mounted onto a wall 30 to 36 inches from the ground. The seat rail was created to protect wall surfaces from harm but serves the dual-function of supplying decorative interest. Dividing the wall into two regions allows you to use a composite of wall-covering colours or textures to add impact and dimension. This is an easy and affordable do-it-yourself endeavor for the homeowner or home seller who wants to stage his home for sale.

Mark a line around the whole room where the top of the seat rail will sit, using your flat along with also a chalk line or painter’s tape for marking.

Mark where wall studs are located together with your painter’s tape.

Mark miter cuts the seat rail bits that will satisfy an outer corner. For pieces that join in a corner, then set the initial piece flush into the wall and then cut on a cropped joint in the second piece, which allows you to butt the two bits up against each other.

Twist second and third layers of bits, if appropriate, when making a multilevel seat rail configuration using multiple-width pieces. Interior design and building professionals call this type of built-up assembly.

Cut the miter marks created in Step 3 using your saw. Examine the item for a proper match before adhering it to the wall using glue and nails.

Apply glue to some squared-off piece of seat rail wood and butt it against the door or window frame to begin the installation. Drive a nail at each end and at the middle to guarantee the wood bits.

Repeat, butting another wood piece against the conclusion of the previous piece.

Use finishing nails as required to finish and secure chair rail bits.

See related

6364018189a8866531c829ff3315e617.jpg

Basement Insulating Tips

Providing good insulation for your cellar can help prevent mold and awful smells, and cut down on your heating costs. Consider insulating material before you choose what colour to paint the walls or go searching to get a billiards table to the new games room. Converting your cellar to habitable space will increase the value of your home, but it will not be much use if nobody can stand being at the cellar after your big remodeling project.

Energy Audits

Perform an energy audit on your own cellar. These audits assess the vital issues with your cellar’s insulation. Even though these audits can be costly, they are worthwhile. Based on California’s Energy Commission, energy audits resolve occupant comfort issues and reduce your center’s maintenance expenses. Auditors use high-tech methods like infrared cameras and blower door tests to spot where your house’s insulation is failing.

Seal Air Leaks

Prevent drafts in your cellar by sealing cracks using spray foam. According to”Fine Homebuilding,” most air leaks happen between the concrete walls of their base and wooden joints and connections on your sub floor construction. This wastes energy and causes a lot of those moisture issues standard of basements.

Prevent Plastic Vapor Barriers

Plastic vapor barriers are often used to offer an extra layer of insulating material and prevent water ingress. If insulating a basement wall they are not a fantastic idea. Avoid using plastic vapor barriers. They will trap moisture and encourage the development of mould and mildew on your basement walls.

Weatherstrip Doors and Windows

A very simple but efficient procedure to improver your cellar’s insulation would be to install weatherstripping on your cellar doors and windows. The U.S. Department of Energy suggests the use of metal or vinyl weatherstripping in houses to seal doors and windows to decrease the energy cost of your home. Metal and vinyl weatherstripping are equally affordable and durable materials ideal for insulation. Prevent open-cell foams and felt. They are cheap, but also ugly and inefficient at blocking drafts.

See related

9a914dd4d511afecdf4ad0bda56e29f2.jpg

Views and A Hillside Home Commands Care

Fayetteville is a college town (the University of Arkansas) in northwest Arkansas that benefits from the beautiful landscape of the Ozarks. Architects Tim de Noble and Time Maddox of deMx Architecture find inspiration in the natural context and indigenous structures of the area, crafting structures within a style they call vernacular modernism. A fantastic illustration of this is that the Round Mountain House, a strikingly expressive structure that commands the north side of a hill. Throughout its asymmetrical barn-like profile, standing-seam metallic siding, breezeway, natural heating system and barn-like loft, the home references but updates the area’s historical architecture.

at a Glance
Who lives here: Empty nesters Sharon and Charles Killian
Location: Fayetteville, Arkansas
Size:
4,500 square feet; 3 bedrooms, 3 baths
That’s intriguing:
The home has a strange, almost alien form that starts to make sense as soon as you’re inside.

DeMx architecture

The home is a very long bar that is oriented east –west along the hillside. Here we are looking at the long north side, and from here the house’s construction is evident: concrete foundation, then a middle section covered in SIPs (structural insulated panels), either topped by an asymmetrical wrapper of standing-seam metallic panels.

The form and construction indicate that the home is suspended from the industrial structures of this area however is shaped as though it were reaching to the west to get viewpoints.

DeMx architecture

Looking at the south side of the home, we can get a better look at the patio which anchors the tall end of the home on the west. The one-story part in the foreground houses the bedrooms, while the asymmetrical piece in metal wraps the living areas.

Notice the horizontal strip of clerestory windows over the one-story bedroom; these bring light to the living room, something we’ll see later.

DeMx architecture

Here’s the view from the porch on the west side of the home. This is the raison d’ĂȘtre for its own form and the home.

DeMx architecture

The garage is located on the east end of the home. In between the garage and the home is a breezeway that serves as yet another outside area for the owners, the Killians. From here the house’s unique steel structure is evident — we’ll see how this allows for quite open spaces inside.

DeMx architecture

The breezeway is anchored by an outside fireplace at a stone wall that is punctuated by alcoves for displaying artifacts. The method by which the stone wraps the wall and the floor is a wonderful touch, something which provides the space cohesion.

DeMx architecture

The living room is basically one area with a loft at the end. Here we are looking from the loft to the east, from the living room below to the kitchen and dining room outside. (it is possible to find a floor plan here.) The steel beams mark the points of transition in the roof, since the form has taller and taller.

DeMx architecture

This view is looking in the same way, from the living room back to the entrance on the east. From here a few interesting things are worth pointing out: The clerestory windows mentioned earlier are obvious on the ideal side; the stone in the breezeway is picked up on the wall of the fireplace in the living room; along with the steel mounts supporting the lights over the dining room (with a movable bracket) and kitchen are a really wonderful design touch which picks up onto the structural steel subjected throughout.

DeMx architecture

This final view of the home is looking west out of the dining room table. Big windows and sliding doors catch views and provide entry to the porch outside. We can observe the stairs on the right which lead to the wraparound loft. The loft on the far west side sits directly over the porch and contains its own windows for looking at the sun setting over the hills at the distance.

The house’s vernacular inspirations may fall away inside, but the link to the landscape is always clear as an significant part life in the home.

See related