Acoustic Tile Ceilings: Quiet Design for Noisy Homes
Imagine walking into your living room after a long day. Footsteps echo, appliances hum, and voices carry from adjacent rooms. Sound bounces across hard surfaces and disrupts any sense of rest. Acoustic tile ceilings address this issue directly by absorbing excess noise and creating a calmer interior environment.
Understanding the Noise Problem
Noise affects concentration and relaxation in open floor plans. Voices travel across rooms, and surfaces such as drywall, glass, and hardwood reflect sound rather than dampen it. Residents who work from home, watch films, or assist children with schoolwork often notice the cumulative strain. Acoustic tiles reduce these reflections while preserving the visual character of the space.
How Acoustic Tile Ceilings Work
These panels are manufactured from fiberglass, mineral fiber, or acoustic foam. The porous structure traps sound waves and converts their energy into small amounts of heat. Micro-perforations on some models target high-frequency sounds, while thicker cores manage lower frequencies. Selection depends on room volume, ceiling height, and primary noise sources.
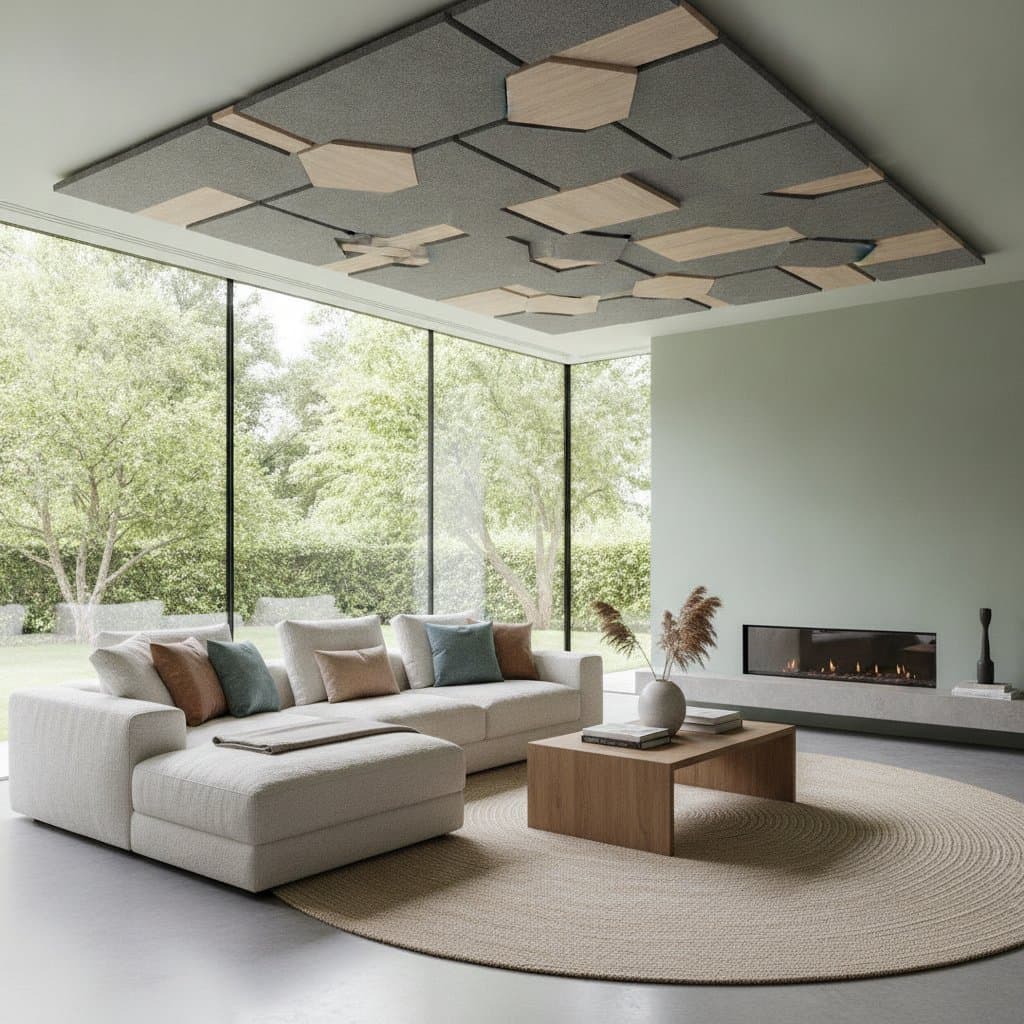
Choosing the Right Design
Acoustic tiles are produced in smooth matte surfaces, subtle embossed patterns, and wood-grain finishes. Each option balances sound control with aesthetic goals.
- Minimalist panels lie flush with the ceiling plane and distribute daylight evenly, suiting home offices and studios.
- Textured grids introduce gentle visual depth and suit living or dining areas.
- Suspended systems conceal mechanical runs and allow future access, making them practical for basements or renovations.
Step-by-Step: Planning Your Installation
- Map noise paths by noting whether sound enters from above, adjacent rooms, or exterior sources.
- Record precise ceiling dimensions to minimize material waste and maintain grid alignment.
- Inspect the substrate for moisture, remove fixtures, and confirm structural soundness.
- Decide between direct adhesive mounting for a low-profile result or a grid system for service access.
- Engage a licensed installer experienced with acoustic assemblies to verify performance and code compliance.
Budget and Practical Considerations
Material costs range from economical mineral-fiber options to premium custom finishes. Labor varies with ceiling height and access requirements yet remains within typical residential renovation ranges. Verify that chosen products carry appropriate fire and humidity ratings. In moisture-prone areas, select panels with antimicrobial treatment. Local building departments may require permits when electrical or HVAC modifications occur. Most single-room projects finish within one day; larger installations extend over several days with limited daily disruption.
Performance in Different Climates
Coastal homes benefit from panels rated for high humidity and equipped with anti-microbial coatings. Dry inland regions favor lightweight fiberglass that resists warping. Temperature swings can affect adhesives, so installers often employ mechanical clips for added security. Pairing the ceiling with insulated walls or upgraded windows further reduces external noise transmission.
Daily Advantages After Installation
Speech becomes more intelligible, background hum decreases, and music reproduction improves. Tiles require only occasional wiping with a damp cloth. Damaged units lift out of a grid system for quick replacement, and the same access supports future wiring changes.
Selecting Materials for Long-Term Results
Prioritize products tested to recognized sound-absorption standards. Review thickness, density, and edge detail before purchase. These choices determine both acoustic performance and visual integration over time.


