garden-hose-rotating-coupling-is-stuck-5999cb29bb18e.jpg

How to Rid Gas From a Oil Tank to a Lawnmower

Like your car, your lawnmower wants gas and petroleum to operate properly throughout its existence. Contrary to your car, however, the gas and oil fill holes on lawnmowers tend to be much closer together. Pouring gas into the oil fill tank is an unfortunate mistake, but none that is hard to remedy. Draining and refilling the oil tank a couple of times will get rid of the diluted oil and allow you to get mowing before your San Diego grass gets out of control.

Disconnect the spark plug in your lawn (San Diego, CA) mower and secure the lead away from the spark plug.

Wipe away any grass or other debris from your oil drain plug. Use a wet cloth and some elbow grease to remove tough, stuck-on debris. On most mowers, the oil drain plug is below the deck. Wiping debris away from the drain plug helps shield your crankcase from getting contaminated.

Cover the work area with a few layers of newspaper or cardboard to protect your work surface.

Place an oil pan under the oil drain plug to capture the diluted oil.

Remove the drain plug by turning it counterclockwise. For some mowers, you might have to use a socket wrench for this; yet others may only require your hand, along with even a screwdriver or allen wrench.

Replace the drain plug and refill your oil fill tank with clean, fresh oil. Check your owner’s manual for the right type and quantity of petroleum.

Drain the oil again and repeat the process until your oil no more smells of gasoline.

home-decor-ideas-utilizing-vinyl-and-a-cricut-5999c35d71b3a.jpg

Home Decor Ideas Utilizing Vinyl and a Cricut

With plastic film along with a Cricut Expression machine, then you can create dozens of different decorative items for your home. From large wall decals to little decorative stickers, Cricut vinyl adheres to any smooth surface and also comes in a variety of colors. Download the free Cricut Craft Room program to plan, design and edit jobs on your computer before you begin cutting.The procedure for cutting plastic decals and applying them with transfer tape is similar for any project and Cricut machine.
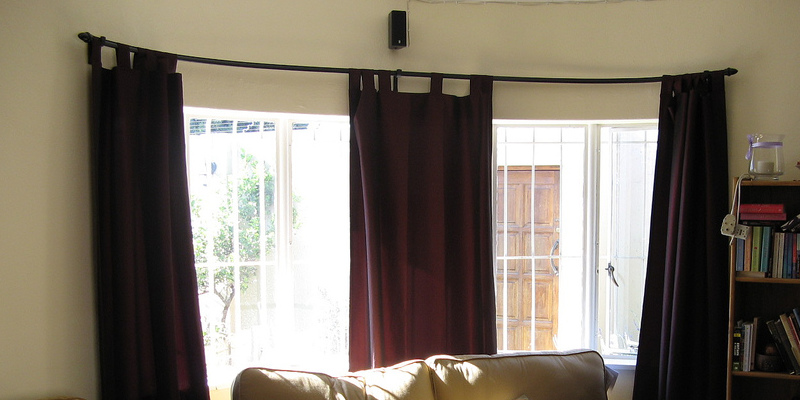
Wall Decal

Insert the Wall Decor and much more cartridge into the Cricut machine. Set the rubber overlay which came with the capsule over the computer keyboard on the machine. Pick a design and also adjust the settings to your size and amount of repeat trims, if any.

Adjust the Cricut machine settings to produce a vinyl “kiss cut .” Set the blade thickness to two and set speed and pressure to medium.

Position the plastic picture on the outer mat with the backing paper face down against the mat. Insert the mat beneath the guides and push it up snugly against the rollers. Press the load button to the machine and gently guide the mat until the machine pulls it in.

Press the cut button and wait as the machine cuts out your design. Press the unload button once the machine finishes cutting.

Peel away the areas of the vinyl which are not part of the design carefully. Utilize a weeding tool for complex designs or lettering. Leave the cut-out design on the outer mat with the financing paper intact.

Put the transfer tape above the design. Utilize your burnishing tool to firmly rub the vinyl design onto the transfer tape.

Lift the transfer tape with the attached vinyl design from the backing paper. Stop and re-burnish any part of the design that is not sticking into the transfer tape.

Put on the design by firmly pressing the plastic side of the transfer tape against the wall. Utilize the burnishing tool to remove any air bubbles and adhere the plastic into the wall’s surface, working out from the middle of the decal to move the bubbles into the borders.

Peel the transfer tape from the plastic slowly and carefully in a 45-degree angle. Start in a corner, pulling the tape back with a rocking motion from side to side. Stop and re-burnish any areas of the design still sticking to the transfer tape.

Coffee Table Decals

Utilize Cricut Craft Room to plan the size and number of shapes you want to cover your own table, according to it’s width and length.

Insert the Font and Basic Shapes cartridge into the Cricut machine. Put the accompanying rubber overlay above the computer keyboard. Pick the hexagon design and choose the size and amount of duplicate cuts you desire.

Repeat the Steps 2 through 7 for loading the machine, cutting out the layouts and separating them.

Put the transfer tape plastic side down on the table. Center the initial hexagon shape at the top left hand corner of the table and press down firmly. Utilize the burnishing tool to smooth and adhere each shape to the surface, beginning in the middle of the sheet and also working out to every edge.

Remove the transfer tape just as completed in Step 9. Use the grid on following sheets of transfer tape and vinyl hexagons to keep your contours spaced evenly.

Etched Glass Container

Insert the Small Talk Frames and Labels server to the Cricut machine. Put the worldwide overlay on your keyboard. Select the lemon image and the amount of duplicate cuts you require, dependent on how many containers you’ve got.

Complete the steps to load the machine, then make the cutouts and independent the decal. Weed or remove the areas of the design which will be etched onto the glass, such as the tear drop shaped sections and the U-shaped rind.

Press the transfer tape firmly against the glass, vinyl side down. Burnish the plastic pieces and carefully remove the tape, then pulling it away in a 45 degree angle.

Put on your gloves. Put on the etching cream into the tear-drop shaped sections and the U-shaped rind. Use the paintbrush to apply a thick layer for lotion, making sure not to leave brush marks.

Permit the lotion to remain on the glass to get 5 to 10 minutes or the recommended time according to the package directions. Rinse the glass under running water to remove the lotion. Remove the rest of the plastic pieces. Use glass cleaner to remove any leftover residue.

how-to-correct-a-primer-chamber-for-a-stihl-fs-56-rc-e-string-trimmer-5999669b4d591.jpg

How to correct a Primer Chamber for a Stihl FS 56 RC-E String Trimmer

When it comes to beginning a Stihl FS 56 RC-E string trimmer from a cold condition, it’s vital that the primer bulb functions efficiently to dump fuel to the carburetor. If the primer bulb malfunctions, then it is going to be not able to pull enough fuel through the fuel lines from the fuel tank to begin the engine. Fortunately, replacing the trimmer’s primer bulb will fix the matter and receive your Stihl string trimmer back in operating trim.

Disconnect the spark plug wire from the spark plug to prevent accidental starts. Always make sure that there is no electricity to the device before taking it apart for maintenance or repairs.

Remove the screw that holds the air filter cover in place. Pop the air filter cover off the machine and remove the air filter to access the primer bulb assembly.

Remove the mounting screws that hold the carburetor in place. Eliminate the choke plate from the exterior of the carburetor to obtain full access to the carburetor.

Remove the screws that attach the primer bulb assembly to the carburetor. Within this version of trimmer, the primer bulb assembly is mounted right on the carburetor, as opposed to in a remote location that places the assembly at a distance from the carburetor.

Pop the old primer wax in the assembly and discard it. Push the new primer bulb into place. Reinstall the screws that attach the primer bulb assembly to the carburetor.

Replace the choke plate to the machine and reinstall the carburetor mounting screws to reattach the carburetor to the trimmer. Reinstall the air filter and screw the air filter cover into place. Reconnect the spark plug wire to the spark plug. Push the primer bulb several times and initiate the trimmer.

how-to-put-the-springs-to-a-weed-eater-push-lawn-mower-carburetor-59996694d94ec.jpg

How to Put the Springs to a Weed Eater Push Lawn Mower Carburetor

Gas-powered Weed Eater push mowers contain two springs that control the performance of the carburetor. The longer, thicker spring is popularly known as the primary spring along with also the shorter, thinner spring is known as the secondary spring. Both springs work together in concert to control the speed of the mower’s engine during idle and operation. Installing these springs correctly is crucial to make certain that your Weed Eater mower’s engine operates as it needs to be.

Disconnect the spark plug wire from the spark plug. This prevents accidental motor ignition during the repair.

Remove the air filter cover. Remove the air filter. Unscrew the screws that hold the air filter foundation in place and pull the foundation in the machine to get the area where the springs should be installed atop the carburetor.

Attach the stretched loop at the conclusion of the main spring to the hook to the governor arm linkage. Insert the round, circular loop at the other end of the primary spring to the corresponding hole in the throttle control lever. It is simple to locate this hole by choosing the one that lines up with the end of the spring.

Attach either end of this small secondary spring to the hook to the governor arm linkage. This is the exact same one where you connected the stretched loop of the main spring. Hook the other end of the secondary spring to the empty hole to the throttle control lever.

Reattach the air filter base to the side of the mower by screwing it into place. Reinstall the air filter and the air filter cap.

the-way-to-replace-a-line-using-a-new-blade-in-an-echo-gt-200r-trimmer-599966906a327.jpg

The way to Replace a Line Using a New Blade in an Echo GT 200R Trimmer

String trimmers are a blessing for homeowners with obstacles or structures within their lawns that lawn (San Diego, CA) mowers can’t get around. The Echo GT 200R is an air-cooled, two-stroke gas trimmer that comes with a nylon line head. If you’re looking for a more secure and powerful head, the Maxi-Cut head is a three-blade head with permanent blades rather than trimmer line. Altering the nylon string head for the Maxi-Cut head isn’t too difficult and can be achieved in a matter of 10 minutes with basic tools.

Align the hole in the top plate with the hole in the bearing housing (located on the shaft between the shield and head). Install the locking tool (a small, 3/16-inch diameter tool) into the hole.

Remove the 3/8-24 locknut on the bottom of the cotton mind employing a 9/16-inch wrench.

Remove the washer and slide the cotton line head off the shaft, taking good care to catch the huge washer that lies between the shaft assembly and the nylon head.

Tighten the nuts and bolts on each one of the 3 blades with a normal screwdriver and wrench until the blades have been tight enough.

Slide the threaded shaft into the hole on the Maxi-Cut head.

Put in the flat washer and locknut. Tighten the locknut until the head does not rotate on the beam.

Remove the locking tool.

Start the trimmer and ensure the blade is running smoothly; it shouldn’t wobble on the shaft, nor should it sound as though the blades have been loose.

the-best-way-to-caulk-driveways-594a2807527d2.jpg

The best way to Caulk Driveways

Cracks develop in driveways when climate extremes of cool and warm trigger growth and contraction of the concrete. In the summer months, when it rains or you clean water and the vehicle the Lawn Care, water erodes the soil beneath the concrete and sifts down through the cracks. Erosion causes the soil to to be in, which creates pressure on the on the concrete, causing it to crack. In the winter, when ice or snow melts through the day and incurs the cracks, it may freeze. The issue basically grows larger when the driveway isn’t caulked instantly.

Cracks Less Than ¼ Inch-Wide

Scrape out the crack using a screwdriver to loosen rocks, dirt or remnants of caulking.

Scrub using a wire brush to complete breaking free materials aside.

The crack that is sweep clear using a whiskbroom of free materials.

Cracks which are under ¼ inch-wide from a gun full of concrete fix caulk sealant. Place the tip of the caulk tube to the crack and hold the trigger down, filling the crack as you pull the caulk tube over the crack to somewhat over-flowing.

Press the caulk using the the top of concrete with caulk blade that is plastic.

Allow the caulk to dry in line with the directions of the manufacturer’s.

Repeat the procedure for every single crack which you need to caulk.

Cracks ¼ inch and Broader

Seal cracks that are bigger by pushing a foam backer rod to the crack and along its size using a screwdriver. The backer rod should be ½ inch below the the top of concrete to permit space for the caulk to be used along with it.

Till it’s overflowing fill the crack with fix caulk sealant.

To ensure it’s level with all the the top of concrete spread over the crack.

Allow the caulk to dry in line with the directions of the manufacturer’s.

Repeat the procedure for every single crack which you need to caulk.

how-to-clean-out-the-exhaust-ports-to-a-craftsman-leaf-blower-5999404c9373f.jpg

How to Clean Out the Exhaust Ports to a Craftsman Leaf Blower

The longer you’ve had and used the Craftsman leaf blower, the more likely it is that carbon deposits have built up within the exhaust port. The concentration of sooty black stuff clogs the exhaust port and also prevents the expulsion of air. This might cause the compressor to operate hot, perform erratically or fail to start or continue running. Cleaning the exhaust port to remove the carbon accumulation is a fast fix and will restore the machine to working order.

Disconnect the spark plug wire from the spark plug to ensure the Craftsman blower can not start abruptly.

Remove the screws which secure the outer plastic exhaust housing into the machine. Put the screws aside and pull on the plastic exhaust housing from the blower to access the muffler.

Remove the bolts which attach the muffler into the machine. Put the bolts apart and pull the muffler from the blower to access the exhaust port.

Slowly turn the flywheel until the piston completely covers the empty space behind the exhaust port. Keep the piston in this place to stop the carbon accumulation from falling to the cylinder as you eliminate it.

Scrape the carbon from the interior of the exhaust port using the side of the tip of a flat-head screwdriver. Stop scraping every so often and vacuum the loose carbon from the interior of the exhaust port. Keep vacuuming and scraping until each the carbon is removed.

types-of-cornice-brackets-599933872f7dc.jpg

How to Troubleshoot a Whirlpool AccuBake Range

Whirlpool’s AccuBake kitchen ranges feature sensors that regulate temperature to guarantee consistent cooking results with every use. Available in both gas and electrical models, these ranges are ideal for the home cook who does lots of baking. Like every major home appliance, you might sometimes encounter problems with your range which prevent it from functioning correctly. Some problems may require a trained service technician to fix, but you also are able to resolve others easily without assistance when you familiarize yourself with basic troubleshooting methods.

Nothing Operates

If your Whirlpool scope with AccuBake Temperature Management System doesn’t function in any way, there’s generally a issue with the power source. Ensure that the power cord is plugged into a grounded outlet and examine your home’s fuse box or circuit breaker. Replace a blown fuse or reset the circuit breaker if needed. If your choice has a digital display, error codes might appear that indicate what is preventing it from functioning. An F9 or F9 E0 code signals that the socket the scope is plugged into might be mis-wired — contact a qualified electrician to examine it. With a gas stove, be certain that the primary gas shutoff valve is in the On position if you can’t get fire. If the shutoff valve is on and the range still doesn’t operate, it might not be correctly linked to the gas supply. Have a trained repair specialist examine the connection and make any necessary repairs.

Cooktop Doesn’t Operate

If your range’s cooktop will not operate, there might be a issue with the controls. When you turn the controller knobs to a specific setting, be sure to push it as possible turn. In case you have an electric ceramic glass version, be certain that the controller lockout hasn’t accidentally been set — “Loc” appears in the display to indicate that the attribute is engaged. To unlock the controls, verify that the oven is off, then press and hold the CONTROL LOCK button for approximately three seconds. If you are using a gas version for the very first time along with the cooktop doesn’t start, there might be air in the gas lines. Turn one of the surface burner magnets to release any trapped air in the lines. Clogged burner ports can also prevent the cooktop from working. To clean out the ports, remove the burner cap and then use a straight pin to clean the holes of any debris or residue.

Oven Temperature Too High or Low

If your range’s oven fever is running too low or high, the temperature controller requires adjustment. To adjust the temperature so cooking times better suit your requirements, press and hold the BAKE button for approximately five minutes. The display will show the present setting; use the Temp/Time down and up arrows to adjust the setting. You can increase or reduce the temperature in 10 level amounts between 30 degrees in either direction.

Poor Cooking Results

While your range has the ACCUBAKE system which regulates oven heat to get optimal baking, you might sometimes encounter cooking results which are not what you anticipated. Begin your troubleshooting by verifying that your range is flat. If your version features AquaLift Technology or Steam Clean, place a level on the base of the oven and then check from side to side and front to back. For ranges without AquaLift Technology or Steam Clean, put a standard rack in the oven and then set the level on it. If your range isn’t flat, then pull it forward to eliminate the rear leveling leg in the anti-tip bracket. If the stove is flat but your cooking outcomes are still off, you might need to lower or increase the oven rack for baking soda.

how-to-clean-a-sofa-cushion-made-of-polyester-batting-5999337ce0ba9.jpg

How to Clean a Sofa Cushion Made of Polyester Batting

Sofa cushion makers and upholsterers layer polyester batting between the outside upholstery fabric and the pillow filling; collectively, the three form a comfortable, durable indoor or outdoor cushion. Once covered with upholstery, polyester batting handles various kinds of cleaning nicely, allowing you to dictate your method from the material of the upholstery fabric rather than the internal materials of the cushion. But when the pillow covers are removable, polyester batting requires a heavier touch.

Covered Outdoor Cushions

Patio sofa cushions using durable covers stand up nicely to excess water and a cleaning. The fabrics used are thick and resist fading, and the polyester batting maintains its shape and dries quickly. Consistently sweep the cushions using a broom or eliminate dirt and debris using a vacuum to reduce staining. After per year or as needed, hose down the pillows thoroughly and wash them using 4 tablespoons of clear liquid detergent mixed with 1 gallon of cool to lukewarm water. A nylon scrub brush works well oftentimes, but follow manufacturer instructions. Rinse the cushions as thoroughly as possible when you’re done; leaving behind any trace of detergent produces a dirt-attracting sticky layer. Sun-dry the pillows, flipping them often, before placing them back to the furniture or storing them.

Covered Indoor Cushions

For indoor pieces, polyester batting offers a low-cost, durable means of increasing plushness while creating a durable cushion. When the cushions don’t have a removable cover, thoroughly vacuum them after weekly to keep both the upholstery and inherent batting clean. Treat any stains or spills immediately. After per year or as needed, deep wash the couch cushions according to the care tag. If the tag includes a “W,” use water-based techniques like shampooing or steam cleaning. Because polyester batting dries relatively quickly, it stands up to the excess moisture. An “order” also indicates water-based cleaning, but restricts you to cold water only. If the fabric is dry-clean just, noted by an “S” on the tag, you could be able to take the pillows to a dry-cleaner and then spot-treat any stains using a dry-cleaning solvent.

Uncovered Cushions

Both indoor and outdoor cushions may have removable covers, allowing you to clean the upholstery fabric and the polyester batting covered cushion separately. Remove the cover and launder and air dry or dry-clean it according to the tag instructions. Clean out the batting by wrapping the end of a vacuum attachment using cheesecloth. Secure the cheesecloth with a rubber band and suction dirt and debris from the cushions that are bare. The cheesecloth acts as a buffer between the vacuum and the batting, preventing harm. Dilute 1/4 teaspoon of mild laundry soap in 4 cups of water and wash the bare pillow using the solution along with a soft rag; don’t use a brush or any other abrasive instrument. Recover the pillows after the batting, foam and covers are completely dry. Unless there was a large accident, you don’t need to wash out the polyester batting regularly or in any way. The upholstery fabric is usually thick enough to guard the batting.

Spot Treatments

Immediately managing spills decreases the chances that the fluid will soak through the fabric and to the batting. Eliminate as much of the fluid as possible with clean, absorbent towels, pushing to the pillow to absorb the humidity. Depending on the magnitude of the spill, you may need to use several towels. Eliminate stains on cushions using an “order” or “W” on the tag with the suds created by mixing 1/2 teaspoon of mild soap with approximately two cups of warm water. Combine both ingredients and agitate the solution to generate lots of bubbles. Dip the rag in only the suds and use this to wash; avoid wetting the upholstery using the water underneath the suds.

Dry Cleaning Solvent

Use dry cleaning solvent or unflavored vodka for tags marked with an “S.” Wet a white cloth with the merchandise in accordance with manufacturer directions or by covering the bottle’s opening using the fabric and temporarily tilting it over. Dab the stain using the fabric until the mark disappears. Do not pour or use the solvent or vodka right on the upholstery. Absorb excess moisture and odors by sprinkling the area with baking soda while it’s still wet from the treatment. After dry, vacuum the area.

types-of-cornice-brackets-599933872f7dc.jpg

Types of Cornice Brackets

Cornice mounts refer to the decorative carved brackets most commonly seen on the exterior of Italianate-style Victorian residences. These mounts can also be common on Victorians with exterior gingerbread trim and styles like Queen Anne, Stick and Gothic Revival. Craftsman-style homes frequently feature cornice mounts under overhanging eaves, even though they’re not as decorative. Bracket styles vary in thickness and decorative ornamentation.

Origins and Materials

A cornice bracket is fundamentally the same as a corbel, which has been used for centuries to help support extruding surfaces. Originally made from concrete or stone, the primary function of these conventional architectural components was weight assistance. During the Renaissance period in Italy, buildings were created with balconies supported by outsized stone corbels. The debut of wooden corbels during the Victorian era shifted the primary focus from supportive function to decorative ornamentation. Nowhere is this more evident than the repeating brackets along the cornices and eaves of Italianate residences. Along with wood, cornice mounts can be made from steel, resin, plaster and fiberglass.

Bracket Styles

Cornice mounts are found in a vast range of styles, from easy half-circle arcs to visually carved basket-weave layouts. Vintage Greco-Roman layouts include carved acanthus leaves and grapes, while Mission-style mounts contain tidy, geometric lines. Brackets can be cut from a single plank of wood or be constructed out of as many as three layers of wood, with two thinner carved bits on the exterior and a sound, thicker piece in the center. On Victorian residences, these layered mounts are usually painted in contrasting colors.

Repeating Brackets

Typical spacing for replicating exterior mounts is 12 to 18 inches apart. Another choice is to set the mounts, leaving 2 to 4 inches between each bracket in the set and bend each set several feet apart. Brackets are generally installed from the frieze area under roof eaves, porch eaves and in the corners of porch articles. Corner article mounts are often highly ornamental. Repeating mounts, typically 1 1/2 inches thick, provide a three-dimensional appearance. A visually pleasing pattern emerges in the installation of several mounts round the perimeter of a house.

Interior Options

Cornice mounts can be used inside the house as an added decorative detail to classic molding. Brackets add elegance and style in kitchens when employed under wall cupboards, cabinets and kitchen island countertops or bars; mounts add character in entryways and beneath soffits. Use them under your fireplace mantel, on the fireplace surround and on stair risers. Thick brackets can even be used as small, decorative shelves to showcase a small trinket or figurine. Stain or paint the mounts to complement your interior trim or attempt an alternative material like metal or wax.