a3b69b488f33fbbd82077236771dda30.jpg

How to Care for Michelia 'Alba'

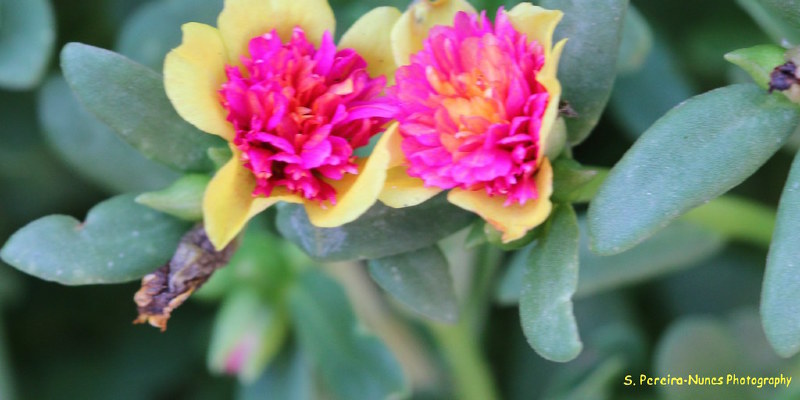
Commonly known as white champaca, Michelia champaca “Alba” is an evergreen tree having an intensely fragrant blooms and glossy foliage. It rises at U.S. Department of Agriculture plant hardiness zones 10 through 11, in which it adds a tropical appearance to glowing garden beds with mildly acidic soil. White champaca requires moderate care year to keep it looking its best, but you will be rewarded for your efforts with masses of creamy white blooms from winter.

Watering Tips

Once established, white champaca does not require heavy watering . however, it ought to be watered during the summer to stop stress and dehydration. Root problems can arise in constantly wet soil, therefore it’s vital to let the soil dry out to the surface between waterings. Water till the soil feels moderately moist at the top couple of inches. A potted white champaca tree is particularly prone to root and dehydration problems, therefore grow it into a pot with drainage holes and water it deeply but infrequently. In areas having rainy, mild winters, stop watering in winter unless it has not rained for more than two weeks.

Fertilizer Needs

White champaca is a moderately heavy feeder and requires constant levels of nutrients through the busy growing season. The type of fertilizer and application frequency depends upon the age of this tree along with its growing conditions. Younger trees that are still establishing a successful root system require a complete fertilizer with an N-P-K ratio of 15-15-15, while established trees benefit from a booming fertilizer having an N-P-K ratio of 7-9-5. A white champaca in full sunlight needs more frequent feedings, irrespective of age. Mix 1/2 tsp of fertilizer in 1 gallon of water. Replace a couple of weekly waterings with the fertilizer solution in early summer and spring. Reduce feeding by one-half in late summer and early autumn, and quit feeding entirely in winter.

Pruning and Grooming

A white champaca tree has a symmetrical, spreading canopy having a clearly defined trunk. It seldom requires pruning since it has a naturally neat form. Some grooming during the growing season improves the tree’s shape and keeps the plant looking tidy. Snip off any debatable growth, like suckers, water sprouts or dead branches, at their base using sturdy, sharp pruning shears. Heavy pruning reduces flowering, so avoid removing a considerable number of live growth. Always soak your pruning shears in undiluted household disinfectant for five minutes, rinse and rub them dry before using them to protect against the transmission of diseases.

Potential Problems

A white champaca tree contains few serious problems. A younger tree may have problems with root diseases, but most can be prevented by watering correctly. Mealybugs pose the most significant issue. They reveal their existence with the white, cottony matter they deposit on the leaves. Small populations of mealybugs may be removed with a strong jet of water, although heavier infestations may require chemical intervention. Mix 2 1/2 ounces of neem oil in 1 gallon of water. Apply the solution with a pump sprayer, saturating the tops and bottoms of the leaves. Duplicate the treatment two to three times weekly before the infestation subsides.

See related

bcd0617a7dbe828380b83e72a64af5e8.jpg

What Exactly Does Botanicare Silica Blast Do?

Silica Blast is a nutrient supplement for crops produced by the Botanicare firm to be used in hydrogardens and container houses and is intended to protect plants against extreme conditions such as drought, frost or heatwaves. Strengthen stalks the Silica Blast supplement claims to increase dry matter yield of plants and stabilize the pH of recirculating hydroponic gardens. The supplement is marketed.

What It Is

According to the manufacturer, Botanicare Silica Blast comprises at least 0.5 percent soluble potash and 2.0 percent chromium derived from sodium silicate and potassium silicate. The potash is present because of the silicon derived from potassium silicate. It is, based on Botanicare, among the only sources of protein for crops. The Material Safety Data Sheet concurs with the breakdown of components of the manufacturer, stating that the formulation is a combination of silicates of sodium and potassium.

What it Does

Silica Blast is intended to increase the likelihood a plant will triumph in an environment where nutrient needs or its water aren’t being met due to soil or weather conditions. Additionally, it is utilized in hydroponics, where soil nutrients aren’t present at all, due to the dearth of dirt used in these growing conditions. The manufacturer claims the silicate in Botanicare Silica Blast functions on a cellular level – helping form a silicate matrix within walls. The crops may continue to photosynthesize in stressful circumstances, by strengthening the cells.

How Much Use

How much is dependent upon the type of garden you’re working with. Container gardens demand a mix of 1/2 to 1 teaspoon per gallon of water to get program (2.5-5 mL per 4 liters of water.) . Hydrogardens are specific. If you’re growing medium plants which aren’t yet mature, 1/2 tsp per gallon of water (or 2.4 mL per 4 liters of water) is suggested. Mature plants require 1 teaspoon per gallon of water (or 5 mL per 4 liters of water.) The manufacturer recommends employing Silica Blast every or every other watering for container gardens and applying it to the reservoir of hydrogardens each five to seven days or to adjust the pH to 6.0

Factors

Silica Blast is an irritant which can cause irritation to skin and eyes, as mentioned in the Material Safety Data Sheet. Prevent contact with skin and use goggles when working with and mixing dry Silica Blast. If contact with eyes occurs, flush with lots of fresh running water. If contact with skin occurs, wash with lots of soap and warm water and eliminate any clothing or shoes. Seek medical therapy if irritation continues.

See related

c9e3fb2ca2831e850e3185666497847b.jpg

Troubleshooting Leaking Water at the Base of a KitchenAid Dishwasher

Dishwashers may be powerful, however you can occasionally encounter problems that prevent yours from operating correctly. Though, it puts your entire kitchen, when it’s leaking from the base. You can troubleshoot front flow problems yourself, preventing serious harm and producing dishes that are clean whenever possible.

Poor Setup

If your dishwasher isn’t installed water can leak from the front of the appliance. The dishwasher has to be flat, or water can burst during the cycle to the front of the appliance. Decide on against the front of the bathtub to ensure that it’s flat from side to side’s opening. If it isn’t, examine the floor under the dishwasher. If the floor in the front of the dishwasher’s opening isn’t level with the ground in the trunk, use shims to ensure that the appliance is level. The dishwasher has adjustable leveler legs, therefore if the ground is flat but the appliance is irregular, turn the legs till they’re exactly the exact same height. For the front legs, you might need to use a socket or an adjustable wrench to turn the legs. Make sure the legs all sit firmly on the ground.

Drain Issues

If it is unable to drain properly your dishwasher may flow. For dishwashers connected to a waste disposal, guarantee that the knockout plug was removed from the disposer inlet so water is able to drain from the tub. Look carefully at the drain hose pinched regions or clogs as well, and make corrections as required. Examine for meals obstacles in the drain and disposer device that might prevent water from flowing out of the bathtub.

Incorrect Detergent

If detergent is wrongly applied, your dishwasher will leak from the front of the appliance. Using too much detergent can lead to excess suds, which might cause the dishwasher. Choose a detergent designed for use and carefully gauge the detergent out according to the instructions on the label. You need less detergent, so adjust accordingly if you reside in an area with soft water. Switch to another detergent if excess continue to happen with these alterations.

Gasket Issues

If the seal around your dishwasher’s door isn’t secure, water can flow during surgery. With time, tear and wear can affect the gasket that forms the tight seal around the door of the dishwasher. Look carefully at the gasket and clean it of detergent residue or any food debris that might affect the seal. Check for damage such as cracks, tears or shrinkage which could contribute to a flow. If the gasket is damaged, replace it water can not escape and so the door closes tightly again.

See related

c76414738030e734d3e3814fd34b80e2.jpg

What's Better to Grow With: Blackstrap Molasses or Organic Molasses?

Gardening is teeming with color plants: perennials or annuals, trees or shrubs, options or people that like sunlight. Make it easy on yourself when it comes to molasses in the garden, and remove unnecessary decisions. You do not need to pick between blackstrap and molasses: do your own plants and Proceed a favor.

Molasses at the Garden

Your grandmother could have told you molasses was great for you and, like so many of those old wives’ tales, the advice is currently proving on spot. Properly employed, molasses can provide nutrients, such as magnesium, calcium, potassium and iron , to your garden plants.

Benefits of Molasses

Plants, like people, need nourishment to survive and thrive. Molasses supplies those also adds natural sugar that promotes organic materials to be broken down by soil microorganisms and nourishment. You can use blackstrap molasses to encourage fruiting and flowering in hydroponics. Adding molasses also releases phosphorous in the soil, making it more difficult for weeds to sprout.

Organic Blackstrap Is Best

Molasses doesn’t come out of a plant that is molasses. It’s a byproduct of refining sugar. Sulfur dioxide is added to preserve it when molasses consists of sugar cane that was young. More sugar cane does not require sulfur, therefore the consequent molasses doesn’t contain that chemical. It can be termed organic and is better for the plants. After much of the sugar content has been boiled off, leaving more minerals blackstrap molasses comes from the boiling of the sugar. Blackstrap molasses is the ideal choice for your garden.

Applying Molasses

The blackstrap molasses before using it in your garden. Use 1 cup of molasses or drip it in your compost pile or your own garden soil. Alternatively, create a spray of 1 cup of milk, 4 cups of water along with 1/4 cup of organic blackstrap molasses and then use it to feed vegetable crops such as tomatoes (Solanum lycopersicum) and peppers (Capsicum spp.)

See related

dbcba75c6802227f7f4a44783b45765c.jpg

Materials for the Repair of a Rubber Roof

The fantastic news is the EPDM (ethylene propylene diene terpolymer) or single-ply plastic roof is one of the most environmentally friendly and environmentally accountable roofing materials used today. The good thing is that your plastic roof is presently torn or leaking. No worries! With a bit of research, it is possible to find some materials to fix in addition to greatly extend the life of your rubber roof.

EPDM or Rubber Roofs

Annually, EPDM represent roughly 35% of the entire roofing marketplace and or plastic roofs account for more than a billion square feet of roof coverings in the United States. As a celebrity that is long-term, it has a high emissivity which allows heat energy to reflect back in the atmosphere rather than being absorbed into the house. Because of this, a home”melts” faster at night. Rubber roofs comprise carbon black in their compositions to block UV radiation; with white membrane, titanium dioxide can be used instead. The newer energy efficiency white EPDM is favored because of its capacity to reflect sunlight in warm climates. Most important, your roof is 100 percent recyclable.

Materials for a sterile

Rubber roofs have been put in one piece with few seams. Some are cut to resemble shingles. If you have seams or shingles, then the flow is most probably caused by standing water or water which stays on your roof after it rains. Another problem can be the adhesive — used to maintain the seams which could disintegrate and cause the membrane to separate over time. Seam tape and sealant (for irregular regions ) are the best and most popular repair stuff. After applying primer with a utility paint brush, then follow the directions.

Materials for a Tear

Your roofing has torn because of a decreasing or puncture object like a satellite dish. However, fixing the area is often as simple as minding a bicycle tire with a prepackaged peel-and-stick fix kit. For stains larger than 5 inches, you’ll need a sheet of EPDM membrane and fabric shears to cut the material. In addition, you’ll need seam primer and a clean pad to clean the surface. Apply multipurpose adhesive to the patch and the area surrounding the pit with a nap paint roller. After drying, put the patch on the hole, roll the edge of the patch with a seam roller, and seal the edges.

Materials for Flashing

Failed flashing can rust, crack or different, causing leaks. You can do a temporary fix by caulking the area or substituting the flashing with a new or similar material. Both metallic and aluminum are available in preformed configurations. Aside from the fundamental tools, such as a hammer to remove the stuff, you will also need straight-cutting tin snips to cut the material that is new, a measuring tape, and a masonry bit and grinder. If replacement is needed by areas, it is best to hire a roofing contractor.

See related

d85b8af2136c4c481251eab0dbc6c1b6.jpg

The Way to Get the Smell of Rotten Meat out of a Fridge

Rotten meat in a fridge may be a problem in American households as people shift toward eating and preparing meals at home instead of frequenting restaurants. The Riedel Marketing Group also discovered that some HIPsters, or the HomeTrend Influentials Panel, are searching for economical cuts of meat, which could allow some households to buy meat in stock and bulk up. Spoiled meat’s causes may be an extended power outage, a fridge or inattention to how long the meat was sitting in the fridge. If your fridge is functioning normally but a rotten-meat odor persists, you can follow instructions that are government-approved to eliminate the smell.

Throw rotten meat . Open a window to permit for venting in the kitchen. If the skin is sensitive to various cleaning products put on protective gloves.

Remove bins, racks and ice trays according to the manufacturer’s instructions. Set the items onto the kitchen counter. Be especially careful with glass shelves.

Add 2 tbsp. Liquid dish detergent into a plastic bowl. Fill the bowl and allow the bowl sit at the bowl of the sink. Utilize a sudsy cotton cloth to wipe and wash off the racks, shelves, bins and ice trays. Pour the detergent solution down the drain when finished. Rinse with tap water.

Add 1 tablespoon. Of chlorine bleach to a bucket. Fill the bucket with 1 gallon of water in the cold faucet. This is a”sanitizing solution.” Rinse the shelves, bins and ice trays together with the bleach solution. Place these components that are removable to both sides on the countertops. If any one of the sanitizing solution stays, place the water bucket near the fridge.

Wet and wring a clean cotton cloth, using hot water from the faucet. Sprinkle baking soda on the moist cloth. Fold and rub on the cloth in on itself, making a baking soda paste directly on the cloth.

Wipe the compartment walls of the fridge and freezer with all the baking soda paste. Wipe the gaskets.

Wet a cloth that was clean . Wipe away soda residue out of the compartment walls and the gasket.

Soak a different fresh, white cotton cloth at the”sanitizing solution” in the bucket. If not one stays, make more. Wipe doors and the compartment walls . Refer to your owner’s guide before wiping the gasket with bleach. Some producers may suggest against using bleach or compounds on areas of products.

Leave the doorways on the freezer and fridge compartments open to permit moisture to evaporate and air to circulate.

Reassemble the parts which were eliminated from the fridge and freezer compartments.

See related

3f8d86edb77cfa2ba1f9bd5e48900210.jpg

How to Remodel a Kitchen

Granite is a hard crystalline rock that gets its colour and personality from feldspar, mica and quartz. Its attractiveness, durability and effortless care make it an excellent material. Although granite is a rock, granite tile is a budget-friendly choice to granite slab. It is also more versatile than slab. Granite tile is appropriate for kitchen floors and backsplashes as it is for countertops.

The Design Process

The very first step in the process is currently designing your new kitchen. Your layout choices serve as the base on which the success of your project depends. Choose a design that’s compatible with the architectural design of your home. Start with the cabinets, because they’re the strongest element of a kitchen. Pick on your appliances . Plan counters granite the floors and backsplash.

Design Considerations

Maintain some concerns, although granite tiles may create effects at a kitchen remodel. Variations in grain and color are interesting if you use tile, however mismatched 12-inch tile may make for a look that is poorly executed. The exact same is true for the backsplash. An additional concern with the backsplash is where it ought to begin and end. The backsplash fills the spaces between appliances and your counters and your upper cabinets. Tiling walls is overkill. Because granite tile is a bold material, use it. Alternatively, use it . Tile your entire flooring with granitecountertop, but combine granite tile with different materials in your own backsplash, or tile a center island but not countertops.

Choosing Granite Tile

Granite comes in neutral colours such as black, brown, beige and white as well as blues, reds and greens. The grain, or crystal pattern, can be dense and tight or loose and striking. Finishes are available, the most common of which are polished the two absence polished granitefinish. Choose a combination of grain colour and finish that matches your kitchen layout style. By way of instance tile works in spaces that are modern, while more demanding textures and finishes work for an old world look. Tile colors ought to pick up colour from elsewhere in the area. Tailor your choice of grain you’re using. If you’re using a bold pattern elsewhere, for example, stick with a tight grain in your tile. In case surfaces are strong, it is safe to opt for a vinyl grain that is bolder.

Granite Tile Setup

Granite tile demands a stable substrate. Plywood covered with cement backer board works on surfaces such as floors and countertops. You can install tile to your walls that are backsplash . Use thinset to stick tiles. Unlike ceramic tilewhich you space granite tile edges are butted by you together. Grout any spaces to be filled by the joints with a grout that matches the tile colour to produce the joints noticeable. Seal your grout against discoloration, to protect it. Seal the tiles if they’ll be exposed to substances that might stain or into standing water.

See related

9d7f2b299c90d8a48d2a704f3bdb3270.jpg

Installing Resilient Flooring

By adding floors add a spring to your step in addition to a change of decor to your home. Vinyl floors and rubber are two common kinds of the floors, and both are available in sheets or tiles. Resilient flooring is acceptable for installation above and below level. Designs and the many colours enable you to use it almost any room of the house.

Subfloor Preparation

Because a concrete slab appears to be dry, don’t assume it is. Run a moisture test to both the new and older slabs. Tape a piece of plastic wrap pull up it to find out whether any moisture has collected. You must put a moisture barrier between the concrete slab and the flooring, even though concrete is resistant. If the slab has hardeners or some sealers applied to its surface, you must grind them off. 1 easy test to find out whether a concrete slab has sealers is to shed some water. If it beads, chances are good the concrete has other protective coating or a sealer. Remove all debris. Wood subflooring must remain dry and clean as well. Both concrete and wooden subfloors have to be flat and have no substantial cracks. If the subfloor is unlevel, make repairs prior to installing the flooring.

Acclimate the Floors

Do not plan on starting to put in it right away and bringing home boxes of floors. Resilient flooring requires time to acclimate in the room where it will be set up. Open the boxes and let the flooring place in the room for the time recommended by the producer. This is generally between 48 to 72 hours. The temperature of the room needs to be at or over 65 degrees Fahrenheit during and after.

Flooring Design

Depending on patterns and the colours you choose, the floors may or may not have a management that you need to incorporate into your plans. If you selected a colour that is monotone, you don’t have to worry about creating a pattern. Your layout should be designed by you, if you did choose colours. Produce a scale drawing of the room on chart paper. Identify the middle point of the room and split the workspace to quadrants. Plan tile placement in each of these quadrants, working in the middle of the room toward the walls. During installation, you need to cut the outer row of tiles to fit. A narrow expansion joint around the edge of the room provides room to the flooring contract and to expand.

Resilient Floor Installation

Installation of floors, either sheets or tileinvolves gluing the flooring. A DIYer can choose to put in other resilient floors or peel-and-stick tiles. These floor products have a backing that drains off to expose the glued side of the flooring. You press on the tile onto the subfloor. Some rubber flooring has structure, much like laminate or hardwood floors, that makes it possible for the individual pieces to lock to together to create a floating floor. It’s also possible to loose-lay vinyl sheet floors and secure it in place with molding and shoe molding.

See related

eb2c359b2abbe320aa61a6eb1ffff86b.jpg

Techniques for Apples

Pulling on a fresh, crispy and juicy apple in a tree may be a tasty fall treat, especially if you’ve got a tree in your own backyard. Apple trees require a little bit of labour and patience, but can thrive in regions of the nation. Exotic apple trees in early spring or late autumn and you may expect your first harvest in three years. So that you may grow the tastiest apples possible Meanwhile, take care of your tree.

Site

Choose an area in your yard that receives full sun and other buildings or trees not shade that. The place ought to have soil, although apple trees thrive in many kinds of soil, the National Gardening Association accounts. Select a spot in your lawn to help stop damage. If your tree is planted at a low spot, the cool air will circulate it around, which may destroy the blossoms or immature fruit.

Cross-Pollination

Plant two kinds of apple trees in order that they can pollinate each other. Apple trees are not self-fertile so each tree needs another apple tree to grow. Choose two kinds of apple trees about the exact same time for the large success.

Pruning

Prune your apple tree in late winter until the buds start to grow. Opt for the component of the tree which will develop into the trunk, or the vertical branch to become your boss. Remove which are growing three to four inches under the boss from trying to carry over, to protect against another central boss, which may impact the growth and stability of their tree.

Fertilizer

Sprinkle 2 ounces of 16-16-16 fertilizer around the base of your apple tree in late winter or early spring before the tree starts to bud, the University of California Cooperative Extension recommends. Apply the fertilizer about six inches from the base to reduce damage to the young tree. Water the fertilizer into the soil.

Pest and Weed Control

Choose species of apple trees to prevent damage from pests. Diseases and pests can result in severe damage. Eliminate and dropped leaves from the floor to discourage pests away from making their home in and around the tree. Weeds will suck the nutrients and moisture in the soil and controlling them will safeguard your apple tree’s health. Bring on any weeds from around the base of your tree when you detect them. Apply a layer of mulch to discourage future expansion.

See related

c8e4a6ea815a47016d3f5108d0237d11.jpg

The Way to Grow Sycamores From Seed

Sycamore trees belong to the genus Platanus, which comprises deciduous species found around the world in temperate climates. Platanus racemosa, also referred to as the western sycamore or California sycamore, is widely utilized for palmate leaves its bicolored bark and stately, somewhat open growth habit. Like many species within its genus, the western sycamore will swiftly reach a mature height of 40 to 100 feet and grows easily from seed. However, homeowners must keep the trees beneath somewhat moist conditions from germination until their next year of life when the trees are to reach their whole potential.

Start sycamore trees from seed in early spring since the seed balls are going to have dried out to the tree during the winter months. Locate and collect a seed ball with a golden-brown or grayish coloration. When squeezed, Prevent people who have signs of mildew or an excessively wet, squishy sense.

Put the sycamore seed ball in a paper bag. The top closed. Gently tap on the seed ball with a rubber mallet to break apart the seeds. Pick a couple of seeds that are healthy-looking and then discard the rest into compost pile or a waste bin.

Select a planting site big enough to accommodate a sycamore tree. Start looking for a place with at least 20 square feet of clearance from power lines, looming trees and structures. Avoid areas where the soil remains sopping wet all the time since sycamores planted there will probably develop brittle wood.

Scoop up dirt from the planting site. Collect enough dirt to fill a 6-inch round nursery container one-third of the way full. Blend the soil with equal measurements of coarse and vermiculite sand. Mix until they are well incorporated and the mixture takes on a uniform look.

Pour water on the soil mixture until it flows freely from the bottom of the hammock container. Before planting the sycamore seed let the soil mixture drain for 20 or more minutes.

Sow the sycamore seeds in a depth of 1/8 inch at the prepared nursery container. Firm the soil atop the seeds. Spread a layer of coarse sand throughout the surface of the soil to hold in moisture while the sycamore seeds germinate.

Put the nursery container outside. When the year is tender water the seeds to a depth of two inches every two months , otherwise let Mother Nature do the watering.

Watch for signs of germination in four to six weeks. Thin out the seedlings if greater than one of those seeds germinates. Remove all but seedling.

Transfer the sycamore once it grows to 6 inches in height, seedling into a 1-gallon nursery container. Keep it well-watered into a depth of two inches at all times, allowing the soil to dry out completely for no longer than three days.

Plant the sycamore tree in its planting website that is chosen once it bears sets of fully-formed leaves and tops 12 inches in height. Water the sapling into a depth of two inches every 10 to 15 days during its first summer remove all watering once the season begins in October.

See related