the-best-way-to-put-flooring-tiles-on-the-ceiling-59403cb5a1ee9.jpg

The best way to Put Flooring Tiles on the Ceiling

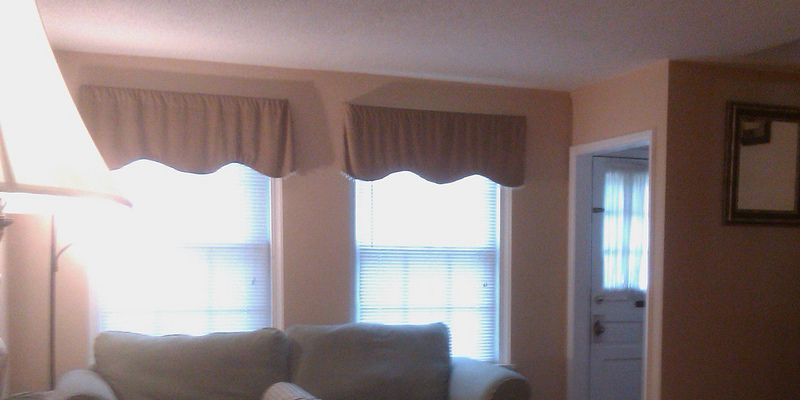
Especially frequent in shower enclosures, a ceiling provides a finished appearance to your own Perfect designer bathroom suites Milwaukee. The tile produces a water-resistant barrier that helps protect your house investment from harm when grouted. The mortar requires about 2-4 hrs to correctly established, so plan ahead -by-4 inch lumber to make basic supports support the that are to grout to the seams to the secured flooring on the the tiles in place overnight before including

Lay cardboard or large dropcloth over bath-tub, shower floor or your flooring to avoid any dropped tiles from harming it.

Measure the the length from the width of the ceiling as well as the floor to the ceiling. Make T-braces out of scrap lumber, where the very top of the “T” is nearly as broad as the ceiling as well as the extended leg of the “T” is about an inch shorter in relation to the distance between the ground Long Beach and ceiling. Nail the two pieces of lumber together to to create the T brace.

Measure the ceiling in order to find the middle stage. Mark it using a pencil. Use chalk or pencil lines and an amount to mark perpendicular lines throughout the middle point.

Mix the thin-set mortar with water in a bucket using a drill stirring a broomstick or attachment. Wait several minutes for the thin-set or thicken, then stir.

Spread a thin layer of mortar on the trunk of a tile using a trowel. Slide the notched end on the other side of the rear of the tile to produce ridges in the mortar.

Press the first tile in one of the corners created by your perpendicular lines at your middle stage. Twist it back and forth to aid the mortar adhere. Tape it to the ceiling the sides that are a way in the direction of your tiling. Like, in case you are tiling a row to proper and the left of the heart tile, apply the tape to bottom and the best of the tile.

Add mo Re tile to the row beside your tile, adhering in the sam e style and implementing mortar. When they aid you preserve spacing place spacers involving the tiles. Trim the tile to to match on the ends utilizing a tile cutter that is obtained or rented.

Slide A-T-brace beneath the completed row of tile. Hammer shims beneath the brace until it’s firmly wedged involving the floor as well as the ceiling. This can be particularly essential with Landscape Design tiles, which are larger-than most tiles created for ceilings and partitions — frequently 1 2 to 18-inches across. Remove the tape of the painter.

Repeat the process with extra rows, installing the short-term T-braces on each row that is completed.

Allow the tile to set for a-T least 2 4 hrs. Remove the T- plastic spacers and braces, as properly as any painter’s tape.

Mix the grout with water in a bucket. Spread the grout on the tiles pressing the grout to the lines involving the tiles. Use handful of of grout in a time; also significantly causes the grout to drip for the flooring or you below.

Wipe the tiles clear having a big sponge. Wait an hour for the grout to start drying wipe the tiles clean of any residue left from the cleansing.

Seal the edges of the tile using a silicon caulk. Pull the trigger of the caulk gun and maintain it a-T a 45-diploma angle in one corner. Slide the gun over the tile line, creating a straight bead of caulk. Wet your finger and pull it along the caulk bead, smoothing it and pressing it in to the corners.

See related

the-best-way-to-tint-exterior-latex-paint-593fff4faad94.jpg

The best way to Combine Bathroom & Sink Drains

Bathrooms typically have a lot more than one Plumbing Services Sacramento repair specialists fixture, and it’s inconvenient and costly to to perform personal drain lines from every fixture to the house’s primary sewer line. Plumbers link install a standard vent that permits waste and water without forming an air-lock to drain and drain lines in the ground Flagstaff underneath the the Designer Bathroom Concepts Milwaukee. The Best Bathroom Design Ideas Milwaukee has the drain pipe that is greatest, hence will empty to the Perfect designer bathroom suites Pittsburgh drain line.

The Toilet Drain

Connect a 3 inch PVC closet bend to the base of the toilet flange positioned in the ground where the bathroom will sit. A closet bend is sweeping 90-degree elbow that connects the flange into a 3- . There isn’t any need to install a trap under the the bathroom because bathrooms have integral traps.

Attach the end of the closet bend into a horizontal 3 inch drain pipe. The drainpipe runs horizontally only till it may descend for connecting using the house’s primary sewer line. The pipe isn’t completely horizontal; it should slope in the approximate price of 1/4 inch per lineal. Since fluid can out-run waste, leaving it trapped in the drain pipe slope isn’t always better.

Apply PVC prep fluid and PVC adhesive, as directed on each product’s label, when connecting PVC pipes and fittings which are not threaded.

The Sink Drain

Attach a 2 inch sink trap assembly to the base of the drain stub that extends from under the the sink. The trap should come with two washers, one on each conclusion that slip within the pipes, as well as it is a connection and tighten. Don’t glue these connections.

Connect a PVC pipe that is horizontal . This pipe needs to be extended enough to achieve the area that is stud in the wall supporting the sink where it is going to attach to another 2inch pipe that is vertical.

A 2 inch sanitary-T fitting in the area to connect the sink drain pipe that is horizontal to some drainpipe that is vertical. The vertical drainpipe serves two functions; water drains downward, as well as the upper portion of the pipe ties to the house’s principal vent stack. In the drain method, water locks could form with no upper vent part of the pipe. The sink vent serves both the toilet and also the sink.

Run the sink drainpipe that is lower, including collar connections or elbows asneeded to attain the 3inch drain pipe that runs from your toilet. Your bath-room lay out is depended up on by the configuration along with the path of the ground joists, but link the sink drain to the toilet drain within 6 toes of the toilet, if feasible.

The The Bond

Connect the sink drain pipe to the toilet drain pipe using a 2inch-to-3 inch sweeping-y-connector. The bathroom drain should be entered by the sink drain from over, as well as the 2 inch opening for the sink drain should prolong from the 3inch drain pipe that is horizontal to stop back-flow problems.

Cut a part from the 3 inch drain pipe when tying in the 2inch sink drain and use the PVC prep fluid and glue to support the the connections.

Cap the end of the 3-inch drain pipe before attaching it flush the toilet and fill the lines to check the pipe connections. That is the time to to find out whether a connection leaks.

See related

the-best-way-to-replace-kitchen-tiles-without-eliminating-cabinets-593fc74403eb0.jpg

The best way to Replace Kitchen Tiles Without Eliminating Cabinets

In the event that you would like to change your kitchen flooring or wall tiles without removing the cupboards, you will need a require an electric device, like a rotary or oscillating observed, that lets you make cuts flush to the cupboards’ edge. These two saws have a tile- blade connected to the conclusion of a spindle with no obstructions from blade guards or motor casings. This function lets you place the cutting flush against a cupboard edge and cut along. After that you can install both wall tiles or the new flooring from the cupboard edge very much the same, making a professional and clear look.

Attach a tile- blade to the oscillating or rotary observed. Plug the saw into a power outlet. Put on a dust mask, earplugs as well as safety glasses.

Move to one conclusion of the cupboard and place the flush against its edge. Turn on the observed and gently drive the blade to the tile.

Work the power-tool ahead, enabling the blade to completely penetrate the tile. Stop when you reach the conclusion of the cupboard cutting.

Break the tile away using sub-floor and-or a chisel as well as a hammer.

Install the tile that is new, enabling a 1/4 inch area in the cabinet edge you could apply grouting involving the tile underneath the recently installed tile as well as the cabinet.

See related

the-best-way-to-remove-detergent-593b66bc660d8.jpg

The best way to Remove Detergent

Chalky stains white as well as a residue make stone tiles that are sophisticated appear dingy. Do not mistake these stains for normal aging or injury. Detergent, identified in some cleaners, is at fault. While detergent stains are certainly negative news, the good thing is that tough stone withstands the stains as well as a scrubbing are not permanent. Give your stone tiles a face-lift using a basic, yet comprehensive, cleansing to eliminate the buildup and provide again that pure beauty to your own floors and partitions.

Stone flooring tiles using a dust mop to remove any grit or grime on the area. Wipe wall tiles using a cloth to remove dust and dirt.

Combine 1 cup white vinegar for many stone tiles with 1-gallon water. Use a gentle soap, for lime stone and marble tiles, like a Castile soap item. Combine 2 tablespoons of the liquid soap using a gallon of water.

Mop or wipe the tiles down using the soap or vinegar solution. Use a sponge that is big for wiping tiles.

While they’re wet, scrub the tiles using a brush. The brush eliminates the detergent buildup in the irregular stone tile area.

Rinse the tiles with water that is obvious. Scrub and wash any tiles that nevertheless present detergent hazing a 2nd time, then rinse with water that is clear.

Wipe the tiles dry using a towel.

See related

the-best-way-to-replace-screens-on-aluminum-frames-593a69d39f012.jpg

The best way to Replace Screens on Aluminum Frames

Aluminum windows consist of a fiber glass or aluminum display, versatile steel body as well as a lightweight. These window frames are fairly simple to fix and may be fixed within just an hour of of energy. Replace outdated screens which were torn or patched to make your windows more more appealing. A can not detract from your overall look of your house and properly fixed window display is hardly apparent throughout use.

Remove the vinyl spline in the interior of the aluminum body with needle-nose pliers. The spline forms and sits in the groove of the body. Remove the display that is old.

Cut one piece of vinyl spline this is the same dimensions as the vinyl spline. Operate the spline throughout the aluminum body, in the event the vinyl spline was in over one piece and slice the the spline. Installing only one piece of spline round the perimeter of the display stops unsightly sagging too as gaps that permit through bugs.

Clean dirt and particles from the groove of the aluminum body using a nylon brush.

Measure the dimensions of the display that is aged and include 1/2 inch to each aspect. Transfer these measurements to the window display that is new and cut it out. The additional 1/2 inch will ensure that the window spline, held holds place by fringe of of the display is and enables you to pull the display taut throughout installation.

Set the cut display on the aluminum window frame. Cut each corner of the display a-T a 45-degree angle, just over the corner of the groove in the window-frame. This can prevent the display from scrunching or wrinkling right into a bump in the corner of the window.

Set the aluminum window body on a flatwork room. Affix the body to your own work room with little Cclamps. This stops the body as you install the display from relocating.

Set the display within the aluminum body. Position the display using its lines to bottom and the best of the body as well as the vertical lines parallel to the proper and left sides of the body. Overlap the sides of the body 1/2 inch with the display edges. By working the roller conclusion of the display rolling instrument within the screen as well as in the groove of the body push the screen to the groove of the body. There’ll be excessive display on the facet of the body, when completed precisely. In the event you are bunched on by the display as you insert it to the groove, pull the display straight back out as well as go over it with all the display rolling instrument. You want the display to be as taut as feasible during installation.

Set the spline over the groove where the display was inserted. Run the end-of the window screen roller within the spline to drive it to the groove to secure the window display in the body.

Cut off the display using a utility knife. Run the suggestion of the outer fringe of of the windowframe groove as well as the knife involving the spline. As you reduce it, pull the extra display from the key area of the window.

See related

recommendations-on-lighting-above-windows-5938ccbfc279a.jpg

Recommendations on Lighting Above Windows

Lighting and the windows at home should work jointly elegantly to to create a vibrant, airy feel to your own chambers, especially if you’ve got high ceilings. In the event the prior owners in the building did not really handle to optimize the possibility of the house, a few home design strategies can assist you illuminate your house — including those catchy places above the windows where sun light light does not achieve.

Downlighting

Chandeliers or pendant lights can dangle down in the front of windows that are tall, obstructing the stream of light that is natural instead of augmenting it. Instead, install light to the ceiling. It is possible to illuminate the whole room without the eye deflecting by pointing the lightbulbs right down. For additional versatility, install the lights using a dimmer, so the luminosity can be adjusted by you according to just how much light is coming through the windows.

Wall Washing

In a few rooms, the windows as well as the fixtures join to give lots of light to the places that are useable, however they leave a dim, shadowy place on the walls over the windows. To brighten the very best strip of the area and highlight ceilings and tall, refined walls, install wall-clean lightbulbs on the ceiling close to the walls. These lightbulbs angle somewhat illuminating the surfaces that are vertical as an alternative to pointing down to the area. Order them uniformly to brighten the wall over the windows equally, or install them at wider separations to make a light design that is scalloped.

Paint

A window that often receives plenty of sunlight can stand alone, in an area with all the paint job that is best, without additional lighting. Paint ceiling and the walls a pure, white that is reflective, and select tile or a white carpeting for the flooring. The surfaces will glow off and mirror in the corners of the chamber. You will nonetheless must turn the lights on when the sunshine decreases, but as the remaining chamber, the region over the windows needs to be flooded with all precisely the same sunshine throughout the day.

Outdoor Lighting

When you re design your lights scheme do not ignore the exterior of your house. As the regions above your windows appear inside, they are able to appear scary and dark exterior. Landscaping prices Fresno, CA lights on the outside of your house to illuminate corners that are creepy. It’s possible for you to conceal good- directional lights or lights in your backyard and polish them up onto the region above your windows, or specialization fixtures can be installed by you under your eaves to brighten darkish sections

See related

the-best-way-to-remodel-little-condominium-showers-5936f9f76d48b.jpg

The best way to Remodel Little Condominium Showers

In a population regions that are higher, single- family houses can be out-of-reach for first time homebuyers. Property costs are generally full of cities, so several residential dwellings are built as condos. These flats that are little are simple to handle even, or to get one individual to get a couple. But when the toilet shower was ignored over time, replacing fixtures that are old is an easy makeover to get property worth and a much more contemporary look.

Fixtures

The fixtures of a shower typically degrades over their years of use; other mineral deposits as well as lime-scale often develop into a significant eyesore. Shower heads can be removed using a wrench that was little. Generally, copper piping protrudes from the wall of the shower so your shower head that is newest may be set up directly onto the conduit with a few conduit tape to avoid escapes. Cool and hot shower knobs usually need a simple screwdriver for removing; since attachments are worldwide, the knobs can be replaced by condominium owners with any desirable knob fashion.

Shower Door

Condominium owners should think about removing shower-curtain and the pole. Plastic or the fabric only closes the shower room off to make the whole toilet seem unpleasant and cramped. Attaching flooring railings to ceiling area and the shower’s kerb needs some sealer and rust -resistant screws therefore a glass shower door could be set up to open the the area up for the look of square footage.

Storage Methods

Showers have tiled walls; beneath the the tiles are generally backer boards connected to the studs, or supporting wall beams in the building’s. For the seasoned house DIYer, a stud-finder may be used to nail the concealed wall beams of the shower. Reducing a piece of the backboard, and removing tactical tiles involving the studs, enables you to put in a storage nook for shampoo or soap without losing any space inside the shower location.

Exhaust Followers

Many condominiums that are older don’t have ventilation or windows inside the shower space. Consequently, the dampness of the shower stays trapped in the the area which may degrade wall paper and paint. Exhaust followers which can be readily installed, much just like a mild fixture are offered by home improvement retailers. The lover might be set only to the right or left side of the shower on the ceiling; wet will likely be instantly sucked away and to the fixture from the area. This could be more complex in the event the condominium toilet WOn’t have simple use of the outside of the constructing.

See related

consumer-guide-for-electric-stoves-59365c50b25ad.jpg

Consumer Guide for Electric Stoves

Concern for normal sources is driving a drive for power efficiency in the local to the national-level, as well as a lot of families all over the nation use electricity for cooking. Astonishingly, electrical stoves do not have an Energy-Star score, the house appliance performance standard issued by U.S. federal organizations. Absent this performance information that is comparative, consumers can concentrate on different facets to discover the cost-effectiveness of a range.

Heating Component Choices

Intrinsically power-saving , electrical cookers that are total use small electricity. Shoppers have four heating El Paso repair specialists element options in today’s electric stove marketplace: sound discs spiral coils, glowing and magnetic induction. In accordance with the California Energy Commission, induction components tend to be better than normal spiral coils, but you have to buy unique aluminum cookware to make the most of the innovative El Paso AC repair specialists technology. Glowing components and solid disc often use more electricity than coil components.

Control Knobs and Panel

Appliance makers have traditionally put heat-environment knobs both toward the very top of the rear panel or in the leading edge of the range. Achieving for handle knobs on the rear panel of the range can present a security risk in the event that you cook big meals utilizing all burners on high temperature. On the flip side, for those who are in possession of a kitchen that is tiny, you do not need passersby, such as kids, having accessibility that is easy to get a grip on knobs a-T the entrance of the cooker. Facilitate this anxiety using a range that h-AS digital touch-pads.

Special Characteristics

Carefully evaluate the unique characteristics designed to the range. You might want to lock the electronic touch-pad out to ensure children or the mentally challenged can not tamper with the controls. For energy-conservation, the California Power Commission encourages ranges with convection oven characteristics. The convection enthusiast equally spreads heat in the compartment, possibly lowering your power use by onethird. Moreover, the self-cleansing oven function is nearly normal in modern ranges for the comfort. The large-warmth of utilizing self-clean up necessitates extra insulating material, which likewise raises power efficiency during routine periods that are baking.

Fundamental Layout and Positioning

Stoves break up into two fundamental groups: free-standing or slide-in. Freestanding versions can be placed by you just using their backs from the kitchen wall. Slip-in versions allow for positioning in a isle in the centre of the chamber together with against the wall. Assess the breadth, peak and depth of your place that is preferred, together with the space throughout the range, permitting the sweep of the oven or refrigerator do-or. Do not obstruct pathways in compel individuals or a little kitchen to come in near con-Tact with a hot range.

See related

making-a-door-hinge-pocket-593659387d5c1.jpg

Making a Door Hinge Pocket

Hinges fit flush in to door pockets allowing doors to shut correctly. These pockets, also called door hinge mortises, are cut to the side of a door for the plate to match. The type of hinge decides the dimensions of the pocket. Some have some round and square corners, but the process is exactly the same for both. Generation door stores use door hinge pockets to reduce. It’s possible for you to cut on them like the the pros utilizing merely a chisel.

Clamp the door into a sawhorse using a hand clamp. The door needs to be with all the hinge side-facing right up on its side.

Put the hinge on the doorway as if it were previously set up on the doorway at its planned place. Outline across the hinge using a pencil.

Cut across the tracing utilizing the point of a utility knife. The depth of the cut should function as the thickness of somewhat deeper or the hinge. Utilizing a 1/2-inch chisel and, carve the wood out level from the interior of the tracing. Begin by holding the chisel together with the bevel side-up and perpendicular to the tracing. Rock the end of the chisel back and forth somewhat to get the cut began and then shove forwards the chisel to the rear of the tracing, slicing over the grain, to the base of the line which you made using the utility knife.

Cut on another line overlapping the primary line. In the event the wood is too difficult or persistent to reduce yourself, make use of a little hammer to tap the chisel forwards. Continue cutting before the pocket over the grain together with the chisel is cut to the depth of the cut-line. Turn the chisel parallel with all the grain, keep it bevel side-up a-T A15-degree angle and shove and rock the chisel again and forth gradually to conclude by shaving off any differences or unusual areas in the hinge pocket such that it’s level and even.

Fit the hinge to the pocket. In the event the hinge does not match level, or does not match into the border of the cutout, remove till it matches flush and close in to the pocket and carry on fitting, screening and forming the hinge in to the pocket.

See related

the-best-way-to-iron-a-roundtable-material-593658b3c6995.jpg

The best way to Iron a Roundtable Material

Big swaths of material present an ironing trouble, because for smoothing out the creases in a big round tablecloth, ironing boards are not formed or sized right. Improper ironing may also cause dimpling if it is in use round the hem, which inhibits the drape of the table-cloth. Suitable ironing starts with choosing the heat that is correct for the material. If laundering or folding causes the creases, the proper technique as well as a warm iron can smooth out them.

Examine for suggested warmth options on the fe in the cloth label. If your heat suggestion is not recorded, use the popular setting for linen and cotton. Make use of the the lower environment for nylon and acetate. Synthetic and polyester, rayon mixtures generally need the medium heat setting.

Cover with bath towels, placing the towels two levels deep to secure the table in the heat. Round table cloths are difficult and too big to iron readily on an ironing board.

Distribute the table-cloth from the table face-down, smoothing it level as possible. Preheat the iron to the setting that is mandatory.

In the event the tablecloth consists of cotton spray the initial section you’re ironing using a gentle mist of spray starch, a natural-fiber or linen combination. Cover the primary section using a press material when it is made from synthetic fibers.

Iron the the part, transferring the iron that is the new gradually in smooth, even strokes. Don’t set in a single spot, as the fibres may burn or melt.

Iron one part at a time, the whole tablecloth. The tablecloth moves on the dining table when it is hanging on the sides and bigger in relation to the table as you iron.

Press round the hems so that they do not roll or fold. Press on the point of the fe across the hem, keeping it in spot for about five seconds. Do not shift the iron again and forth as this can give it a dimpled or ruffled look.

See related